Marauder Equipment Sets: Difference between revisions
From RoR Wiki
m (Added additional information about Keeper's Set) |
|||
| (63 intermediate revisions by 3 users not shown) | |||
| Line 1: | Line 1: | ||
=Tier | =Tier 3 sets= | ||
==RvR== | ==RvR== | ||
=== | ===Devastator Set=== | ||
[[File:DevastatorMarauder.png|left|top|300x300px|link=]] | |||
{| class="wikitable" | {| class="wikitable" | ||
|- | |- | ||
! scope="col" | | ! scope="col" | | ||
! scope="col" | Rank/Renown | ! scope="col" |Rank/Renown | ||
! scope="col" | [https://wiki.returnofreckoning.com/ | ! scope="col" |[https://wiki.returnofreckoning.com/Soldier%27s_Medallion {{#tip-img: /images/9/93/Soldiers_Medallion.png| Costs}}] | ||
! scope="col" | Armor | ! scope="col" |Armor | ||
! scope="col" | Wounds | ! scope="col" |Toughness | ||
! scope="col" | Initiative | ! scope="col" |Wounds | ||
! scope="col" | Strength | ! scope="col" |Initiative | ||
! scope="col" | Weapon Skill | ! scope="col" |Strength | ||
! scope="col" | Bonus #1 | ! scope="col" |Weapon Skill | ||
! scope="col" |Bonus #1 | |||
|- style="text-align:center" | |||
! scope="row" | [https://www.returnofreckoning.com/armory/item/434413{{#tip-img: /images/c/cb/Devastator_Tramplers.png | Devastator Tramplers}}] | |||
|26/26||12||264||8||7||/||11||20||/ | |||
|- style="text-align:center" | |- style="text-align:center" | ||
! scope="row" | [https://www.returnofreckoning.com/armory/item/ | ! scope="row" | [https://www.returnofreckoning.com/armory/item/434425 {{#tip-img: /images/6/62/Devastator_Pummelers.png | Devastator Pummelers}}] | ||
| | |27/27||8||280||/||/||4||19||15||+ 1% Reduced Chance to be Parried | ||
|- style="text-align:center" | |- style="text-align:center" | ||
! scope="row" | [https://www.returnofreckoning.com/armory/item/ | ! scope="row" | [https://www.returnofreckoning.com/armory/item/434437 {{#tip-img: /images/7/72/Devastator_Hardmantle.png | Devastator Hardmantle}}] | ||
| | |28/28||16||342||/||15||/||23||9||+ 2% Melee Critical Chance | ||
|- style="text-align: center; font-weight:bold; vertical-align:top" | |- style="text-align:center" | ||
! scope="row" | Total | ! scope="row" | [https://www.returnofreckoning.com/armory/item/435505 {{#tip-img: /images/7/70/Devastator_Direhelm.png | Devastator Direhelm}}] | ||
! | |29/29||20||324||/||10||5||25||17||/ | ||
|- | |- style="text-align:center" | ||
! scope="row" | 2 Piece | ! scope="row" | [https://www.returnofreckoning.com/armory/item/434449 {{#tip-img: /images/9/98/Devastator_Chestplate.png | Devastator Chestplate}}] | ||
| colspan=" | |29/29||25||380||9||/||16||26||/||+ 40 HP Every 4 Seconds | ||
|- style="text-align: center; font-weight:bold; vertical-align:top" | |||
! scope="row" | Total | |||
!29/29||81||1590||17||32||25||104||61||/ | |||
|- | |||
! scope="row" | 2 Piece | |||
| colspan="9" | + 47 Strength | |||
|- | |||
! scope="row" | 3 Piece | |||
| colspan="9" | + 240 Corporeal Resistance | |||
|- | |||
! scope="row" | 4 Piece | |||
| colspan="9" |Corrosion - On Hit: 10% chance to lower target's Armor by 930 for 10 Seconds | |||
|- | |||
! scope="row" | 5 Piece | |||
| colspan="9" | + 4% Melee Critical Chance | |||
|} | |} | ||
<br> | |||
<br> | |||
<br> | |||
==Scenario== | ==Scenario== | ||
=== | ===Duelist Set=== | ||
[[File:DevastatorMarauder.png|left|top|300x300px|link=]] | |||
{| class="wikitable" | {| class="wikitable" | ||
|- | |- | ||
! scope="col" | | ! scope="col" | | ||
! scope="col" | Rank/Renown | ! scope="col" | Rank/Renown | ||
! scope="col" | {{#tip-img: /images/ | ! scope="col" | [https://wiki.returnofreckoning.com/Soldier%27s_Emblem {{#tip-img: /images/4/44/Soldiers_Emblem.png| Costs}}] | ||
! scope="col" | Armor | ! scope="col" | Armor | ||
! scope="col" | Toughness | ! scope="col" | Toughness | ||
| Line 45: | Line 65: | ||
! scope="col" | Bonus #1 | ! scope="col" | Bonus #1 | ||
|- style="text-align:center" | |- style="text-align:center" | ||
! scope="row" | [https://www.returnofreckoning.com/armory/item/ | ! scope="row" | [https://www.returnofreckoning.com/armory/item/13000181 {{#tip-img: /images/5/5d/Tramplers_of_the_Duelist.png| Tramplers of the Duelist}}] | ||
| | | 26/26 || 20 ||264||8||7||/||11||20||/ | ||
|- style="text-align:center" | |- style="text-align:center" | ||
! scope="row" | [https://www.returnofreckoning.com/armory/item/ | ! scope="row" | [https://www.returnofreckoning.com/armory/item/13000157 {{#tip-img: /images/6/6f/Pummelers_of_the_Duelist.png| Pummelers of the Duelist}}] | ||
| | | 27/27 || 24 ||280||12||/||7||19||/||+ 1% Parry | ||
|- style="text-align: center; font-weight:bold; vertical-align:top" | |- style="text-align:center" | ||
! scope="row" | Total | ! scope="row" | [https://www.returnofreckoning.com/armory/item/13000229 {{#tip-img: /images/c/c7/Hardmantle_of_the_Duelist.png| Hardmantle of the Duelist}}] | ||
! | | 28/28 || 28 ||342||/||20||/||18||9||+ 2% Melee Critical Chance | ||
|- style="text-align:center" | |||
! scope="row" | [https://www.returnofreckoning.com/armory/item/13000205 {{#tip-img: /images/2/2b/Direhelm_of_the_Duelist.png| Direhelm of the Duelist}}] | |||
| 29/29 || 32 ||324||/||15||9||20||13||/ | |||
|- style="text-align:center" | |||
! scope="row" | [https://www.returnofreckoning.com/armory/item/13000133 {{#tip-img: /images/0/0b/Chestplate_of_the_Duelist.png| Chestplate of the Duelist}}] | |||
| 29/29 || 61 ||380||16||/||19||16||/||+ 40 HP Every 4 Seconds | |||
|- style="text-align: center; font-weight:bold; vertical-align:top" | |||
! scope="row" | Total | |||
!29/29 || 165 ||1590||36||42||35||84||42||/ | |||
|- | |- | ||
! scope="row" | 2 Piece | ! scope="row" | 2 Piece | ||
| colspan="9" | + | | colspan="9" | + 47 Toughness | ||
|- | |||
! scope="row" | 3 Piece | |||
| colspan="9" | + 240 Corporeal Resistance | |||
|- | |||
! scope="row" | 4 Piece | |||
| colspan="9" |Reactionary - On Defense: 25% Chance to increase Parry, Evade, and Dodge by 10% for 10 seconds | |||
|- | |||
! scope="row" | 5 Piece | |||
| colspan="9" | + 5% Parry | |||
|} | |} | ||
<br> | |||
<br> | |||
<br> | |||
==PQ== | ==PQ== | ||
=== | ===Mayhem Set=== | ||
[[File:MayhemMarauder.png|left|top|300x300px|link=]] | |||
{| class="wikitable" | {| class="wikitable" | ||
|- | |- | ||
! scope="col" | | ! scope="col" | | ||
! scope="col" | Rank | ! scope="col" | Rank | ||
! scope="col" | | ! scope="col" | [https://wiki.returnofreckoning.com/Soldier%27s_Coin Costs] | ||
! scope="col" | Armor | ! scope="col" | Armor | ||
! scope="col" | Toughness | ! scope="col" | Toughness | ||
| Line 74: | Line 114: | ||
! scope="col" | Bonus #1 | ! scope="col" | Bonus #1 | ||
|- style="text-align:center" | |- style="text-align:center" | ||
! scope="row" | [https://www.returnofreckoning.com/armory/item/ | ! scope="row" | [https://www.returnofreckoning.com/armory/item/434509 {{#tip-img: /images/0/03/Tramplers_of_Mayhem.png | Tramplers of Mayhem}}] | ||
| | |22||13||216||/||6||7||17||7||/ | ||
|- style="text-align:center" | |- style="text-align:center" | ||
! scope="row" | [https://www.returnofreckoning.com/armory/item/ | ! scope="row" | [https://www.returnofreckoning.com/armory/item/434521 {{#tip-img: /images/0/0a/Pummelers_of_Mayhem.png | Pummelers of Mayhem}}] | ||
| | |23||15||224||/||10||/||15||6||+ 1% Parry | ||
|- style="text-align: center; font-weight:bold; vertical-align:top" | |- style="text-align:center" | ||
! scope="row" | Total | ! scope="row" | [https://www.returnofreckoning.com/armory/item/434533 {{#tip-img: /images/3/30/Hardmantle_of_Mayhem.png | Hardmantle of Mayhem}}] | ||
! | |24||18||261||11||/||/||18||7||+ 2% Reduction in Being Critically Hit | ||
|- style="text-align:center" | |||
! scope="row" | [https://www.returnofreckoning.com/armory/item/435553 {{#tip-img: /images/8/85/Direhelm_of_Mayhem.png | Direhelm of Mayhem}}] | |||
|25||20||260||/||10||2||25||8||/ | |||
|- style="text-align:center" | |||
! scope="row" | [https://www.returnofreckoning.com/armory/item/434545 {{#tip-img: /images/4/48/Chestplate_of_Mayhem.png | Chestplate of Mayhem}}] | |||
|24||40||290||13||7||/||20||/||+ 32 HP Every 4 Seconds | |||
|- style="text-align: center; font-weight:bold; vertical-align:top" | |||
! scope="row" | Total | |||
!25||106||1251||24||33||9||95||28||/ | |||
|- | |- | ||
! scope="row" | 2 Piece | ! scope="row" | 2 Piece | ||
| colspan=" | | colspan="9" | + 37 Strength | ||
|- | |||
! scope="row" | 3 Piece | |||
| colspan="9" | + 192 Corporeal Resistance | |||
|- | |||
! scope="row" | 4 Piece | |||
| colspan="9" | + 37 Toughness | |||
|- | |||
! scope="row" | 5 Piece | |||
| colspan="9" |On Being Hit: 10% chance to increase movement speed by 20% for 10 seconds | |||
|} | |} | ||
<br> | |||
<br> | |||
<br> | |||
==PvE== | ==PvE== | ||
=== | ===Stalker Set=== | ||
[[File:StalkerMarauder.png|left|top|300x300px|link=]] | |||
{| class="wikitable" | {| class="wikitable" | ||
|- | |- | ||
! scope="col" | | ! scope="col" | | ||
! scope="col" |Rank | ! scope="col" | Rank | ||
! scope="col" | Armor | |||
! scope="col" | Armor | |||
! scope="col" | Toughness | ! scope="col" | Toughness | ||
! scope="col" | Wounds | ! scope="col" | Wounds | ||
| Line 132: | Line 162: | ||
! scope="col" | Bonus #1 | ! scope="col" | Bonus #1 | ||
|- style="text-align:center" | |- style="text-align:center" | ||
! scope="row" | [https://www.returnofreckoning.com/armory/item/ | ! scope="row" | [https://www.returnofreckoning.com/armory/item/434605 {{#tip-img: /images/8/83/Stalkers_Tramplers.png | Stalker's Tramplers}}] | ||
| | |26||264||/||7||/||12||4||+ 2 % Dodge | ||
|- style="text-align:center" | |||
! scope="row" | [https://www.returnofreckoning.com/armory/item/434617 {{#tip-img: /images/7/7a/Stalkers_Pummelers.png | Stalker's Pummelers}}] | |||
|26||280||/||8||/||23||5||+ 1% Melee Critical Chance | |||
|- style="text-align:center" | |- style="text-align:center" | ||
! scope="row" | [https://www.returnofreckoning.com/armory/item/ | ! scope="row" | [https://www.returnofreckoning.com/armory/item/434629 {{#tip-img: /images/d/db/Stalkers_Hardmantle.png | Stalker's Hardmantle}}] | ||
| | |28||342||11||/||5||18||7||/ | ||
|- style="text-align:center" | |- style="text-align:center" | ||
! scope="row" | [https://www.returnofreckoning.com/armory/item/ | ! scope="row" | [https://www.returnofreckoning.com/armory/item/434641 {{#tip-img: /images/f/f9/Stalkers_Chestplate.png| Stalker's Chestplate}}] | ||
| | |30||380||/||/||12||19||7||+ 2% Disrupt | ||
|- style="text-align: center; font-weight:bold; vertical-align:top" | |- style="text-align: center; font-weight:bold; vertical-align:top" | ||
! scope="row" | Total | ! scope="row" | Total | ||
! | !30||1366||11||15||17||72||23||/ | ||
|- | |- | ||
! scope="row" | 2 Piece | ! scope="row" | 2 Piece | ||
| colspan=" | | colspan="8" | + 34 Strength | ||
|- | |- | ||
! scope="row" | 3 Piece | ! scope="row" | 3 Piece | ||
| colspan=" | | colspan="8" | + 2 Morale Per Second | ||
|- | |||
! scope="row" | 4 Piece | |||
| colspan="8" | + 34 Wounds | |||
|} | |} | ||
<br> | |||
== | <br> | ||
=== | <br> | ||
=Tier 4 sets= | |||
==RvR== | |||
===Annihilator Set=== | |||
[[File:AnniMarauder.png|left|top|300x300px|link=]] | |||
{| class="wikitable" | {| class="wikitable" | ||
|- | |- | ||
! scope="col" | | ! scope="col" | | ||
! scope="col" | Rank/Renown | ! scope="col" | Rank/Renown | ||
! scope="col" | {{#tip-img: /images/ | ! scope="col" | [https://wiki.returnofreckoning.com/Officer%27s_Medallion {{#tip-img: /images/7/70/Officers_Medallion.png | Costs}}] | ||
! scope="col" | Armor | ! scope="col" | Armor | ||
! scope="col" | Toughness | ! scope="col" | Toughness | ||
| Line 167: | Line 206: | ||
! scope="col" | Bonus #1 | ! scope="col" | Bonus #1 | ||
|- style="text-align:center" | |- style="text-align:center" | ||
! scope="row" | [https://www.returnofreckoning.com/armory/item/ | ! scope="row" | [https://www.returnofreckoning.com/armory/item/434161 {{#tip-img: /images/6/66/Annihilator_Tramplers2.png| Annihilator Tramplers}}] | ||
| | | 35/35 || 32 ||366||21||/||13||10||/||+ 2% Dodge | ||
|- style="text-align:center" | |||
! scope="row" | [https://www.returnofreckoning.com/armory/item/434173 {{#tip-img: /images/1/11/Annihilator_Pummelers2.png| Annihilator Pummelers}}] | |||
| 35/36 || 37 ||366||/||14||9||11||23||/ | |||
|- style="text-align:center" | |||
! scope="row" | [https://www.returnofreckoning.com/armory/item/434197 {{#tip-img: /images/6/65/Annihilator_Hardmantle2.png| Annihilator Hardmantle}}] | |||
| 35/37 || 55 ||424||12||18||/||25||/||+ 1% Reduction in being Critically Hit | |||
|- style="text-align:center" | |- style="text-align:center" | ||
! scope="row" | [https://www.returnofreckoning.com/armory/item/ | ! scope="row" | [https://www.returnofreckoning.com/armory/item/434185 {{#tip-img: /images/2/2c/Annihilator_Direhelm2.png| Annihilator Direhelm}}] | ||
| | | 35/38 || 50 ||424||13||/||15||25||/||+ 2% Disrupt | ||
|- style="text-align:center" | |- style="text-align:center" | ||
! scope="row" | [https://www.returnofreckoning.com/armory/item/ | ! scope="row" | [https://www.returnofreckoning.com/armory/item/434209 {{#tip-img: /images/8/87/Annihilator_Chestplate2.png| Annihilator Chestplate}}] | ||
| | | 35/39 || 67 ||472||/||23||/||32||15||+ 60 HP Every 4 Seconds | ||
|- style="text-align: center; font-weight:bold; vertical-align:top" | |- style="text-align: center; font-weight:bold; vertical-align:top" | ||
! scope="row" | Total | ! scope="row" | Total | ||
! | ! 35/39|| 241 ||2052||46||55||37||103||38||/ | ||
|- | |- | ||
! scope="row" | 2 Piece | ! scope="row" | 2 Piece | ||
| colspan="9" | + | | colspan="9" | + 53 Toughness | ||
|- | |- | ||
! scope="row" | 3 Piece | ! scope="row" | 3 Piece | ||
| colspan="9" | + 1 | | colspan="9" | + 290 Elemental Resistance | ||
| | |- | ||
! scope="row" | 4 Piece | |||
= | | colspan="9" | + 1 Path of Brutality Abilities | ||
=== | |- | ||
! scope="row" | 5 Piece | |||
{| class="wikitable" | | colspan="9" | + 5% Parry | ||
|} | |||
<br> | |||
===Conqueror Set=== | |||
[[File:ConquerorMarauder.png|left|top|300x300px|link=]] | |||
{| class="wikitable" | |||
|- | |- | ||
! scope="col" | | ! scope="col" | | ||
! scope="col" | Rank | ! scope="col" | Rank/Renown | ||
! scope="col" | {{#tip-img: /images/ | ! scope="col" | [https://wiki.returnofreckoning.com/Conqueror%27s_Medallion {{#tip-img: /images/b/b6/Conquerors_Medallion.png| Costs}}] | ||
! scope="col" | Armor | ! scope="col" | Armor | ||
! scope="col" | Toughness | ! scope="col" | Toughness | ||
! scope="col" | Wounds | ! scope="col" | Wounds | ||
! scope="col" | Strength | ! scope="col" | Strength | ||
! scope="col" | Weapon Skill | ! scope="col" | Weapon Skill | ||
! scope="col" | Bonus #1 | ! scope="col" | Bonus #1 | ||
! scope="col" | Sp. Resist | |||
! scope="col" | El. Resist | |||
! scope="col" | Co. Resist | |||
|- style="text-align:center" | |- style="text-align:center" | ||
! scope="row" | [https://www.returnofreckoning.com/armory/item/ | ! scope="row" | [https://www.returnofreckoning.com/armory/item/434293 {{#tip-img: /images/0/0e/Conqueror_Tramplers2.png| Conqueror Tramplers}}] | ||
| | | 40/40 || 70 ||392||/||10||16||14||+ 2% Melee Critical Chance||/||/||/ | ||
|- style="text-align:center" | |- style="text-align:center" | ||
! scope="row" | [https://www.returnofreckoning.com/armory/item/ | ! scope="row" | [https://www.returnofreckoning.com/armory/item/434305 {{#tip-img: /images/3/34/Conqueror_Pummelers2.png| Conqueror Pummelers}}] | ||
| | | 40/41 || 81 ||392||/||8||15||25||+ 2% Reduced Chance to be Parried||/||/||/ | ||
|- style="text-align:center" | |||
! scope="row" | [https://www.returnofreckoning.com/armory/item/434317 {{#tip-img: /images/1/1c/Conqueror_Midstrap2.png| Conqueror Midstrap}}] | |||
| 40/42 || 49 ||/||18||12||6||/||+ 36 Melee Power||83||77||83 | |||
|- style="text-align:center" | |- style="text-align:center" | ||
! scope="row" | [https://www.returnofreckoning.com/armory/item/ | ! scope="row" | [https://www.returnofreckoning.com/armory/item/434329 {{#tip-img: /images/6/60/Conqueror_Hardmantle2.png| Conqueror Hardmantle}}] | ||
| | | 40/43 || 111 ||450||18||/||30||12||+ 10 Auto Attack Haste||/||/||/ | ||
|- style="text-align: center; font-weight:bold; vertical-align:top" | |- style="text-align:center" | ||
! scope="row" | Total | ! scope="row" | [https://www.returnofreckoning.com/armory/item/434341 {{#tip-img:/images/9/9b/Conqueror_Direhelm2.png| Conqueror Direhelm}}] | ||
! | | 40/44 || 122 ||450||/||17||30||10||+ 2% Reduced Chance to be Blocked||/||/||/ | ||
|- | |- style="text-align:center" | ||
! scope="row" | 2 Piece | ! scope="row" | [https://www.returnofreckoning.com/armory/item/434353 {{#tip-img: /images/6/6d/Conqueror_Chestplate2.png| Conqueror Chestplate}}] | ||
| colspan=" | | 40/45 || 147 ||510||13||/||33||19||+ 3 AP Per Second||/||/||/ | ||
|- style="text-align: center; font-weight:bold; vertical-align:top" | |||
! scope="row" | Total | |||
! 40/45|| 580 ||2194||49||47||130||80||/||83||77||83 | |||
|- | |||
! scope="row" | 2 Piece | |||
| colspan="11" | + 57 Strength | |||
|- | |- | ||
! scope="row" | 3 Piece | ! scope="row" | 3 Piece | ||
| colspan=" | | colspan="11" | + 63 Wounds | ||
|- | |||
! scope="row" | 4 Piece | |||
| colspan="11" | + 5% Reduced Chance to be Parried | |||
|- | |||
! scope="row" | 5 Piece | |||
| colspan="11" | On Hit : 25% chance to steal 100 Toughness from your target for 10 seconds | |||
|- | |||
! scope="row" | 6 Piece | |||
| colspan="11" | + 5% Melee Critical Chance | |||
|} | |} | ||
== | === Vanquisher Set === | ||
[[File:VanquisherMarauder.png|left|top|300x300px|link=]] | |||
| | |||
| | |||
| | |||
{| class="wikitable" | {| class="wikitable" | ||
|- | |- | ||
! scope="col" | | ! scope="col" | | ||
! scope="col" |Rank | ! scope="col" | Rank/Renown | ||
! scope="col | ! scope="col" | [https://wiki.returnofreckoning.com/Vanquisher%27s_Medallion{{#tip-img: /images/c/ce/Vanquishers_Medallion.png | Costs}}] | ||
! scope="col" | Armor | ! scope="col" | Armor | ||
! scope="col" | | ! scope="col" | Weapon Skill | ||
! scope="col" | Wounds | ! scope="col" | Wounds | ||
! scope="col" | Initiative | ! scope="col" | Initiative | ||
! scope="col" | Strength | ! scope="col" | Strength | ||
! scope="col" | Bonus #1 | ! scope="col" | Bonus #1 | ||
!Sp. Resist. | ! scope="col" | Sp. Resist | ||
! scope="col" | El. Resist | |||
! scope="col" | Co. Resist | |||
|- style="text-align:center" | |||
! scope="row" | [https://www.returnofreckoning.com/armory/item/3253 {{#tip-img: /images/a/a4/Vanquisher_Tramplers.png | Vanquisher Tramplers}}] | |||
| 40/56 || 109 ||418||15||/||15||21||+ 10% Auto Attack Haste||/||/||/ | |||
|- style="text-align:center" | |- style="text-align:center" | ||
! scope="row" | [https://www.returnofreckoning.com/armory/item/ | ! scope="row" | [https://www.returnofreckoning.com/armory/item/3229 {{#tip-img: /images/9/99/Vanquisher_Pummelers.png | Vanquisher Pummelers}}] | ||
| | | 40/56 || 126 ||418||10||10||/||23||+ 2% Reduction in being Critically Hit||/||/||/ | ||
| | |||
| | |||
|/ | |||
|- style="text-align:center" | |- style="text-align:center" | ||
! scope="row" | [https://www.returnofreckoning.com/armory/item/ | ! scope="row" | [https://www.returnofreckoning.com/armory/item/3325 {{#tip-img: /images/5/5b/Vanquisher_Midstrap.png | Vanquisher Midstrap}}] | ||
| | | 40/55 || 76 ||/||13||8||/||19||+ 36 Melee Power||87||86||86 | ||
| | |||
| | |||
|- style="text-align:center" | |- style="text-align:center" | ||
! scope="row" | [https://www.returnofreckoning.com/armory/item/ | ! scope="row" | [https://www.returnofreckoning.com/armory/item/3301 {{#tip-img: /images/c/cb/Vanquisher_Hardmantle.png| Vanquisher Hardmantle}}] | ||
| | | 40/57 || 172 ||482||/||15||16||23||+ 2% Melee Critical Chance||/||/||/ | ||
| | |||
| | |||
|/ | |||
|- style="text-align:center" | |- style="text-align:center" | ||
! scope="row" | [https://www.returnofreckoning.com/armory/item/ | ! scope="row" | [https://www.returnofreckoning.com/armory/item/3277 {{#tip-img: /images/0/03/Vanquisher_Direhelm.png| Vanquisher Direhelm}}] | ||
| | | 40/57 || 189 ||482||15||10||/||31||+ 3% Reduced Chance to be Parried||/||/||/ | ||
| | |||
| | |||
|- style="text-align:center" | |- style="text-align:center" | ||
! scope="row" | [https://www.returnofreckoning.com/armory/item/ | ! scope="row" | [https://www.returnofreckoning.com/armory/item/3205 {{#tip-img: /images/a/ad/Vanquisher_Chestplate.png | Vanquisher Chestplate}}] | ||
| | | 40/58 || 229 ||548||11||15||20||39||/||/||/||/ | ||
| | |||
|/|| | |||
|/ | |||
|- style="text-align: center; font-weight:bold; vertical-align:top" | |- style="text-align: center; font-weight:bold; vertical-align:top" | ||
! scope="row" | Total | ! scope="row" | Total | ||
! | ! 40/58|| 901 ||2348||64||58||51||156||/||87||86||86 | ||
|- | |||
! | ! scope="row" | 2 Piece | ||
| colspan="11" | + 62 Strength | |||
|- | |- | ||
! scope="row" | 3 Piece | ! scope="row" | 3 Piece | ||
| colspan=" | | colspan="11" | + 68 Wounds | ||
|- | |- | ||
! scope="row" | 4 Piece | ! scope="row" | 4 Piece | ||
| colspan=" | | colspan="11" | Vicious Strikes - On Hit: 15% chance to reduce target's Toughness by 110 while increasing your Weaponskill by 110 for 10 Seconds | ||
|- | |- | ||
! scope="row" | 5 Piece | ! scope="row" | 5 Piece | ||
| colspan=" | | colspan="11" | + 5% Melee Critial Chance | ||
|- | |||
! scope="row" | 6 Piece | |||
| colspan="11" | + 4% Damage | |||
|} | |} | ||
=== Invader Set === | |||
[[File:InvaderMarauder.png|left|top|300x300px|link=]] | |||
=== | |||
{| class="wikitable" | {| class="wikitable" | ||
|- | |- | ||
! scope="col" | | ! scope="col" | | ||
! scope="col" |Rank/Renown | ! scope="col" | Rank/Renown | ||
! scope="col" |[https://wiki.returnofreckoning.com/ | ! scope="col" | [https://wiki.returnofreckoning.com/Invader_Medallion {{#tip-img: /images/0/09/Invader_Medallion.png | Costs}}] | ||
! scope="col" |Armor | ! scope="col" | Armor | ||
! scope="col" |Toughness | ! scope="col" | Toughness | ||
! scope="col" |Wounds | ! scope="col" | Wounds | ||
! scope="col" |Initiative | ! scope="col" | Initiative | ||
! scope="col" |Strength | ! scope="col" | Strength | ||
! scope="col" | | !Weapon Skill | ||
! scope="col" | | ! scope="col" | Bonus #1 | ||
!Bonus #2 | |||
! scope="col" | Sp. Resist | |||
! scope="col" | El. Resist | |||
! scope="col" | Co. Resist | |||
|- style="text-align:center" | |- style="text-align:center" | ||
! scope="row" | [https://www.returnofreckoning.com/armory/item/ | ! scope="row" | [https://www.returnofreckoning.com/armory/item/434989 {{#tip-img: /images/b/b5/Invader_Tramplers.png | Invader Tramplers}}] | ||
| | | 40/61 || 25 ||442||/||/||18||22 | ||
|/||+2% Disrupt | |||
| + 3 Morale Per Second||/||/||/ | |||
|- style="text-align:center" | |- style="text-align:center" | ||
! scope="row" | [https://www.returnofreckoning.com/armory/item/ | ! scope="row" | [https://www.returnofreckoning.com/armory/item/435001 {{#tip-img: /images/e/eb/Invader_Pummelers.png | Invader Pummelers}}] | ||
| | | 40/61 || 21 ||442||15||17||/||25||/||+ 10% Auto Attack Haste||/||/||/||/ | ||
|- style="text-align:center" | |- style="text-align:center" | ||
! scope="row" | [https://www.returnofreckoning.com/armory/item/ | ! scope="row" | [https://www.returnofreckoning.com/armory/item/435013 {{#tip-img: /images/9/99/Invader_Midstrap.png | Invader Midstrap}}] | ||
| | | 40/60 || 15 ||/||/||/||/||18 | ||
|12||+ 2% Parry | |||
| + 2% Dodge||91||91||91 | |||
|- style="text-align:center" | |- style="text-align:center" | ||
! scope="row" | [https://www.returnofreckoning.com/armory/item/ | ! scope="row" | [https://www.returnofreckoning.com/armory/item/435025 {{#tip-img: /images/f/f3/Invader_Hardmantle.png | Invader Hardmantle}}] | ||
| | | 40/62 || 35 ||514||/||20||/||26 | ||
|12||+ 2% Melee Critial Chance | |||
|/||/||/||/ | |||
|- style="text-align:center" | |- style="text-align:center" | ||
! scope="row" | [https://www.returnofreckoning.com/armory/item/ | ! scope="row" | [https://www.returnofreckoning.com/armory/item/435037 {{#tip-img: /images/f/ff/Invader_Direhelm.png | Invader Direhelm}}] | ||
|29/ | | 40/62 || 37 ||514||13||/||18||29 | ||
|- style="text-align: center; font-weight:bold; vertical-align:top" | |/||+ 3% Armor Penetration | ||
|/||/||/||/ | |||
|- style="text-align:center" | |||
! scope="row" | [https://www.returnofreckoning.com/armory/item/435049 {{#tip-img: /images/e/e4/Invader_Chestplate.png | Invader Chestplate}}] | |||
| 40/63 || 45 ||584||/||12||16||36 | |||
|21||+ 1 AP Per Second | |||
|/||/||/||/ | |||
|- style="text-align:center" | |||
! scope="row" | [https://www.returnofreckoning.com/armory/item/437017 {{#tip-img: /images/3/3d/Invader_Spikestrap.png | Invader Spikestrap}}] | |||
| 40/63 || 43 ||/||/||27||/||12 | |||
|/||+ 2% Reduced chance to be Parried | |||
| + 2 AP Per Second||79||78||78 | |||
|- style="text-align: center; font-weight:bold; vertical-align:top" | |||
! scope="row" | Total | ! scope="row" | Total | ||
! | ! 40/63|| 221 ||2496||28||76||52||168 | ||
!45||/ | |||
!/||170||169||169 | |||
|- | |- | ||
! scope="row" | 2 Piece | ! scope="row" | 2 Piece | ||
| colspan=" | | colspan="13" | + 66 Strengh | ||
|- | |- | ||
! scope="row" | 3 Piece | ! scope="row" | 3 Piece | ||
| colspan=" | | colspan="13" | + 73 Wounds | ||
|- | |- | ||
! scope="row" | 4 Piece | ! scope="row" | 4 Piece | ||
| colspan=" | | colspan="13" | + 5% Reduced chance to be Parried | ||
|- | |- | ||
! scope="row" | 5 Piece | ! scope="row" | 5 Piece | ||
| colspan=" | | colspan="13" | + 15% Auto Attack Haste | ||
|- | |||
! scope="row" | 6 Piece | |||
| colspan="13" | Red Frenzy - On Critical Hit: 10% chance to increase your auto attack damage by 25% for 5 seconds. | |||
|- | |||
!7 Piece | |||
| colspan="13" |Brutal Aggressor - Increases the critical hit rate of all Path Of Brutality abilities by 10% | |||
|} | |} | ||
== | === Warlord Set === | ||
[[File:WarlordMarauder.png|left|top|300x300px|link=]] | |||
{| class="wikitable" | {| class="wikitable" | ||
|- | |- | ||
! scope="col" | | ! scope="col" | | ||
! scope="col" | Rank/Renown | ! scope="col" | Rank/Renown | ||
! scope="col" | {{#tip-img: /images/ | ! scope="col" | [https://wiki.returnofreckoning.com/Royal_Crest {{#tip-img: /images/e/e9/Royal_Crest.png | Costs}}] | ||
! scope="col" | Armor | ! scope="col" | Armor | ||
! scope="col" | Toughness | ! scope="col" | Toughness | ||
| Line 400: | Line 433: | ||
! scope="col" | Initiative | ! scope="col" | Initiative | ||
! scope="col" | Strength | ! scope="col" | Strength | ||
! | !Weapon Skill | ||
! scope="col" | Bonus #1 | ! scope="col" | Bonus #1 | ||
!Bonus #2 | |||
! scope="col" | Sp. Resist | |||
! scope="col" | El. Resist | |||
! scope="col" | Co. Resist | |||
|- style="text-align:center" | |- style="text-align:center" | ||
! scope="row" | [https://www.returnofreckoning.com/armory/item/ | ! scope="row" | [https://www.returnofreckoning.com/armory/item/435145 {{#tip-img: /images/b/b8/Warlord_Tramplers.png | Warlord Tramplers}}] | ||
| | | 40/71 || 31 ||482||15||15||10||26 | ||
|/||+ 1% Dodge | |||
| + 1% Disrupt||/||/||/ | |||
|- style="text-align:center" | |- style="text-align:center" | ||
! scope="row" | [https://www.returnofreckoning.com/armory/item/ | ! scope="row" | [https://www.returnofreckoning.com/armory/item/435157 {{#tip-img: /images/7/70/Warlord_Pummelers.png | Warlord Pummelers}}] | ||
| | | 40/71 || 27 ||482||18||20||10||20||/||+ 10% Auto Attack Haste||/||/||/||/ | ||
|- style="text-align:center" | |- style="text-align:center" | ||
! scope="row" | [https://www.returnofreckoning.com/armory/item/ | ! scope="row" | [https://www.returnofreckoning.com/armory/item/435193 {{#tip-img: /images/f/f9/Warlord_Midstrap.png | Warlord Midstrap}}] | ||
| | | 40/70 || 19 ||/||/||18||18||18 | ||
|/||+ 2% Dodge | |||
| + 2% Parry||102||101||101 | |||
|- style="text-align:center" | |- style="text-align:center" | ||
! scope="row" | [https://www.returnofreckoning.com/armory/item/ | ! scope="row" | [https://www.returnofreckoning.com/armory/item/435181 {{#tip-img: /images/0/05/Warlord_Hardmantle.png | Warlord Hardmantle}}] | ||
| | | 40/72 || 42 ||572||17||15||/||17 | ||
|30||+ 2% Reduced chance to be Parried | |||
|/||/||/||/ | |||
|- style="text-align:center" | |- style="text-align:center" | ||
! scope="row" | [https://www.returnofreckoning.com/armory/item/ | ! scope="row" | [https://www.returnofreckoning.com/armory/item/435205 {{#tip-img: /images/c/c1/Warlord_Direhelm.png | Warlord Direhelm}}] | ||
| | | 40/72 || 47 ||572||18||14||15||24 | ||
|/||+ 2% Melee Critial Chance | |||
|/||/||/||/ | |||
|- style="text-align:center" | |||
! scope="row" | [https://www.returnofreckoning.com/armory/item/435217 {{#tip-img: /images/1/11/Warlord_Chestplate.png | Warlord Chestplate}}] | |||
| 40/73 || 57 ||646||20||20||20||33 | |||
|/||+ 2% Parry | |||
|/||/||/||/ | |||
|- style="text-align:center" | |||
! scope="row" | [https://www.returnofreckoning.com/armory/item/435169 {{#tip-img: /images/8/87/Warlord_Rend_Ring.png | Warlord Rend Ring}}] | |||
| 40/73 || 54 ||/||/||15||/||20 | |||
|14||+ 4 AP Per Second | |||
|/||87||87||86 | |||
|- style="text-align:center" | |||
! scope="row" | [https://www.returnofreckoning.com/armory/item/14109 {{#tip-img: /images/8/8d/Warlord_Shroud.png | Warlord Shroud}}] | |||
| 40/70 || 24 ||/||17||19||20||18 | |||
|/||+ 10% Auto Attack Haste | |||
| /||101||101||102 | |||
|- style="text-align: center; font-weight:bold; vertical-align:top" | |- style="text-align: center; font-weight:bold; vertical-align:top" | ||
! scope="row" | Total | ! scope="row" | Total | ||
! | ! 40/73|| 301 ||2754||105||136||73||176 | ||
!44||/ | |||
!/||290||289||289 | |||
|- | |- | ||
! scope="row" | 2 Piece | ! scope="row" | 2 Piece | ||
| colspan=" | | colspan="13" | + 75 Strengh | ||
|- | |- | ||
! scope="row" | 3 Piece | ! scope="row" | 3 Piece | ||
| colspan=" | | colspan="13" | + 83 Weapon Skill | ||
|- | |- | ||
! scope="row" | 4 Piece | ! scope="row" | 4 Piece | ||
| colspan=" | | colspan="13" | + 15% Auto Attack Haste | ||
|- | |- | ||
! scope="row" | 5 Piece | ! scope="row" | 5 Piece | ||
| colspan=" | | colspan="13" | + 99 Melee Power | ||
|} | |- | ||
! scope="row" | 6 Piece | |||
| colspan="13" | + 2 Path of Brutality Abilities | |||
|- | |||
!7 Piece | |||
| colspan="13" |Depleting - On Hit: 10% chance to remove 50 AP from target | |||
|- | |||
!8 Piece | |||
| colspan="13" |Gain ability: Sadist | |||
|} | |||
== | === Sovereign Set of the Abomination (Primary) === | ||
[[File:AbomSovMara.png|left|top|300x300px|link=]] | |||
{| class="wikitable" | {| class="wikitable" | ||
|- | |- | ||
! scope="col" | | ! scope="col" | | ||
! scope="col" | Rank | ! scope="col" | Rank/Renown | ||
! scope="col" | Costs | ! scope="col" | [https://wiki.returnofreckoning.com/Royal_Crest {{#tip-img: /images/e/e9/Royal_Crest.png | Costs}}] | ||
! scope="col" | Armor | ! scope="col" | Armor | ||
! scope="col" | Toughness | ! scope="col" | Toughness | ||
| Line 447: | Line 517: | ||
! scope="col" | Initiative | ! scope="col" | Initiative | ||
! scope="col" | Strength | ! scope="col" | Strength | ||
! | !Weapon Skill | ||
! scope="col" | Bonus #1 | ! scope="col" | Bonus #1 | ||
!Bonus #2 | |||
! scope="col" | Sp. Resist | |||
! scope="col" | El. Resist | |||
! scope="col" | Co. Resist | |||
|- style="text-align:center" | |- style="text-align:center" | ||
! scope="row" | [https://www.returnofreckoning.com/armory/item/ | ! scope="row" | [https://www.returnofreckoning.com/armory/item/435325 {{#tip-img: /images/c/c5/Sovereign_Tramplers.png | Sovereign Tramplers}}] | ||
| | | 40/76 || 44 ||494||/||/||25||26 | ||
|/||+ 2% Disrupt | |||
| + 3 Morale per Second||/||/||/ | |||
|- style="text-align:center" | |- style="text-align:center" | ||
! scope="row" | [https://www.returnofreckoning.com/armory/item/ | ! scope="row" | [https://www.returnofreckoning.com/armory/item/435337 {{#tip-img: /images/a/a8/Sovereign_Pummelers.png | Sovereign Pummelers}}] | ||
| | | 40/76 || 38 ||494||19||21||/||28||/||+ 10% Auto Attack Haste||/||/||/||/ | ||
|- style="text-align:center" | |||
! scope="row" | [https://www.returnofreckoning.com/armory/item/435373 {{#tip-img: /images/6/6d/Sovereign_Midstrap.png | Sovereign Midstrap}}] | |||
| 40/75 || 26 ||/||/||15||/||22 | |||
|17||+ 2% Parry | |||
| + 2% Dodge||102||101||101 | |||
|- style="text-align:center" | |- style="text-align:center" | ||
! scope="row" | [https://www.returnofreckoning.com/armory/item/ | ! scope="row" | [https://www.returnofreckoning.com/armory/item/435361 {{#tip-img: /images/9/9e/Sovereign_Hardmantle.png | Sovereign Hardmantle}}] | ||
| | | 40/77 || 59 ||592||/||21||/||30 | ||
|20||+ 2% Melee Critial Chance | |||
|/||/||/||/ | |||
|- style="text-align:center" | |- style="text-align:center" | ||
! scope="row" | [https://www.returnofreckoning.com/armory/item/ | ! scope="row" | [https://www.returnofreckoning.com/armory/item/435385 {{#tip-img: /images/9/9a/Sovereign_Direhelm.png | Sovereign Direhelm}}] | ||
| | | 40/77 || 65 ||592||20||/||20||33 | ||
|/||+ 3% Armor Penetration | |||
|/||/||/||/ | |||
|- style="text-align:center" | |- style="text-align:center" | ||
! scope="row" | [https://www.returnofreckoning.com/armory/item/ | ! scope="row" | [https://www.returnofreckoning.com/armory/item/435409 {{#tip-img: /images/b/ba/Sovereign_Chestplate.png | Sovereign Chestplate}}] | ||
| | | 40/78 || 79 ||668||/||20||17||38 | ||
|- style="text-align: center; font-weight:bold; vertical-align:top" | |25||+ 1 AP Per Second | ||
! scope="row" | Total | |/||/||/||/ | ||
! | |- style="text-align:center" | ||
|- | ! scope="row" | [https://www.returnofreckoning.com/armory/item/435349 {{#tip-img: /images/b/b0/Sovereign_Spikestrap.png | Sovereign Spikestrap}}] | ||
! scope="row" | 2 Piece | | 40/78 || 75 ||/||/||29||/||18 | ||
| colspan=" | |/||+ 2 AP Per Second | ||
| + 2% Reduced chance to be Parried||87||87||86 | |||
|- style="text-align:center" | |||
! scope="row" | [https://www.returnofreckoning.com/armory/item/435397 {{#tip-img: /images/7/78/Sovereign_Shroud.png | Sovereign Shroud}}] | |||
| 40/75 || 33 ||/||/||20||17||21 | |||
|/||+ 2% Melee Critial Chance | |||
| /||101||101||102 | |||
|- style="text-align: center; font-weight:bold; vertical-align:top" | |||
! scope="row" | Total | |||
! 40/78|| 419 ||2840||39||126||79||216 | |||
!62||/ | |||
!/||290||289||289 | |||
|- | |||
! scope="row" | 2 Piece | |||
| colspan="13" | + 80 Strength | |||
|- | |- | ||
! scope="row" | 3 Piece | ! scope="row" | 3 Piece | ||
| colspan=" | | colspan="13" | + 88 Wounds | ||
|- | |- | ||
! scope="row" | 4 Piece | ! scope="row" | 4 Piece | ||
| colspan=" | | colspan="13" | + 6% Armor Penetration | ||
|- | |- | ||
! scope="row" | 5 Piece | ! scope="row" | 5 Piece | ||
| colspan=" | | colspan="13" | + 6% Melee Critial Chance | ||
| | |- | ||
! scope="row" | 6 Piece | |||
= | | colspan="13" | + 2 Path of Savagery Abilities | ||
|- | |||
!7 Piece | |||
| colspan="13" |On Hit: 10% chance to increase target's chance to be critically hit by 7% for 10 Seconds | |||
! | |||
|- | |- | ||
| | !8 Piece | ||
| colspan="13" |Gain ability: Desolation | |||
| | |||
|} | |} | ||
=== Sovereign Set of the Hulker (Secondary) === | |||
[[File:HulkerSovMara.png|left|top|300x300px|link=]] | |||
{| class="wikitable" | {| class="wikitable" | ||
|- | |- | ||
! scope="col" | | ! scope="col" | | ||
! scope="col" | Rank | ! scope="col" | Rank/Renown | ||
! scope="col" | [https://wiki.returnofreckoning.com/Royal_Crest {{#tip-img: /images/e/e9/Royal_Crest.png | Costs}}] | |||
! scope="col" | Armor | ! scope="col" | Armor | ||
! scope="col" | Toughness | ! scope="col" | Toughness | ||
| Line 514: | Line 601: | ||
! scope="col" | Initiative | ! scope="col" | Initiative | ||
! scope="col" | Strength | ! scope="col" | Strength | ||
! | !Weapon Skill | ||
! scope="col" | Bonus #1 | ! scope="col" | Bonus #1 | ||
!Bonus #2 | |||
! scope="col" | Sp. Resist | |||
! scope="col" | El. Resist | |||
! scope="col" | Co. Resist | |||
|- style="text-align:center" | |- style="text-align:center" | ||
! scope="row" | [https://www.returnofreckoning.com/armory/item/ | ! scope="row" | [https://www.returnofreckoning.com/armory/item/436533 {{#tip-img: /images/c/c4/Sovereign_Tramplers_Ałt.png | Sovereign Tramplers}}] | ||
| | | 40/76 || 44 ||494||/||20||18||28 | ||
|/||+ 2% Dodge | |||
|/||/||/||/ | |||
|- style="text-align:center" | |- style="text-align:center" | ||
! scope="row" | [https://www.returnofreckoning.com/armory/item/ | ! scope="row" | [https://www.returnofreckoning.com/armory/item/436545 {{#tip-img: /images/4/45/Sovereign_Pummelers_Ałt.png | Sovereign Pummelers}}] | ||
| | | 40/76 || 38 ||494||/||20||/||23 | ||
|23 | |||
| + 2% Parry | |||
|/||/||/||/ | |||
|- style="text-align:center" | |||
! scope="row" | [https://www.returnofreckoning.com/armory/item/436581 {{#tip-img: /images/8/89/Sovereign_Midstrap_Ałt.png | Sovereign Midstrap}}] | |||
| 40/75 || 26 ||/||/||18||15||21 | |||
|/||+ 2% Parry | |||
| + 2% Dodge||102||101||101 | |||
|- style="text-align:center" | |- style="text-align:center" | ||
! scope="row" | [https://www.returnofreckoning.com/armory/item/ | ! scope="row" | [https://www.returnofreckoning.com/armory/item/436569 {{#tip-img: /images/b/bc/Sovereign_Hardmantle_Ałt.png | Sovereign Hardmantle}}] | ||
| | | 40/77 || 59 ||592||/||16||25||30 | ||
|/||+ 2% Melee Critial Chance | |||
|/||/||/||/ | |||
|- style="text-align:center" | |||
! scope="row" | [https://www.returnofreckoning.com/armory/item/436593 {{#tip-img: /images/a/af/Sovereign_Direhelm_Ałt.png | Sovereign Direhelm}}] | |||
| 40/77 || 65 ||592||20||16||20||25||/||+ 10% Auto Attack Haste||/||/||/||/ | |||
|- style="text-align:center" | |- style="text-align:center" | ||
! scope="row" | [https://www.returnofreckoning.com/armory/item/ | ! scope="row" | [https://www.returnofreckoning.com/armory/item/436617 {{#tip-img: /images/5/50/Sovereign_Chestplate_Ałt.png | Sovereign Chestplate}}] | ||
|30|| | | 40/78 || 79 ||668||20||20||/||30 | ||
|- style="text-align: center; font-weight:bold; vertical-align:top" | |15||+ 4 AP Per Second | ||
! scope="row" | Total | |/||/||/||/ | ||
! | |- style="text-align:center" | ||
|- | ! scope="row" | [https://www.returnofreckoning.com/armory/item/436557 {{#tip-img: /images/2/2c/Sovereign_Spikestrap_Ałt.png | Sovereign Spikestrap}}] | ||
! scope="row" | 2 Piece | | 40/78 || 75 ||/||/||16||20||20 | ||
| colspan=" | |/||+ 2% Disrupt | ||
|- | |/||87||87||86 | ||
! scope="row" | 3 Piece | |- style="text-align:center" | ||
| colspan=" | ! scope="row" | [https://www.returnofreckoning.com/armory/item/436605 {{#tip-img: /images/6/6a/Sovereign_Shroud_Ałt.png | Sovereign Shroud}}] | ||
| 40/75 || 33 ||/||/||18||/||20 | |||
|20||+ 2% Melee Critial Chance | |||
| /||101||101||102 | |||
|- style="text-align: center; font-weight:bold; vertical-align:top" | |||
! scope="row" | Total | |||
! 40/78|| 419 ||2840||40||144||98||197 | |||
!58||/ | |||
!/||290||289||289 | |||
|- | |||
! scope="row" | 2 Piece | |||
| colspan="13" | + 80 Strength | |||
|- | |||
! scope="row" | 3 Piece | |||
| colspan="13" | + 88 Toughness | |||
|- | |- | ||
! scope="row" | 4 Piece | ! scope="row" | 4 Piece | ||
| colspan=" | | colspan="13" | + 96 Wounds | ||
| | |- | ||
! scope="row" | 5 Piece | |||
= | | colspan="13" | + 734 Armor Bonus | ||
|- | |||
==RvR== | ! scope="row" | 6 Piece | ||
=== | | colspan="13" | + 2 Path of Monstrosity Abilities | ||
|- | |||
!7 Piece | |||
| colspan="13" |On Being Attacked: 10% chance to reduce incoming damage by 4% for 10 Secinds | |||
|- | |||
!8 Piece | |||
| colspan="13" |Gain ability: Inexorable Force | |||
|} | |||
== RvR Auxiliary == | |||
===Overlord Set=== | |||
{| class="wikitable" | {| class="wikitable" | ||
|- | |- | ||
! scope="col" | | ! scope="col" | | ||
! scope="col" | Rank | ! scope="col" |Rank | ||
! scope="col" | [https://wiki.returnofreckoning.com/ | ! scope="col" |[https://wiki.returnofreckoning.com/Seal_of_the_Exemplar {{#tip-img: /images/e/e4/Seal_of_the_Exemplar.png | Costs}}] / [https://wiki.returnofreckoning.com/Seal_of_the_Paragon {{#tip-img: /images/2/23/Seal_of_the_Paragon.png | Costs}}] | ||
! scope="col" | Armor | ! scope="col" |Armor | ||
! scope="col" | Toughness | ! scope="col" |Toughness | ||
! scope="col" | Wounds | ! scope="col" |Wounds | ||
! scope="col" | | ! scope="col" |Strength | ||
! scope="col" | | ! scope="col" |Weapon Skill | ||
! scope="col" | | ! scope="col" |Bonus #1 | ||
! scope="col" | Bonus # | ! scope="col" |Bonus #2 | ||
|- style="text-align:center" | |- style="text-align:center" | ||
! scope="row" | [https://www.returnofreckoning.com/armory/item/ | ! scope="row" |[https://www.returnofreckoning.com/armory/item/2095 {{#tip-img: /images/9/9d/Hardmantle_of_the_Overlord.png| Hardmantle of the Overlord}}] | ||
| | |40||80 / 120 | ||
||475||12||/||23||29||+ 5% Auto Attack Haste||+ 1% Reduced Chance to be Parried | |||
|- style="text-align:center" | |- style="text-align:center" | ||
! scope="row" | [https://www.returnofreckoning.com/armory/item/ | ! scope="row" |[https://www.returnofreckoning.com/armory/item/2096 {{#tip-img: /images/8/87/Direhelm_of_the_Overlord.png| Direhelm of the Overlord}}] | ||
| | |40||80 / 120 | ||
| | ||475||/||12||28||24||+ 5% Auto Attack Haste||+ 1% Reduced Chance to be Parried | ||
| | |||
|- style="text-align: center; font-weight:bold; vertical-align:top" | |- style="text-align: center; font-weight:bold; vertical-align:top" | ||
! scope="row" | Total | ! scope="row" |Total | ||
! | !40||160 / 240||950||12||12||51||53||/||/ | ||
|- | |- | ||
! scope="row" | 2 Piece | ! scope="row" |2 Piece | ||
| colspan="9" | + | | colspan="9" | + 61 Wounds | ||
|} | |} | ||
=== | ===Imperator Set=== | ||
{| class="wikitable" | {| class="wikitable" | ||
|- | |- | ||
! scope="col" | | ! scope="col" | | ||
! scope="col" | Rank | ! scope="col" |Rank | ||
! scope="col" | [https://wiki.returnofreckoning.com/ | ! scope="col" |[https://wiki.returnofreckoning.com/Seal_of_the_Exemplar {{#tip-img: /images/e/e4/Seal_of_the_Exemplar.png | Costs}}] / [https://wiki.returnofreckoning.com/Seal_of_the_Paragon {{#tip-img: /images/2/23/Seal_of_the_Paragon.png | Costs}}] | ||
! scope="col" | Armor | ! scope="col" |Armor | ||
! scope="col" | Toughness | ! scope="col" |Toughness | ||
! scope="col" | Wounds | ! scope="col" |Wounds | ||
! scope="col" | Strength | ! scope="col" |Initiative | ||
! scope="col" | Weapon Skill | ! scope="col" |Strength | ||
! scope="col" |Weapon Skill | |||
! scope="col" |Bonus #1 | |||
|- style="text-align:center" | |||
! scope="row" |[https://www.returnofreckoning.com/armory/item/2143 {{#tip-img: /images/9/96/Hardmantle_of_the_Imperator.png | Hardmantle of the Imperator}}] | |||
|40||80 / 120 | |||
||475||28||10||/||12||14||+ 2% Reduced Armor Penetration | |||
|- style="text-align:center" | |||
! scope="row" |[https://www.returnofreckoning.com/armory/item/2144 {{#tip-img: /images/8/8d/Direhelm_of_the_Imperator.png | Direhelm of the Imperator}}] | |||
|40||80 / 120 | |||
||475||28||10||14||12||/||+ 2% Reduction in being Critically Hit | |||
|- style="text-align: center; font-weight:bold; vertical-align:top" | |||
! scope="row" |Total | |||
!40||160 / 240 ||950||56||20||14||24||14||/ | |||
|- | |||
! scope="row" |2 Piece | |||
| colspan="9" | + 61 Initiative | |||
|} | |||
==RvR Accessories== | |||
=== Genesis === | |||
==== Warrior Set ==== | |||
{| class="wikitable" | |||
|- | |||
! scope="col" | | |||
! scope="col" | Rank | |||
!Cost | |||
! scope="col" | Wounds | |||
! scope="col" | Initiative | |||
! scope="col" | Strength | |||
! scope="col" | Bonus #1 | ! scope="col" | Bonus #1 | ||
! scope="col" | Bonus #2 | |||
! scope="col" | Sp. Resist | ! scope="col" | Sp. Resist | ||
! scope="col" | El. Resist | ! scope="col" | El. Resist | ||
! scope="col" | Co. Resist | ! scope="col" | Co. Resist | ||
|- style="text-align:center" | |- style="text-align:center" | ||
! scope="row" | [https://www.returnofreckoning.com/armory/item/ | ! scope="row" | [https://www.returnofreckoning.com/armory/item/463 {{#tip-img: /images/6/6e/Genesis_Aspect_of_the_Warrior.png| Genesis Aspect of the Warrior}}] | ||
| | | 36 | ||
|1 [[Genesis Aspect]]||/||24||/||+ 36 Melee Power||/||64||64||64 | |||
|- style="text-align:center" | |- style="text-align:center" | ||
! scope="row" | [https://www.returnofreckoning.com/armory/item/ | ! scope="row" | [https://www.returnofreckoning.com/armory/item/462 {{#tip-img: /images/4/4e/Genesis_Fragment_of_the_Warrior.png| Genesis Fragment of the Warrior}}] | ||
| | | 36 | ||
|1 [[Genesis Fragment]]||/||/||14||+ 3% Parry||/||53||53||53 | |||
|- style="text-align:center" | |- style="text-align:center" | ||
! scope="row" | [https://www.returnofreckoning.com/armory/item/ | ! scope="row" | [https://www.returnofreckoning.com/armory/item/464 {{#tip-img: /images/5/59/Genesis_Remnant_of_the_Warrior.png| Genesis Remnant of the Warrior}}] | ||
| | | 36 | ||
|1 [[Genesis Remnant]]||24||/||24||/||/||64||64||64 | |||
|- style="text-align:center" | |- style="text-align:center" | ||
! scope="row" | [https://www.returnofreckoning.com/armory/item/ | ! scope="row" | [https://www.returnofreckoning.com/armory/item/461 {{#tip-img: /images/f/f7/Genesis_Shard_of_the_Warrior.png| Genesis Shard of the Warrior}}] | ||
| | | 36 | ||
|1 [[Genesis Shard]]||/||/||/||+ 2% Dodge||+ 2% Disrupt||55||55||55 | |||
|- style="text-align:center" | |- style="text-align:center" | ||
! scope="row" | [https://www.returnofreckoning.com/armory/item/ | ! scope="row" | [https://www.returnofreckoning.com/armory/item/465 {{#tip-img: /images/a/a6/Genesis_Cloak_of_the_Warrior.png| Genesis Cloak of the Warrior}}] | ||
| | | 36 | ||
| | |1 [[Genesis Cloak]]||/||/||28||+ 4 AP Per Second||/||53||53||53 | ||
| | |||
|- style="text-align: center; font-weight:bold; vertical-align:top" | |- style="text-align: center; font-weight:bold; vertical-align:top" | ||
! scope="row" | Total | ! scope="row" | Total | ||
! | ! 36 | ||
!/||24||24||66||/||/||289||289||289 | |||
|- | |- | ||
! scope="row" | 2 Piece | ! scope="row" | 2 Piece | ||
| colspan=" | | colspan="10" | + 37 Strength | ||
|- | |- | ||
! scope="row" | 3 Piece | ! scope="row" | 3 Piece | ||
| colspan=" | | colspan="10" | + 3% Reduced Chance to be Parried | ||
|- | |- | ||
! scope="row" | 4 Piece | ! scope="row" | 4 Piece | ||
| colspan=" | | colspan="10" | + 37 Weapon Skill | ||
|- | |- | ||
! scope="row" | 5 Piece | ! scope="row" | 5 Piece | ||
| colspan=" | | colspan="10" | + 3% Melee Critical Chance | ||
|} | |} | ||
=== | ==== Undying Set ==== | ||
{| class="wikitable" | {| class="wikitable" | ||
|- | |- | ||
! scope="col" | | ! scope="col" | | ||
! scope="col" | Rank | ! scope="col" | Rank | ||
! | !Cost | ||
! scope="col" | Toughness | |||
! scope="col" | | |||
! scope="col" | Wounds | ! scope="col" | Wounds | ||
! scope="col" | Initiative | ! scope="col" | Initiative | ||
! scope="col" | Bonus #1 | ! scope="col" | Bonus #1 | ||
! scope="col" | Bonus #2 | |||
! scope="col" | Sp. Resist | ! scope="col" | Sp. Resist | ||
! scope="col" | El. Resist | ! scope="col" | El. Resist | ||
! scope="col" | Co. Resist | ! scope="col" | Co. Resist | ||
|- style="text-align:center" | |- style="text-align:center" | ||
! scope="row" | [https://www.returnofreckoning.com/armory/item/ | ! scope="row" | [https://www.returnofreckoning.com/armory/item/891 {{#tip-img: /images/b/b5/Genesis_Aspect_of_the_Undying.png | Genesis Aspect of the Undying}}] | ||
| | |36 | ||
|1 [[Genesis Aspect]]||24||/||24||/||/||64||64||64 | |||
|- style="text-align:center" | |- style="text-align:center" | ||
! scope="row" | [https://www.returnofreckoning.com/armory/item/ | ! scope="row" | [https://www.returnofreckoning.com/armory/item/890 {{#tip-img: /images/7/7e/Genesis_Fragment_of_the_Undying.png | Genesis Fragment of the Undying}}] | ||
| | |36 | ||
|1 [[Genesis Fragment]]||/||14||/||+ 3% Parry||/||53||53||53 | |||
|- style="text-align:center" | |- style="text-align:center" | ||
! scope="row" | [https://www.returnofreckoning.com/armory/item/ | ! scope="row" | [https://www.returnofreckoning.com/armory/item/892 {{#tip-img: /images/b/b2/Genesis_Remnant_of_the_Undying.png | Genesis Remnant of the Undying}}] | ||
| | |36 | ||
|1 [[Genesis Remnant]]||24||24||/||/||/||64||64||64 | |||
|- style="text-align:center" | |- style="text-align:center" | ||
! scope="row" | [https://www.returnofreckoning.com/armory/item/ | ! scope="row" | [https://www.returnofreckoning.com/armory/item/889 {{#tip-img: /images/d/d6/Genesis_Shard_of_the_Undying.png | Genesis Shard of the Undying}}] | ||
| | |36 | ||
|1 [[Genesis Shard]]||/||/||/||+ 2% Dodge ||+ 2% Disrupt||55||55||55 | |||
|- style="text-align:center" | |- style="text-align:center" | ||
! scope="row" | [https://www.returnofreckoning.com/armory/item/ | ! scope="row" | [https://www.returnofreckoning.com/armory/item/893 {{#tip-img: /images/9/90/Genesis_Cloak_of_the_Undying.png | Genesis Cloak of the Undying}}] | ||
| | |36 | ||
| | |1 [[Genesis Cloak]]||28||/||/||+ 4AP Per Second||/||53||53||53 | ||
| | |||
|- style="text-align: center; font-weight:bold; vertical-align:top" | |- style="text-align: center; font-weight:bold; vertical-align:top" | ||
! scope="row" | Total | ! scope="row" | Total | ||
! | !36 | ||
!/||76||48||24||/||/||289||289||289 | |||
|- | |- | ||
! scope="row" | 2 Piece | ! scope="row" | 2 Piece | ||
| colspan=" | | colspan="10" | + 37 Wounds | ||
|- | |- | ||
! scope="row" | 3 Piece | ! scope="row" | 3 Piece | ||
| colspan=" | | colspan="10" | + 3% Reduced Armor Penetration | ||
|- | |- | ||
! scope="row" | 4 Piece | ! scope="row" | 4 Piece | ||
| colspan=" | | colspan="10" | + 37 Toughness | ||
|- | |- | ||
! scope="row" | 5 Piece | ! scope="row" | 5 Piece | ||
| colspan=" | | colspan="10" | + 3% Reduced Chance to be Critically Hit | ||
|} | |} | ||
=== | === Warrant === | ||
==== Brawler Set ==== | |||
{| class="wikitable" | {| class="wikitable" | ||
|- | |- | ||
! scope="col" | | ! scope="col" | | ||
! scope="col" | Rank/Renown | ! scope="col" | Rank/Renown | ||
! scope="col" | {{#tip-img: /images/ | ! scope="col" | [https://wiki.returnofreckoning.com/Imperious_Warrant {{#tip-img: /images/2/29/Imperious_Warrant.png| Costs}}] | ||
! scope="col" | Wounds | ! scope="col" | Wounds | ||
! scope="col" | Initiative | ! scope="col" | Initiative | ||
! scope="col" | Strength | ! scope="col" | Strength | ||
! scope="col" | Bonus #1 | ! scope="col" | Bonus #1 | ||
! scope="col" | Sp. Resist | ! scope="col" | Sp. Resist | ||
! scope="col" | El. Resist | ! scope="col" | El. Resist | ||
! scope="col" | Co. Resist | ! scope="col" | Co. Resist | ||
|- style="text-align:center" | |- style="text-align:center" | ||
! scope="row" | [https://www.returnofreckoning.com/armory/item/ | ! scope="row" | [https://www.returnofreckoning.com/armory/item/500 {{#tip-img: /images/4/49/Icon_of_the_Brawler.png | Icon of the Brawler}}] | ||
| | |36||1||12||13||17||/||62||62||62 | ||
|/|| | |||
|- style="text-align:center" | |- style="text-align:center" | ||
! scope="row" | [https://www.returnofreckoning.com/armory/item/ | ! scope="row" | [https://www.returnofreckoning.com/armory/item/501 {{#tip-img: /images/8/8f/Mark_of_the_Brawler.png | Mark of the Brawler}}] | ||
| | |36||1||/||/||24||+ 1% Parry||68||68||68 | ||
| | |||
| | |||
|- style="text-align:center" | |- style="text-align:center" | ||
! scope="row" | [https://www.returnofreckoning.com/armory/item/ | ! scope="row" | [https://www.returnofreckoning.com/armory/item/502 {{#tip-img: /images/9/94/Cinture_of_the_Brawler.png | Cinture of the Brawler}}] | ||
| | |36||1||/||15||15||+ 18 Melee Power||60||60||60 | ||
| | |||
|- style="text-align:center" | |- style="text-align:center" | ||
! scope="row" | Total | ! scope="row" | Total | ||
! | !36||3||12||28||56||/||190||190||190 | ||
| | |||
| | |||
|- | |- | ||
! scope="row" | 3 Piece | ! scope="row" | 3 Piece | ||
| colspan=" | | colspan="9" | + 4 Morale Per Second | ||
|} | |} | ||
=== | ==== Assailant Set ==== | ||
{| class="wikitable" | {| class="wikitable" | ||
|- | |- | ||
! scope="col" | | ! scope="col" | | ||
! scope="col" | Rank/Renown | ! scope="col" | Rank/Renown | ||
! scope="col" | {{#tip-img: /images/ | ! scope="col" | [https://wiki.returnofreckoning.com/Empowered_Warrant {{#tip-img: /images/7/72/Empowered_Warrant.png| Costs}}] | ||
! scope="col" | Wounds | ! scope="col" | Wounds | ||
! scope="col" | Initiative | ! scope="col" | Initiative | ||
! scope="col" | Strength | ! scope="col" | Strength | ||
! scope="col" | Bonus #1 | ! scope="col" | Bonus #1 | ||
!Bonus #2 | ! scope="col" | Bonus #2 | ||
! scope="col" | Sp. Resist | ! scope="col" | Sp. Resist | ||
! scope="col" | El. Resist | ! scope="col" | El. Resist | ||
! scope="col" | Co. Resist | ! scope="col" | Co. Resist | ||
|- style="text-align:center" | |- style="text-align:center" | ||
! scope="row" | [https://www.returnofreckoning.com/armory/item/ | ! scope="row" | [https://www.returnofreckoning.com/armory/item/515 {{#tip-img: /images/7/70/Icon_of_the_Assailant.png | Icon of the Assailant}}] | ||
| | |36||1||16||16||20||/||/||69||69||69 | ||
|/|| | |||
|- style="text-align:center" | |- style="text-align:center" | ||
! scope="row" | [https://www.returnofreckoning.com/armory/item/ | ! scope="row" | [https://www.returnofreckoning.com/armory/item/516 {{#tip-img: /images/a/ab/Mark_of_the_Assailant.png | Mark of the Assailant}}] | ||
| | |36||1||/||/||19||+ 2% Parry||/||72||72||72 | ||
| | |||
| | |||
|/|| | |||
|- style="text-align:center" | |- style="text-align:center" | ||
! scope="row" | [https://www.returnofreckoning.com/armory/item/ | ! scope="row" | [https://www.returnofreckoning.com/armory/item/517 {{#tip-img: /images/8/81/Cloak_of_the_Assailant.png| Cloak of the Assailant}}] | ||
| | |36||1||/||/||16||+ 2 AP Per Second||+ 18 Melee Power||65||65||65 | ||
| + | |||
|- style="text-align:center" | |- style="text-align:center" | ||
! scope="row" | [https:// | ! scope="row" | Total | ||
| | !36||3||16||16||55||/||/||206||206||206 | ||
| | |- | ||
| | ! scope="row" | 3 Piece | ||
|- style="text-align:center" | | colspan="9" | +3% Reduced Chance to be Parried | ||
! scope="row" | [https://www.returnofreckoning.com/armory/item/ | |} | ||
| | |||
| | ==Scenario== | ||
===Mercenary Set=== | |||
[[File:AnniMarauder.png|left|top|300x300px|link=]] | |||
{| class="wikitable" | |||
|- | |||
! scope="col" | | |||
! scope="col" | Rank/Renown | |||
! scope="col" | [https://wiki.returnofreckoning.com/Officer%27s_Emblem {{#tip-img: /images/6/61/Officers_Emblem.png | Costs}}] | |||
! scope="col" | Armor | |||
! scope="col" | Toughness | |||
! scope="col" | Wounds | |||
! scope="col" | Initiative | |||
! scope="col" | Strength | |||
! scope="col" | Weapon Skill | |||
! scope="col" | Bonus #1 | |||
|- style="text-align:center" | |||
! scope="row" | [https://www.returnofreckoning.com/armory/item/129837947 {{#tip-img: /images/c/c9/Tramplers_of_the_Mercenary.png| Tramplers of the Mercenary}}] | |||
| 35/35 || 46 ||366||10||/||/||21||13||+ 2% Dodge | |||
|- style="text-align:center" | |- style="text-align:center" | ||
! scope="row" | [https://www.returnofreckoning.com/armory/item/ | ! scope="row" | [https://www.returnofreckoning.com/armory/item/129837946 {{#tip-img: /images/c/cc/Pummelers_of_the_Mercenary.png| Pummelers of the Mercenary}}] | ||
| | | 35/36 || 54 ||366||/||14||9||11||23||/ | ||
| | |||
|- style="text-align:center" | |- style="text-align:center" | ||
! scope="row" | [https://www.returnofreckoning.com/armory/item/ | ! scope="row" | [https://www.returnofreckoning.com/armory/item/129837948 {{#tip-img: /images/8/85/Hardmantle_of_the_Mercenary.png | Hardmantle of the Mercenary}}] | ||
| | | 35/37 || 80 ||424||12||/||/||25||18||+ 1% Reduction in being Critically Hit | ||
|/|| | |||
|- style="text-align:center" | |- style="text-align:center" | ||
! scope="row" | [https://www.returnofreckoning.com/armory/item/ | ! scope="row" | [https://www.returnofreckoning.com/armory/item/129837945 {{#tip-img: /images/e/e8/Direhelm_of_the_Mercenary.png| Direhelm of the Mercenary}}] | ||
| | | 35/38 || 73 ||424||/||14||/||23||13||+ 2% Disrupt | ||
|/|| | |- style="text-align:center" | ||
| /|| | ! scope="row" | [https://www.returnofreckoning.com/armory/item/129837944 {{#tip-img: /images/4/46/Chestplate_of_the_Mercenary.png | Chestplate of the Mercenary}}] | ||
| 35/39 || 98 ||472||/||12||/||30||17||+ 3 AP Per Second | |||
|- style="text-align: center; font-weight:bold; vertical-align:top" | |- style="text-align: center; font-weight:bold; vertical-align:top" | ||
! scope="row" | Total | ! scope="row" | Total | ||
! | ! 35/39|| 351 ||2048||22||40||9||110||84||/ | ||
|- | |- | ||
! scope="row" | 2 Piece | ! scope="row" | 2 Piece | ||
| colspan=" | | colspan="9" | + 53 Strength | ||
|- | |- | ||
! scope="row" | 3 Piece | ! scope="row" | 3 Piece | ||
| colspan=" | | colspan="9" | + 290 Elemental Resistance | ||
|- | |- | ||
! scope="row" | 4 Piece | ! scope="row" | 4 Piece | ||
| colspan=" | | colspan="9" | + 1 to Path of Savagery Abilities | ||
|- | |- | ||
! scope="row" | 5 Piece | ! scope="row" | 5 Piece | ||
| colspan=" | | colspan="9" | + 5% Melee Critial Chance | ||
|} | |} | ||
=== | ===Dominator Set=== | ||
[[File:ConquerorMarauder.png|left|top|300x300px|link=]] | |||
{| class="wikitable" | {| class="wikitable" | ||
|- | |- | ||
! scope="col" | | ! scope="col" | | ||
! scope="col" | Rank/Renown | ! scope="col" |Rank/Renown | ||
! scope="col" | {{#tip-img: /images/ | ! scope="col" |[https://wiki.returnofreckoning.com/Dominator%27s_Emblem {{#tip-img: /images/7/77/Dominators_Emblem.png | Costs}}] | ||
! scope="col" | Armor | ! scope="col" |Armor | ||
! scope="col" | Toughness | ! scope="col" |Toughness | ||
! scope="col" | Wounds | ! scope="col" |Wounds | ||
! scope="col" | Initiative | ! scope="col" |Initiative | ||
! scope="col" | Strength | ! scope="col" |Strength | ||
! scope="col" |Bonus #1 | |||
! scope="col" | Bonus #1 | ! scope="col" |Sp. Resist | ||
! scope="col" |El. Resist | |||
! scope="col" | Sp. Resist | ! scope="col" |Co. Resist | ||
! scope="col" | El. Resist | |||
! scope="col" | Co. Resist | |||
|- style="text-align:center" | |- style="text-align:center" | ||
! scope="row" | [https://www.returnofreckoning.com/armory/item/ | ! scope="row" |[https://www.returnofreckoning.com/armory/item/1777 {{#tip-img: /images/1/18/Dominator_Tramplers.png | Dominator Tramplers}}] | ||
| 40/ | |40/40||119||392||14||/||10||16||+ 2% Reduction in being Critically Hit||/||/||/ | ||
| | |||
|- style="text-align:center" | |- style="text-align:center" | ||
! scope="row" | [https://www.returnofreckoning.com/armory/item/ | ! scope="row" |[https://www.returnofreckoning.com/armory/item/1789 {{#tip-img: /images/b/be/Dominator_Pummelers.png | Dominator Pummelers}}] | ||
| 40/ | |40/41||103||392||15||8||/||25||+ 2% Parry||/||/||/ | ||
| | |||
| | |||
|- style="text-align:center" | |- style="text-align:center" | ||
! scope="row" | [https://www.returnofreckoning.com/armory/item/ | ! scope="row" |[https://www.returnofreckoning.com/armory/item/1801 {{#tip-img: /images/2/28/Dominator_Midstrap.png | Dominator Midstrap}}] | ||
| 40/ | |40/42||72||/||24||18||12||6||/||83||77||83 | ||
| | |||
|- style="text-align:center" | |- style="text-align:center" | ||
! scope="row" | [https://www.returnofreckoning.com/armory/item/ | ! scope="row" |[https://www.returnofreckoning.com/armory/item/1813 {{#tip-img: /images/0/05/Dominator_Hardmantle.png | Dominator Hardmantle}}] | ||
| 40/ | |40/43||162||450||29||/||16||12||+ 2% Reduced Armor Penetration||/||/||/ | ||
| | |||
|- style="text-align:center" | |- style="text-align:center" | ||
! scope="row" | [https://www.returnofreckoning.com/armory/item/ | ! scope="row" |[https://www.returnofreckoning.com/armory/item/1825 {{#tip-img: /images/3/32/Dominator_Direhelm.png | Dominator Direhelm}}] | ||
| 40/ | |40/44||178||450||30||10||/||17||+ 2% Disrupt||/||/||/ | ||
|- style="text-align:center" | |- style="text-align:center" | ||
! scope="row" | [https://www.returnofreckoning.com/armory/item/ | ! scope="row" |[https://www.returnofreckoning.com/armory/item/1837 {{#tip-img: /images/9/92/Dominator_Chestplate.png | Dominator Chestplate}}] | ||
| 40/ | |40/45||216||510||13||/||33||19||+ 3 AP Per Second||/||/||/ | ||
| | |- style="text-align: center; font-weight:bold; vertical-align:top" | ||
! scope="row" |Total | |||
!40/45||850||2194||125||36||71||95||/||83||77||83 | |||
| | |||
|/| | |||
| / | |||
|- style="text-align: center; font-weight:bold; vertical-align:top" | |||
! scope="row" | Total | |||
! 40/ | |||
|- | |- | ||
! scope="row" | 2 Piece | ! scope="row" |2 Piece | ||
| colspan=" | | colspan="11" | + 57 Strength | ||
|- | |- | ||
! scope="row" | 3 Piece | ! scope="row" |3 Piece | ||
| colspan=" | | colspan="11" | + 63 Wounds | ||
|- | |- | ||
! scope="row" | 4 Piece | ! scope="row" |4 Piece | ||
| colspan=" | | colspan="11" | + 561 Armor | ||
|- | |- | ||
! scope="row" | 5 Piece | ! scope="row" |5 Piece | ||
| colspan=" | | colspan="11" |On Being Hit: 10% chance to form a protective barrier that will absorb up to 183 damage over 5 seconds | ||
|- | |- | ||
! scope="row" | 6 Piece | ! scope="row" |6 Piece | ||
| colspan=" | | colspan="11" | + 5% Reduction in Being Critically Hit | ||
|} | |} | ||
=== | === Oppressor Set === | ||
[[File:VanquisherMarauder.png|left|top|300x300px|link=]] | |||
{| class="wikitable" | {| class="wikitable" | ||
|- | |- | ||
! scope="col" | | ! scope="col" | | ||
! scope="col" | Rank/Renown | ! scope="col" | Rank/Renown | ||
! scope="col" | {{#tip-img: /images/e/ | ! scope="col" | [https://wiki.returnofreckoning.com/Oppressor%27s_Emblem {{#tip-img: /images/e/e0/Oppersors_Emblem.png | Costs}}] | ||
! scope="col" | Armor | ! scope="col" | Armor | ||
! | !Toughness | ||
! scope="col" | Wounds | ! scope="col" | Wounds | ||
! scope="col" | Initiative | ! scope="col" | Initiative | ||
! scope="col" | Strength | ! scope="col" | Strength | ||
!Weapon | !Weapon SKill | ||
! scope="col" | Bonus #1 | ! scope="col" | Bonus #1 | ||
!Bonus #2 | !Bonus #2 | ||
| Line 971: | Line 1,024: | ||
! scope="col" | Co. Resist | ! scope="col" | Co. Resist | ||
|- style="text-align:center" | |- style="text-align:center" | ||
! scope="row" | [https://www.returnofreckoning.com/armory/item/ | ! scope="row" | [https://www.returnofreckoning.com/armory/item/3109 {{#tip-img: /images/3/3b/Oppressor_Tramplers.png | Oppressor Tramplers}}] | ||
| 40/ | | 40/56 ||182||418 | ||
|/||+ 2% | |15||10||/||18 | ||
|/||+ 2% Reduction in being Critically Hit | |||
|/||/||/||/ | |/||/||/||/ | ||
|- style="text-align:center" | |- style="text-align:center" | ||
! scope="row" | [https://www.returnofreckoning.com/armory/item/ | ! scope="row" | [https://www.returnofreckoning.com/armory/item/3085 {{#tip-img: /images/3/3d/Oppressor_Pummelers.png | Oppressor Pummelers}}] | ||
| 40/ | | 40/56 ||157||418 | ||
| | |11||25||/||15 | ||
| +2% Parry | |/||+ 2% Parry | ||
|/||/||/||/ | |/||/||/||/ | ||
|- style="text-align:center" | |- style="text-align:center" | ||
! scope="row" | [https://www.returnofreckoning.com/armory/item/ | ! scope="row" | [https://www.returnofreckoning.com/armory/item/3181 {{#tip-img: /images/8/87/Oppressor_Midstrap.png | Oppressor Midstrap}}] | ||
| 40/ | | 40/55 || 110 ||/ | ||
| | |/||/||/||15 | ||
| + 2% | |12||+ 36 Melee Power | ||
| + 2% Reduced Armor Penetration||87||86||86 | |||
|- style="text-align:center" | |- style="text-align:center" | ||
! scope="row" | [https://www.returnofreckoning.com/armory/item/ | ! scope="row" | [https://www.returnofreckoning.com/armory/item/3157 {{#tip-img: /images/6/60/Oppressor_Hardmantle.png | Oppressor Hardmantle}}] | ||
| 40/ | | 40/57 || 248 ||482 | ||
|/||+ 2% | |15||28||/||19 | ||
|/||+ 2% Reduced Armor Penetration | |||
|/||/||/||/ | |/||/||/||/ | ||
|- style="text-align:center" | |- style="text-align:center" | ||
! scope="row" | [https://www.returnofreckoning.com/armory/item/ | ! scope="row" | [https://www.returnofreckoning.com/armory/item/3133 {{#tip-img: /images/a/ae/Oppressor_Direhelm.png | Oppressor Direhelm}}] | ||
| 40/ | | 40/57 || 273 ||482 | ||
|/|| | |12||33||/||17 | ||
|/||+ 2% Parry | |||
|/||/||/||/ | |/||/||/||/ | ||
|- style="text-align:center" | |- style="text-align:center" | ||
! scope="row" | [https://www.returnofreckoning.com/armory/item/ | ! scope="row" | [https://www.returnofreckoning.com/armory/item/3061 {{#tip-img: /images/4/40/Oppressor_Chestplate.png | Oppressor Chestplate}}] | ||
| 40/ | | 40/58 || 331 ||548 | ||
| | |/||29||16||20 | ||
|/||+ 2% Reduction in being Critically Hit | |||
|/||/||/||/ | |/||/||/||/ | ||
|- style="text-align: center; font-weight:bold; vertical-align:top" | |- style="text-align: center; font-weight:bold; vertical-align:top" | ||
! scope="row" | Total | ! scope="row" | Total | ||
! 40/ | ! 40/58|| 1301 ||2348 | ||
! | !53||125||16||104 | ||
! | !12||/ | ||
!||87||86||86 | |||
|- | |- | ||
! scope="row" | 2 Piece | ! scope="row" | 2 Piece | ||
| colspan="13" | + | | colspan="13" | + 62 Strength | ||
|- | |- | ||
! scope="row" | 3 Piece | ! scope="row" | 3 Piece | ||
| colspan="13" | + | | colspan="13" | + 68 Wounds | ||
|- | |- | ||
! scope="row" | 4 Piece | ! scope="row" | 4 Piece | ||
| colspan="13" | | | colspan="13" | Endure - On Being Hit: 15% chance to reduce attackers Strength, Ballistic Skill and Intelligence by 110 while increasing your Initiative by 110 for 10 Seconds | ||
|- | |- | ||
! scope="row" | 5 Piece | ! scope="row" | 5 Piece | ||
| colspan="13" | + | | colspan="13" | + 5% Reduction in being Critically Hit | ||
|- | |- | ||
! scope="row" | 6 Piece | ! scope="row" | 6 Piece | ||
| colspan="13" | + | | colspan="13" | + 4% Damage | ||
|} | |} | ||
== | ==Ranked== | ||
=== Triumphant Set === | |||
=== | [[File:InvaderMarauder.png|left|top|300x300px|link=]] | ||
{| class="wikitable" | {| class="wikitable" | ||
|- | |- | ||
! scope="col" | | ! scope="col" | | ||
! scope="col" |Rank | ! scope="col" | Rank/Renown | ||
! scope="col" |[https://wiki.returnofreckoning.com/ | ! scope="col" | [https://wiki.returnofreckoning.com/Triumphant_Emblem {{#tip-img: /images/4/45/Triumphant_Emblem.png | Costs}}] | ||
! scope="col" |Armor | ! scope="col" | Armor | ||
! scope="col" | | ! scope="col" | Wounds | ||
! scope="col" | | ! scope="col" | Initiative | ||
! scope="col" |Strength | ! scope="col" | Strength | ||
! scope="col" | | !Weapon SKill | ||
! scope="col" | | ! scope="col" | Bonus #1 | ||
! scope=" | ! scope="col" | Sp. Resist | ||
! scope="col" | El. Resist | |||
! scope="col" | Co. Resist | |||
|- style="text-align:center" | |||
! scope="row" | [https://www.returnofreckoning.com/armory/item/4693 {{#tip-img: /images/6/66/Triumphant_Tramplers.png | Triumphant Tramplers}}] | |||
| 40/66 | |||
|648||470||/||19||21 | |||
|19||<nowiki>+ 10% Auto Attack Haste</nowiki>||/||/||/ | |||
|- style="text-align:center" | |||
! scope="row" | [https://www.returnofreckoning.com/armory/item/4692 {{#tip-img: /images/b/b6/Triumphant_Pummelers.png | Triumphant Pummelers}}] | |||
| 40/66 | |||
|752||470||14||/||23 | |||
|13 | |||
| + 2% Reduction in being Critically Hit||/||/||/ | |||
|- style="text-align:center" | |- style="text-align:center" | ||
! scope="row" |[https://www.returnofreckoning.com/armory/item/ | ! scope="row" | [https://www.returnofreckoning.com/armory/item/4697 {{#tip-img: /images/d/d5/Triumphant_Midstrap.png | Triumphant Midstrap}}] | ||
|40 | | 40/65 | ||
|| | |456||/||11||/||23 | ||
|13||+ 36 Melee Power | |||
|94||94||94 | |||
|- style="text-align:center" | |- style="text-align:center" | ||
! scope="row" |[https://www.returnofreckoning.com/armory/item/ | ! scope="row" | [https://www.returnofreckoning.com/armory/item/4695 {{#tip-img: /images/2/25/Triumphant_Hardmantle.png | Triumphant Hardmantle}}] | ||
|40 | | 40/67 | ||
|| | |1024||550||15||16||/ | ||
|25||+ 2% Melee Critical Chance||/||/||/ | |||
|- style="text-align:center" | |||
! scope="row" | [https://www.returnofreckoning.com/armory/item/4694 {{#tip-img: /images/c/c8/Triumphant_Direhelm.png | Triumphant Direhelm}}] | |||
|- | | 40/67 | ||
|1128||550||13||/||34 | |||
|18||+ 3% Reduced chance to be Parried||/||/||/ | |||
! scope=" | |||
|- style="text-align:center" | |- style="text-align:center" | ||
! scope="row" |[https://www.returnofreckoning.com/armory/item/ | ! scope="row" | [https://www.returnofreckoning.com/armory/item/4691 {{#tip-img: /images/5/50/Triumphant_Chestplate.png | Triumphant Chestplate}}] | ||
|40|| | | 40/68 | ||
|| | |1360||616||20||20||39 | ||
|16||/ | |||
|/||/||/ | |||
|- style="text-align:center" | |- style="text-align:center" | ||
! scope="row" |[https://www.returnofreckoning.com/armory/item/ | ! scope="row" | [https://www.returnofreckoning.com/armory/item/4696 {{#tip-img: /images/7/7c/Triumphant_Shroud.png | Triumphant Shroud}}] | ||
|40|| | | 40/65 | ||
|| | |760||/||10||18||23 | ||
|10||+ 2 AP Per Second||94||94||94 | |||
|- style="text-align: center; font-weight:bold; vertical-align:top" | |- style="text-align: center; font-weight:bold; vertical-align:top" | ||
! scope="row" |Total | ! scope="row" | Total | ||
!40|| | ! 40/68 | ||
!6128||2656||83||73||163 | |||
!114||/||188||188||188 | |||
|- | |||
! scope="row" | 2 Piece | |||
| colspan="11" | + 71 Strength | |||
|- | |||
! scope="row" | 3 Piece | |||
| colspan="11" | + 78 Wounds | |||
|- | |||
! scope="row" | 4 Piece | |||
| colspan="11" | Vicious Strikes - On Hit: 15% chance to reduce target's Toughness by 130 while increasing your Weaponskill by 130 for 10 Seconds | |||
|- | |||
! scope="row" | 5 Piece | |||
| colspan="11" | + 5% Melee Critical Chance | |||
|- | |||
! scope="row" | 6 Piece | |||
| colspan="11" | + 4% Damage | |||
|- | |- | ||
! | !7 Piece | ||
| colspan=" | | colspan="11" |On Hit: 10% chance to increase Block Strikethrough and Parry Strikethrough by 7% for 10 Seconds | ||
|} | |} | ||
== | === Victorious Set === | ||
[[File:InvaderMarauder.png|left|top|300x300px|link=]] | |||
{| class="wikitable" | {| class="wikitable" | ||
|- | |- | ||
! scope="col" | | ! scope="col" | | ||
! scope="col" | Rank | ! scope="col" | Rank/Renown | ||
! scope="col" | [https://wiki.returnofreckoning.com/Triumphant_Emblem {{#tip-img: /images/4/45/Triumphant_Emblem.png | Costs}}] | |||
! scope="col" | Armor | |||
! scope="col" | Toughness | |||
! scope="col" | Wounds | ! scope="col" | Wounds | ||
! scope="col" | Initiative | ! scope="col" | Initiative | ||
! scope="col" | Strength | ! scope="col" | Strength | ||
!Weapon Skill | |||
! scope="col" | Bonus #1 | ! scope="col" | Bonus #1 | ||
! | !Bonus #2 | ||
! scope="col" | Sp. Resist | ! scope="col" | Sp. Resist | ||
! scope="col" | El. Resist | ! scope="col" | El. Resist | ||
! scope="col" | Co. Resist | ! scope="col" | Co. Resist | ||
|- style="text-align:center" | |- style="text-align:center" | ||
! scope="row" | [https://www.returnofreckoning.com/armory/item/ | ! scope="row" | [https://www.returnofreckoning.com/armory/item/4861 {{#tip-img: /images/b/b5/Victorious_Tramplers.png | Victorious Tramplers}}] | ||
| | | 40/66 | ||
|648||470||19||14||/||18 | |||
|/||+ 2% Reduction in being Critically Hit | |||
|/||/||/||/ | |||
|- style="text-align:center" | |||
! scope="row" | [https://www.returnofreckoning.com/armory/item/4860 {{#tip-img: /images/b/b0/Victorious_Pummelers.png | Victorious Pummelers}}] | |||
| 40/66 | |||
|752||470||11||25||/||16 | |||
|/ | |||
| + 3% Parry | |||
|/||/||/||/ | |||
|- style="text-align:center" | |- style="text-align:center" | ||
! scope="row" | [https://www.returnofreckoning.com/armory/item/ | ! scope="row" | [https://www.returnofreckoning.com/armory/item/4865 {{#tip-img: /images/7/7d/Victorious_Midstrap.png | Victorious Midstrap}}] | ||
| | | 40/65 | ||
|456||/||/||/||/||17 | |||
|12||+ 36 Melee Power | |||
| + 3% Reduced Armor Penetration | |||
|94||94||94 | |||
|- style="text-align:center" | |- style="text-align:center" | ||
! scope="row" | [https://www.returnofreckoning.com/armory/item/ | ! scope="row" | [https://www.returnofreckoning.com/armory/item/4863 {{#tip-img: /images/c/cc/Victorious_Hardmantle.png | Victorious Hardmantle}}] | ||
| | | 40/67 | ||
|1024||550||20||28||/||21 | |||
|/||+ 2% Reduced Armor Penetration | |||
|/||/||/||/ | |||
|- style="text-align:center" | |- style="text-align:center" | ||
! scope="row" | [https://www.returnofreckoning.com/armory/item/ | ! scope="row" | [https://www.returnofreckoning.com/armory/item/4862 {{#tip-img: /images/f/fb/Victorious_Direhelm.png | Victorious Direhelm}}] | ||
| 36 ||/|| | | 40/67 | ||
|1128||550||15||36||/||20 | |||
|/||+ 2% Parry | |||
|/||/||/||/ | |||
|- style="text-align:center" | |- style="text-align:center" | ||
! scope="row" | [https://www.returnofreckoning.com/armory/item/ | ! scope="row" | [https://www.returnofreckoning.com/armory/item/4859 {{#tip-img: /images/7/7f/Victorious_Chestplate.png | Victorious Chestplace}}] | ||
| | | 40/68 | ||
|- style="text-align: center; font-weight:bold; vertical-align:top" | |1360||616||/||29||16||20 | ||
! scope="row" | Total | |/||+ 3% Reduction in being Critically Hit | ||
! | |/ | ||
|- | |/||/||/ | ||
|- style="text-align:center" | |||
! scope="row" | [https://www.returnofreckoning.com/armory/item/4864 {{#tip-img: /images/1/17/Victorious_Shroud.png | Victorious Shroud}}] | |||
| 40/65 | |||
|760||/||10||21||18||10 | |||
|/||+ 2% Parry | |||
|/||94||94||94 | |||
|- style="text-align: center; font-weight:bold; vertical-align:top" | |||
! scope="row" | Total | |||
! 40/68 | |||
!6128||2656||75||153||34||122 | |||
!12||/ | |||
!||188||188||188 | |||
|- | |||
! scope="row" | 2 Piece | ! scope="row" | 2 Piece | ||
| colspan=" | | colspan="13" | + 71 Strength | ||
|- | |- | ||
! scope="row" | 3 Piece | ! scope="row" | 3 Piece | ||
| colspan=" | | colspan="13" | + 78 Wounds | ||
|- | |- | ||
! scope="row" | 4 Piece | ! scope="row" | 4 Piece | ||
| colspan=" | | colspan="13" | Endure - On Being Hit: 15% chance to reduce attackers Strength, Ballistic Skill and Intelligence by 130 while increasing your Initiative by 130 for 10 Seconds | ||
|- | |- | ||
! scope="row" | 5 Piece | ! scope="row" | 5 Piece | ||
| colspan=" | | colspan="13" | + 5% Reduction in being Critically Hit | ||
|- | |||
! scope="row" | 6 Piece | |||
| colspan="13" | + 4% Damage | |||
|- | |||
!7 Piece | |||
| colspan="13" |Domination - On Hit: 25% chance to steal 130 Toughness from your target for 10 Seconds | |||
|} | |} | ||
==== | ==PQ== | ||
=== Ruin Set === | |||
[[File:RuinMarauder.png|left|top|300x300px|link=]] | |||
{| class="wikitable" | {| class="wikitable" | ||
|- | |- | ||
! scope="col" | | ! scope="col" | | ||
! scope="col" | Rank/ | ! scope="col" | Rank | ||
! scope="col" | [https://wiki.returnofreckoning.com/Officer%27s_Coin {{#tip-img: /images/f/f9/Officers_Coin.png | Costs}}] | |||
! scope="col" | Armor | |||
! scope="col" | Toughness | ! scope="col" | Toughness | ||
! scope="col" | Wounds | ! scope="col" | Wounds | ||
! scope="col" | Initiative | ! scope="col" | Initiative | ||
! scope="col" | Strength | |||
! scope="col" | Weapon Skill | |||
! scope="col" | Bonus #1 | ! scope="col" | Bonus #1 | ||
|- style="text-align:center" | |- style="text-align:center" | ||
! scope="row" | [https://www.returnofreckoning.com/armory/item/ | ! scope="row" | [https://www.returnofreckoning.com/armory/item/434857 {{#tip-img: /images/e/e7/Tramplers_of_Ruin.png| Tramplers of Ruin}}] | ||
| | | 34 ||13||328||11||9||/||10||20||/ | ||
|- style="text-align:center" | |||
! scope="row" | [https://www.returnofreckoning.com/armory/item/434869 {{#tip-img: /images/7/7a/Pummelers_of_Ruin.png| Pummelers of Ruin}}] | |||
| 35 ||15||328||10||/||/||20||8||+ 2% Parry | |||
|- style="text-align:center" | |- style="text-align:center" | ||
! scope="row" | [https://www.returnofreckoning.com/armory/item/ | ! scope="row" | [https://www.returnofreckoning.com/armory/item/434893 {{#tip-img: /images/b/bf/Hardmantle_of_Ruin.png| Hardmantle of Ruin}}] | ||
| | | 35 ||18||378||11||/||13||27||/||+ 1% Melee Critical Chance | ||
|- style="text-align:center" | |- style="text-align:center" | ||
! scope="row" | [https://www.returnofreckoning.com/armory/item/ | ! scope="row" | [https://www.returnofreckoning.com/armory/item/434881 {{#tip-img: /images/0/00/Direhelm_of_Ruin.png| Direhelm of Ruin}}] | ||
|36|| | | 36 ||20||378||/||14||11||23||11||/ | ||
|- style="text-align:center" | |- style="text-align:center" | ||
! scope="row" | [https://www.returnofreckoning.com/armory/item/ | ! scope="row" | [https://www.returnofreckoning.com/armory/item/434905 {{#tip-img: /images/7/76/Chestplate_of_Ruin.png| Chestplate of Ruin}}] | ||
|36|| | | 36 ||40||430||/||15||/||29||14||+ 2 Morale Per Second | ||
| | |||
| | |||
|- style="text-align: center; font-weight:bold; vertical-align:top" | |- style="text-align: center; font-weight:bold; vertical-align:top" | ||
! scope="row" | Total | ! scope="row" | Total | ||
!36|| | !36 ||106||1851||31||38||24||109||53||/ | ||
|- | |- | ||
! scope="row" | 2 Piece | ! scope="row" | 2 Piece | ||
| colspan="9" | + | | colspan="9" | + 48 Strength | ||
|- | |- | ||
! scope="row" | 3 Piece | ! scope="row" | 3 Piece | ||
| colspan="9" | + | | colspan="9" | + 265 Corporeal Resistance | ||
|- | |- | ||
! scope="row" | 4 Piece | ! scope="row" | 4 Piece | ||
| colspan="9" | + | | colspan="9" | + 1 to Path of Savagery Abilities | ||
|- | |- | ||
! scope="row" | 5 Piece | ! scope="row" | 5 Piece | ||
| colspan="9" | + | | colspan="9" | + 63 Toughness | ||
|} | |} | ||
=== | ===Onslaught Set=== | ||
[[File:OnslaughtMarauder.png|left|top|300x300px|link=]] | |||
{| class="wikitable" | {| class="wikitable" | ||
|- | |- | ||
! scope="col" | | ! scope="col" | | ||
! scope="col" | Rank/Renown | ! scope="col" |Rank/Renown | ||
! scope="col" | | ! scope="col" |Armor | ||
! scope="col" | | ! scope="col" |Toughness | ||
! scope="col" | | ! scope="col" |Wounds | ||
! scope="col" | | ! scope="col" |Initiative | ||
! scope="col" | | ! scope="col" |Strength | ||
! scope="col" | | ! scope="col" |Weapon Skill | ||
! scope="col" | | ! scope="col" |Bonus #1 | ||
|- style="text-align:center" | |- style="text-align:center" | ||
! scope="row" | [https://www.returnofreckoning.com/armory/item/ | ! scope="row" |[https://www.returnofreckoning.com/armory/item/2017069 {{#tip-img: /images/a/a8/Onslaught_Tramplers.png| Onslaught Tramplers}}] | ||
| | |40/32||406||14||16||18||/||/||+ 18 Melee Power | ||
|- style="text-align:center" | |- style="text-align:center" | ||
! scope="row" | [https://www.returnofreckoning.com/armory/item/ | ! scope="row" |[https://www.returnofreckoning.com/armory/item/2017068 {{#tip-img: /images/8/84/Onslaught_Pummelers.png| Onslaught Pummelers }}] | ||
| | |40/32||406||/||16||12||24||/||+ 10% Auto Attack Haste | ||
|- style="text-align:center" | |- style="text-align:center" | ||
! scope="row" | [https://www.returnofreckoning.com/armory/item/ | ! scope="row" |[https://www.returnofreckoning.com/armory/item/2017066 {{#tip-img: /images/3/35/Onslaught_Hardmantle.png| Onslaught Hardmantle }}] | ||
| | |40/32||462||20||/||/||25||16||+ 2 AP Per Second | ||
|- style="text-align:center" | |- style="text-align:center" | ||
! scope="row" | Total | ! scope="row" |[https://www.returnofreckoning.com/armory/item/2017065 {{#tip-img: /images/d/d3/Onslaught_Direhelm.png| Onslaught Direhelm }}] | ||
! | |40/32||462||18||23||/||20||/||+ 1% Reduction in Being Critically Hit | ||
|- style="text-align:center" | |||
! scope="row" |[https://www.returnofreckoning.com/armory/item/2017067 {{#tip-img: /images/7/7d/Onslaught_Chestplate.png| Onslaught Chestplate }}] | |||
|40/32||518||/||20||/||27||16||+ 3% Reduced Armor Penetration | |||
|- style="text-align: center; font-weight:bold; vertical-align:top" | |||
! scope="row" |Total | |||
!40/32||2254||52||75||30||95||32||/ | |||
|- | |||
! scope="row" |2 Piece | |||
| colspan="8" | + 58 Wounds | |||
|- | |||
! scope="row" |3 Piece | |||
| colspan="8" | + 64 Strength | |||
|- | |||
! scope="row" |4 Piece | |||
| colspan="8" |Preservation - On Being Hit : 10% chance to increase Wounds by 100 for 20 seconds | |||
|- | |- | ||
! scope="row" | | ! scope="row" |5 Piece | ||
| colspan=" | | colspan="8" | + 5% Disrupt | ||
|} | |} | ||
==== | |||
==PvE== | |||
===Beastlord Set=== | |||
{| class="wikitable" | {| class="wikitable" | ||
|- | |- | ||
! scope="col" | | ! scope="col" | | ||
! scope="col" | Rank/Renown | ! scope="col" | Rank/Renown | ||
! scope="col" | [https://wiki.returnofreckoning.com/ | ! scope="col" | [https://wiki.returnofreckoning.com/Beastlord_Token {{#tip-img: /images/c/c2/Beastlord_Token_Fixed.png | Costs }}] | ||
! scope="col" | Armor | |||
! scope="col" | Toughness | |||
! scope="col" | Wounds | ! scope="col" | Wounds | ||
! scope="col" | Strength | ! scope="col" | Strength | ||
! scope="col" | Weapon Skill | |||
! scope="col" | Bonus #1 | ! scope="col" | Bonus #1 | ||
! scope="col" | Sp. Resist | ! scope="col" | Sp. Resist | ||
! scope="col" | El. Resist | ! scope="col" | El. Resist | ||
! scope="col" | Co. Resist | ! scope="col" | Co. Resist | ||
|- style="text-align:center" | |- style="text-align:center" | ||
! scope="row" | [https://www.returnofreckoning.com/armory/item/ | ! scope="row" | [https://www.returnofreckoning.com/armory/item/2034 {{#tip-img: /images/b/b0/Beastlord_Rend_Ring.png | Beastlord Rend Ring}}] | ||
| | |40||/||/||/||/||24||13||+1 AP Per Second||60||60||64 | ||
|- style="text-align:center" | |||
! scope="row" | [https://www.returnofreckoning.com/armory/item/2000 {{#tip-img: /images/8/87/Beastlord_Cloak_Marauder.png | Beastlord Cloak}}] | |||
|40||/||/||/||32||/||24||/||72||84||72 | |||
|- style="text-align:center" | |- style="text-align:center" | ||
! scope="row" | [https://www.returnofreckoning.com/armory/item/ | ! scope="row" | [https://www.returnofreckoning.com/armory/item/2058 {{#tip-img: /images/3/30/Beastlord_Hunting_Guide_Marauder.png | Beastlord Hunting Guide}}] | ||
| | |40||5||/||/||/||/||/||On Use: Increases AP Regeneration for 15s on all party members. 30m cooldown||/||/||/ | ||
|- style="text-align:center" | |- style="text-align:center" | ||
! scope="row" | [https://www.returnofreckoning.com/armory/item/ | ! scope="row" | [https://www.returnofreckoning.com/armory/item/1962 {{#tip-img: /images/5/59/Beastlord_Hardmantle.png | Beastlord Hardmantle}}] | ||
| | |40||/||406||/||14||24||14||/||/||30||25 | ||
|- style="text-align:center" | |- style="text-align:center" | ||
! scope="row" | Total | ! scope="row" | [https://www.returnofreckoning.com/armory/item/1938 {{#tip-img: /images/7/70/Beastlord_Direhelm.png | Beastlord Direhelm}}] | ||
! | |40||/||406||20||/||20||12||/||/||25||30 | ||
|- | |- style="text-align:center" | ||
! scope="row" | 3 Piece | ! scope="row" | [https://www.returnofreckoning.com/armory/item/1914 {{#tip-img: /images/a/a1/Beastlord_Chestplate.png | Beastlord Chestplate}}] | ||
| colspan=" | |40||/||450||14||30||/||15||/||30||/||30 | ||
|- style="text-align: center; font-weight:bold; vertical-align:top" | |||
! scope="row" | Total | |||
!40||/||1262||34||75||68||78||/||195||257||304 | |||
|- | |||
! scope="row" | 3 Piece | |||
| colspan="11" | + 55 Weapon Skill | |||
|- | |||
! scope="row" | 4 Piece | |||
| colspan="11" | + 60 Strength | |||
|- | |||
! scope="row" | 5 Piece | |||
| colspan="11" | + 5% Reduced chance to be Parried | |||
|- | |||
! scope="row" | 6 Piece | |||
| colspan="10" |Overwhelming - On Hit: 25% chance to reduce target's Weapon Skill by 80 while increasing your Strength by 80 for 10 seconds | |||
|} | |} | ||
== | ===Rare Fortune Set=== | ||
{| class="wikitable" | {| class="wikitable" | ||
|- | |- | ||
! scope="col" | | ! scope="col" | | ||
! scope="col" | Rank | ! scope="col" |Rank | ||
! scope="col" |Armor | |||
! scope="col" | Armor | ! scope="col" |Toughness | ||
! scope="col" | Toughness | ! scope="col" |Wounds | ||
! scope="col" | Wounds | ! scope="col" |Initiative | ||
! scope="col" | Initiative | ! scope="col" |Strength | ||
! scope="col" | Strength | ! scope="col" |Weapon Skill | ||
! scope="col" | Weapon Skill | ! scope="col" |Bonus #1 | ||
! scope="col" | Bonus #1 | |||
|- style="text-align:center" | |- style="text-align:center" | ||
! scope="row" | [https://www.returnofreckoning.com/armory/item/ | ! scope="row" |[https://www.returnofreckoning.com/armory/item/2729 {{#tip-img: /images/b/bf/Rare_Fortune_Tramplers.png| Rare Fortune Tramplers}}] | ||
| | |37||380||13||/||14||24||/||+ 2% Dodge | ||
|- style="text-align:center" | |- style="text-align:center" | ||
! scope="row" | [https://www.returnofreckoning.com/armory/item/ | ! scope="row" |[https://www.returnofreckoning.com/armory/item/2717 {{#tip-img: /images/9/93/Rare_Fortune_Pummelers.png| Rare Fortune Pummelers}}] | ||
| | |37||380||/||19||12||21||6||/ | ||
|- style="text-align:center" | |- style="text-align:center" | ||
! scope="row" | [https://www.returnofreckoning.com/armory/item/ | ! scope="row" |[https://www.returnofreckoning.com/armory/item/2693 {{#tip-img: /images/0/0d/Rare_Fortune_Hardmantle.png| Rare Fortune Hardmantle}}] | ||
| | |39||430||20||17||/||22||/||+ 1% Reduction in being Critically Hit | ||
|- style="text-align:center" | |- style="text-align:center" | ||
! scope="row" | [https://www.returnofreckoning.com/armory/item/ | ! scope="row" |[https://www.returnofreckoning.com/armory/item/2705 {{#tip-img: /images/6/63/Rare_Fortune_Direhelm.png| Rare Fortune Direhelm}}] | ||
| | |38||430||17||/||18||20||/||+ 2% Disrupt | ||
|- style="text-align:center" | |- style="text-align:center" | ||
! scope="row" | [https://www.returnofreckoning.com/armory/item/ | ! scope="row" |[https://www.returnofreckoning.com/armory/item/2681 {{#tip-img: /images/0/05/Rare_Fortune_Chestplate.png| Rare Fortune Chestplate}}] | ||
| | |39||480||/||27||/||22||12||+ 3 AP Per Second | ||
|- style="text-align: center; font-weight:bold; vertical-align:top" | |- style="text-align: center; font-weight:bold; vertical-align:top" | ||
! scope="row" | Total | ! scope="row" |Total | ||
! | !39||2100||50||63||44||109||18||/ | ||
|- | |- | ||
! scope="row" | 2 Piece | ! scope="row" |2 Piece | ||
| colspan=" | | colspan="8" | + 54 Initiative | ||
|- | |- | ||
! scope="row" | 3 Piece | ! scope="row" |3 Piece | ||
| colspan=" | | colspan="8" | + 59 Strength | ||
|- | |- | ||
! scope="row" | 4 Piece | ! scope="row" |4 Piece | ||
| colspan=" | | colspan="8" |Creeping - On Being Hit: 10% chance to reduce attacker's movement speed by 40% for 5 seconds | ||
|- | |- | ||
! scope="row" | 5 Piece | ! scope="row" |5 Piece | ||
| colspan=" | | colspan="8" | + 5% Reduced chance to be Parried | ||
|} | |} | ||
=== | == PvE Accessories== | ||
=== [[The Sundered Rings|The Sundered Rings Set]] === | |||
{| class="wikitable" | {| class="wikitable" | ||
|- | |- | ||
! scope="col" | | ! scope="col" | | ||
! scope="col" |Rank | ! scope="col" | Rank | ||
! scope="col" | Wounds | |||
! scope="col" | Initiative | |||
! scope="col" | Toughness | |||
! scope="col" |Wounds | ! scope="col" | Weapon Skill | ||
! scope="col" |Initiative | ! scope="col" | Sp. Resist | ||
! scope="col" | | ! scope="col" | El. Resist | ||
! scope="col" | | ! scope="col" | Co. Resist | ||
! scope="col" |Sp. Resist | |||
! scope="col" |El. Resist | |||
! scope="col" |Co. Resist | |||
|- style="text-align:center" | |- style="text-align:center" | ||
! scope="row" |[https://www.returnofreckoning.com/armory/item/ | ! scope="row" | [https://www.returnofreckoning.com/armory/item/640100 {{#tip-img: /images/c/c8/Cytheril.png | Cytheril}}] | ||
| | | 35 ||/||17||17 | ||
|/||61||74||51 | |||
|- style="text-align:center" | |- style="text-align:center" | ||
! scope="row" |[https://www.returnofreckoning.com/armory/item/ | ! scope="row" | [https://www.returnofreckoning.com/armory/item/640101 {{#tip-img: /images/1/1f/Foserain.png | Foserain}}] | ||
| | | 35 ||14||/||/ | ||
|17||51||65||74 | |||
|- style="text-align: center; font-weight:bold; vertical-align:top" | |- style="text-align: center; font-weight:bold; vertical-align:top" | ||
! scope="row" |Total | ! scope="row" | Total | ||
! | ! 35||14||17||17 | ||
!17||112||139||125 | |||
|- | |- | ||
! scope="row" |2 Piece | ! scope="row" | 2 Piece | ||
| colspan=" | | colspan="8" | + 25 Wounds | ||
|} | |} | ||
=== | === [[The Divided|The Divided Set]] === | ||
{| class="wikitable" | {| class="wikitable" | ||
|- | |- | ||
! scope="col" | | ! scope="col" | | ||
! scope="col" | Rank | ! scope="col" | Rank | ||
! scope="col" | Wounds | ! scope="col" | Wounds | ||
! scope="col" | Initiative | ! scope="col" | Initiative | ||
! scope="col" | | ! scope="col" | Toughness | ||
! scope="col" | Weapon Skill | |||
! scope="col" | | |||
! scope="col" | Sp. Resist | ! scope="col" | Sp. Resist | ||
! scope="col" | El. Resist | ! scope="col" | El. Resist | ||
! scope="col" | Co. Resist | ! scope="col" | Co. Resist | ||
|- style="text-align:center" | |- style="text-align:center" | ||
! scope="row" | [https://www.returnofreckoning.com/armory/item/ | ! scope="row" | [https://www.returnofreckoning.com/armory/item/640102 {{#tip-img: /images/c/cd/The_Seeping_Lava.png | The Seeping Larva}}] | ||
| | | 35 ||/||15||15 | ||
| | |/||67||77||79 | ||
|/|| | |- style="text-align:center" | ||
|/||/|| | ! scope="row" | [https://www.returnofreckoning.com/armory/item/640103 {{#tip-img: /images/5/54/Writhing_Shackles.png | Writhing Shackles}}] | ||
| 35 ||15||/||/ | |||
|15||77||79||67 | |||
|- style="text-align:center" | |- style="text-align:center" | ||
! scope="row" | [https://www.returnofreckoning.com/armory/item/ | ! scope="row" | [https://www.returnofreckoning.com/armory/item/640104 {{#tip-img: /images/1/19/Fated_Veil.png | Fated Veil}}] | ||
| | | 35 ||/||15||15 | ||
|/||79||67||77 | |||
| | |||
|/|| | |||
|- style="text-align:center" | |- style="text-align:center" | ||
! scope="row" | [https://www.returnofreckoning.com/armory/item/ | ! scope="row" | [https://www.returnofreckoning.com/armory/item/640105 {{#tip-img: /images/5/5a/Bloodfied_Fracture.png | Bloodied Fracture}}] | ||
| | | 35 ||15||/||/ | ||
| | |15||76||72||72 | ||
| | |- style="text-align: center; font-weight:bold; vertical-align:top" | ||
| + | ! scope="row" | Total | ||
|- style="text-align:center" | ! 35||30||30||30 | ||
! scope="row" | [https://www.returnofreckoning.com/armory/item/ | !30||299||295||302 | ||
| | |- | ||
| | ! scope="row" | 2 Piece | ||
| | | colspan="8" | + 3% Dodge | ||
|- | |||
! scope="row" | 3 Piece | |||
| colspan="8" | + 3% Disrupt | |||
|- | |||
! scope="row" | 4 Piece | |||
| colspan="8" | Clarity - Any Ability : 10% chance to reduce the cost of the next ability used within 10 seconds to 0 Action Points | |||
|} | |||
=== [[Fortune’s Baubles|The Fortune’s Baubles Set]] === | |||
{| class="wikitable" | |||
|- | |||
! scope="col" | | |||
! scope="col" | Rank | |||
! scope="col" | Wounds | |||
! scope="col" | Initiative | |||
! scope="col" | Toughness | |||
! scope="col" | Weapon Skill | |||
! scope="col" | Bonus #1 | |||
! scope="col" | Sp. Resist | |||
! scope="col" | El. Resist | |||
! scope="col" | Co. Resist | |||
|- style="text-align:center" | |||
! scope="row" | [https://www.returnofreckoning.com/armory/item/640106 {{#tip-img: /images/4/42/Hapless.png | Hapless Ha'penny}}] | |||
| 35 ||/||8||17 | |||
|/||+ 2% Parry||46||57||46 | |||
|- style="text-align:center" | |||
! scope="row" | [https://www.returnofreckoning.com/armory/item/640107 {{#tip-img: /images/7/70/Gorkamork.png | Gorkamork}}] | |||
| 35 ||17||/||/ | |||
|8||+ 2% Dodge||46||46||57 | |||
|- style="text-align:center" | |- style="text-align:center" | ||
! scope="row" | [https://www.returnofreckoning.com/armory/item/ | ! scope="row" | [https://www.returnofreckoning.com/armory/item/640108 {{#tip-img: /images/1/1f/Wind_of_Change.png | Wind of Change}}] | ||
| | | 35 ||/||17||8 | ||
|/||+ 2% Disrupt||57||46||46 | |||
|/||+ 2% | |||
| | |||
|- style="text-align:center" | |- style="text-align:center" | ||
! scope="row" | [https://www.returnofreckoning.com/armory/item/ | ! scope="row" | [https://www.returnofreckoning.com/armory/item/640109 {{#tip-img: /images/0/0a/FLF.png | Fullbelly's Lucky Foot}}] | ||
| | | 35 ||8||/||/ | ||
|/|| | |17||+ 2% Reduced Armor Penetration||50||50||50 | ||
| | |||
| | |||
|- style="text-align: center; font-weight:bold; vertical-align:top" | |- style="text-align: center; font-weight:bold; vertical-align:top" | ||
! scope="row" | Total | ! scope="row" | Total | ||
! | ! 35||25||25||25 | ||
!25||/||199||199||199 | |||
! | |- | ||
|- | |||
! scope="row" | 2 Piece | ! scope="row" | 2 Piece | ||
| colspan=" | | colspan="9" | + 2 Morale per Second | ||
|- | |- | ||
! scope="row" | 3 Piece | ! scope="row" | 3 Piece | ||
| colspan=" | | colspan="9" | + 2 AP per Second | ||
|- | |- | ||
! scope="row" | 4 Piece | ! scope="row" | 4 Piece | ||
| colspan=" | | colspan="9" | + 52 HP every 4 seconds | ||
|} | |} | ||
=== | === [[The Winds Impervious | The Winds Impervious Set]] === | ||
{| class="wikitable" | {| class="wikitable" | ||
|- | |- | ||
! scope="col" | | ! scope="col" | | ||
! scope="col" | Rank/Renown | ! scope="col" | Rank/Renown | ||
! scope="col" | Wounds | ! scope="col" | Wounds | ||
! scope="col" | Initiative | ! scope="col" | Initiative | ||
! scope="col" | | ! scope="col" | Toughness | ||
! scope="col" | Weapon Skill | |||
! scope="col" | | |||
! scope="col" | Sp. Resist | ! scope="col" | Sp. Resist | ||
! scope="col" | El. Resist | ! scope="col" | El. Resist | ||
! scope="col" | Co. Resist | ! scope="col" | Co. Resist | ||
|- style="text-align:center" | |- style="text-align:center" | ||
! scope="row" | [https://www.returnofreckoning.com/armory/item/ | ! scope="row" | [https://www.returnofreckoning.com/armory/item/640110 {{#tip-img: /images/3/35/Crow_Caller_Chain_2.png | Crow Caller Chain}}] | ||
| | | 35 ||/||/||4 | ||
| | |12||104||89||178 | ||
|- style="text-align:center" | |- style="text-align:center" | ||
! scope="row" | [https://www.returnofreckoning.com/armory/item/ | ! scope="row" | [https://www.returnofreckoning.com/armory/item/640111 {{#tip-img: /images/d/df/The_Obdurate_Seal_2.png | The Obdurate Seal}}] | ||
| | | 35||12||/||4 | ||
| | |/||89||178||104 | ||
| | |||
|- style="text-align:center" | |- style="text-align:center" | ||
! scope="row" | [https://www.returnofreckoning.com/armory/item/ | ! scope="row" | [https://www.returnofreckoning.com/armory/item/640112 {{#tip-img: /images/1/1c/Worbreaker_Band_2.png | Wordbreaker Band}}] | ||
| | | 35 ||/||12||4 | ||
|/||178||104||89 | |||
| | |||
|- style="text-align: center; font-weight:bold; vertical-align:top" | |- style="text-align: center; font-weight:bold; vertical-align:top" | ||
! scope="row" | Total | ! scope="row" | Total | ||
! | ! 35||12||12||12 | ||
! | !12||371||371||371 | ||
|- | |- | ||
! scope="row" | 2 Piece | ! scope="row" | 2 Piece | ||
| colspan=" | | colspan="8" | + 25 Initiative | ||
|- | |- | ||
! scope="row" | 3 Piece | ! scope="row" | 3 Piece | ||
| colspan=" | | colspan="8" | + 210 Armor Bonus | ||
|} | |} | ||
=== | === [[The Great Oathstones|The Great Oathstones Set]] === | ||
{| class="wikitable" | {| class="wikitable" | ||
|- | |- | ||
! scope="col" | | ! scope="col" | | ||
! scope="col" | Rank | ! scope="col" | Rank | ||
! scope="col" | | ! scope="col" | Wounds | ||
! scope="col" | Initiative | |||
! scope="col" | Toughness | ! scope="col" | Toughness | ||
! scope="col" | Weapon Skill | |||
! scope="col" | Bonus #1 | |||
! scope="col" | Sp. Resist | |||
! scope="col" | El. Resist | |||
! scope="col" | Co. Resist | |||
|- style="text-align:center" | |||
! scope="row" | [https://www.returnofreckoning.com/armory/item/640113 {{#tip-img: /images/1/1e/Oathstone_of_Karaz-a-Karak.png | Oathstone of Karaz-a-Karak}}] | |||
| 35 ||/||/||4 | |||
|17||+ 2% Dodge||47||41||61 | |||
|- style="text-align:center" | |||
! scope="row" | [https://www.returnofreckoning.com/armory/item/640114 {{#tip-img: /images/3/3c/Oathstone_of_Karak_Eight_Peaks.png | Oathstone of Karak Eight Peaks}}] | |||
| 35||4||17||/ | |||
|/||+ 2% Dodge||41||61||47 | |||
|- style="text-align: center; font-weight:bold; vertical-align:top" | |||
! scope="row" | Total | |||
! 35||4||17||4 | |||
!17||/||88||102||108 | |||
|- | |||
! scope="row" | 2 Piece | |||
| colspan="9" | + 15% Auto Attack Haste | |||
|} | |||
=== [[The Broken Covenant|The Broken Covenant Set]] === | |||
{| class="wikitable" | |||
|- | |||
! scope="col" | | |||
! scope="col" | Rank | |||
! scope="col" | Wounds | ! scope="col" | Wounds | ||
! scope="col" | Initiative | ! scope="col" | Initiative | ||
! scope="col" | | ! scope="col" | Toughness | ||
!Weapon Skill | ! scope="col" | Weapon Skill | ||
! scope="col" | Bonus #1 | ! scope="col" | Bonus #1 | ||
! scope="col" | Sp. Resist | ! scope="col" | Sp. Resist | ||
! scope="col" | El. Resist | ! scope="col" | El. Resist | ||
! scope="col" | Co. Resist | ! scope="col" | Co. Resist | ||
|- style="text-align:center" | |- style="text-align:center" | ||
! scope="row" | [https://www.returnofreckoning.com/armory/item/ | ! scope="row" | [https://www.returnofreckoning.com/armory/item/640115 {{#tip-img: /images/f/fa/The_Ascendant_Verses.png | The Ascendant Verses}}] | ||
| | | 35 ||/||/||17 | ||
| | |4||+ 2% Disrupt||61||48||40 | ||
| | |||
|- style="text-align:center" | |- style="text-align:center" | ||
! scope="row" | [https://www.returnofreckoning.com/armory/item/ | ! scope="row" | [https://www.returnofreckoning.com/armory/item/640116 {{#tip-img: /images/6/6f/The_Deep_Oaths.png | The Deep Oaths}}] | ||
| | | 35||17||4||/ | ||
|/||+ 2% Disrupt||61||40||48 | |||
| | |||
|/||+ 2% | |||
| 40 | |||
|- style="text-align: center; font-weight:bold; vertical-align:top" | |- style="text-align: center; font-weight:bold; vertical-align:top" | ||
! scope="row" | Total | ! scope="row" | Total | ||
! | ! 35||17||4||17 | ||
! | !4||/||122||88||88 | ||
|- | |- | ||
! scope="row" | 2 Piece | ! scope="row" | 2 Piece | ||
| colspan=" | | colspan="9" | + 3 AP per Second | ||
|} | |} | ||
== | ===[[Da Waaagh! Teef|Da Waaagh! Teef Set]] === | ||
{| class="wikitable" | {| class="wikitable" | ||
|- | |- | ||
! scope="col" | | ! scope="col" | | ||
! scope="col" | Rank | ! scope="col" | Rank | ||
! scope="col" | Wounds | ! scope="col" | Wounds | ||
! scope="col" | Initiative | ! scope="col" | Initiative | ||
! scope="col" | | ! scope="col" | Toughness | ||
! scope="col" | Weapon Skill | ! scope="col" | Weapon Skill | ||
! scope="col" | | ! scope="col" | Sp. Resist | ||
! scope="col" | El. Resist | |||
! scope=" | ! scope="col" | Co. Resist | ||
|- style="text-align:center" | |- style="text-align:center" | ||
! scope="row" | [https://www.returnofreckoning.com/armory/item/ | ! scope="row" | [https://www.returnofreckoning.com/armory/item/640117 {{#tip-img: /images/e/e9/Black_Toof.png | Black Toof}}] | ||
| 35 || | | 35 ||17||17||/ | ||
|/||44||64||78 | |||
|- style="text-align:center" | |- style="text-align:center" | ||
! scope="row" | [https://www.returnofreckoning.com/armory/item/ | ! scope="row" | [https://www.returnofreckoning.com/armory/item/640118 {{#tip-img: /images/f/f4/One_Tusk.png | One Tusk}}] | ||
| 35 || | | 35||/||/||17 | ||
|17||93||33||60 | |||
|- style="text-align:center" | |- style="text-align:center" | ||
! scope="row" | [https://www.returnofreckoning.com/armory/item/ | ! scope="row" | [https://www.returnofreckoning.com/armory/item/640119 {{#tip-img: /images/d/d0/Broke_Toof_2.png | Broke Toof}}] | ||
| | | 35 ||/||17||17 | ||
|/||33||89||64 | |||
|- style="text-align:center" | |- style="text-align:center" | ||
! scope="row" | [https://www.returnofreckoning.com/armory/item/ | ! scope="row" | [https://www.returnofreckoning.com/armory/item/640120 {{#tip-img: /images/3/37/Moon_Fang.png | Moon Fang}}] | ||
| | | 35 ||17||/||/ | ||
|17||65||57||65 | |||
|- style="text-align: center; font-weight:bold; vertical-align:top" | |- style="text-align: center; font-weight:bold; vertical-align:top" | ||
! scope="row" | Total | ! scope="row" | Total||35||34||34||34 | ||
!34||235||243||267 | |||
|- | |- | ||
! scope="row" | 2 Piece | ! scope="row" | 2 Piece | ||
| colspan=" | | colspan="8" | + 2% Reduction in being Critically Hit | ||
|- | |- | ||
! scope="row" | 3 Piece | ! scope="row" | 3 Piece | ||
| colspan=" | | colspan="8" | + 2% Reduced Armor Penetration | ||
|- | |- | ||
! scope="row" | 4 Piece | ! scope="row" | 4 Piece | ||
| colspan=" | | colspan="8" | + 20 Additional AP Pool | ||
|} | |} | ||
=== | === [[The Blood-soaked Sigils|The Blood-soaked Sigils Set]] === | ||
{| class="wikitable" | {| class="wikitable" | ||
|- | |- | ||
! scope="col" | | ! scope="col" | | ||
! scope="col" |Rank | ! scope="col" | Rank | ||
! scope="col" | | ! scope="col" | Wounds | ||
! scope="col" |Toughness | ! scope="col" | Initiative | ||
! scope="col" | | ! scope="col" | Toughness | ||
! scope="col" | | ! scope="col" | Weapon Skill | ||
! scope="col" | | ! scope="col" | Bonus #1 | ||
! scope="col" | | ! scope="col" | Sp. Resist | ||
! scope="col" | | ! scope="col" | El. Resist | ||
! scope="col" | Co. Resist | |||
|- style="text-align:center" | |- style="text-align:center" | ||
! scope="row" |[https://www.returnofreckoning.com/armory/item/ | ! scope="row" | [https://www.returnofreckoning.com/armory/item/640121 {{#tip-img: /images/f/f8/Strife.png | Strife}}] | ||
| | | 35 ||10||/||12 | ||
|/||+ 2% Parry||23||98||28 | |||
|- style="text-align:center" | |- style="text-align:center" | ||
! scope="row" |[https://www.returnofreckoning.com/armory/item/ | ! scope="row" | [https://www.returnofreckoning.com/armory/item/640122 {{#tip-img: /images/8/8f/Tourment.png | Torment}}] | ||
| | | 35 ||/||12||/ | ||
|10||+ 2% Parry||98||28||23 | |||
|- style="text-align: center; font-weight:bold; vertical-align:top" | |- style="text-align: center; font-weight:bold; vertical-align:top" | ||
! scope="row" |Total | ! scope="row" | Total | ||
! | ! 35||10||12||12 | ||
!10||/||121||121||51 | |||
|- | |- | ||
! scope="row" |2 Piece | ! scope="row" | 2 Piece | ||
| colspan=" | | colspan="9" | + 2% Reduced Chance to be Parried | ||
|} | |} | ||
== | ==Instance== | ||
=== | ===Redeye Set=== | ||
[[File:RedeyeMarauder.png|left|top|300x300px|link=]] | |||
| | |||
| | |||
| | |||
{| class="wikitable" | {| class="wikitable" | ||
|- | |- | ||
! scope="col" | | ! scope="col" | | ||
! scope="col" | Rank | ! scope="col" |Rank | ||
! scope="col" | | ! scope="col" |Armor | ||
! scope="col" | | ! scope="col" |Toughness | ||
! scope="col" | | ! scope="col" |Wounds | ||
! scope="col" | | ! scope="col" |Initiative | ||
! scope="col" | Strength | ! scope="col" |Strength | ||
! scope="col" | Weapon Skill | ! scope="col" |Weapon Skill | ||
! scope="col" | Bonus #1 | ! scope="col" |Bonus #1 | ||
! scope="col" | Sp. Resist | ! scope="col" |Sp. Resist | ||
! scope="col" | El. Resist | ! scope="col" |El. Resist | ||
! scope="col" | Co. Resist | ! scope="col" |Co. Resist | ||
|- style="text-align:center" | |- style="text-align:center" | ||
! scope="row" | [https://www.returnofreckoning.com/armory/item/ | ! scope="row" |[https://www.returnofreckoning.com/armory/item/2017283 {{#tip-img: /images/4/43/Redeye_Shroud.png | Redeye Cloak}}] | ||
|40||/||/|| | |40||/||/||21||/||21||17||/||91||76||73 | ||
|- style="text-align:center" | |- style="text-align:center" | ||
! scope="row" | [https://www.returnofreckoning.com/armory/item/ | ! scope="row" |[https://www.returnofreckoning.com/armory/item/2017281 {{#tip-img: /images/7/79/Redeye_Tramplers.png | Redeye Tramplers}}] | ||
|40|| | |40||380||16||/||/||15||17||+ 1% Reduction in being Critically Hit||/||/||/ | ||
|- style="text-align:center" | |- style="text-align:center" | ||
! scope="row" | [https://www.returnofreckoning.com/armory/item/ | ! scope="row" |[https://www.returnofreckoning.com/armory/item/2017280{{#tip-img: /images/3/3d/Redeye_Pummelers.png | Redeye Pummelers}}] | ||
|40|| | |40||380||/||13||12||21||12||/||/||/||/ | ||
|- style="text-align:center" | |- style="text-align:center" | ||
! scope="row" | [https://www.returnofreckoning.com/armory/item/ | ! scope="row" |[https://www.returnofreckoning.com/armory/item/2017279 {{#tip-img: /images/3/36/Redeye_Hardmantle.png | Redeye Hardmantle}}] | ||
|40|| | |40||430||/||/||20||23||13||+ 2% Reduced Armor Penetration||/||/||/ | ||
|- style="text-align:center" | |- style="text-align:center" | ||
! scope="row" | [https://www.returnofreckoning.com/armory/item/ | ! scope="row" |[https://www.returnofreckoning.com/armory/item/2017282 {{#tip-img: /images/7/72/Redeye_Direhelm.png | Redeye Direhelm}}] | ||
|40|| | |40||430||14||13||/||22||27||/||/||/||/ | ||
|- style="text-align:center" | |- style="text-align:center" | ||
! scope="row" | [https://www.returnofreckoning.com/armory/item/ | ! scope="row" |[https://www.returnofreckoning.com/armory/item/2017278{{#tip-img: /images/c/ca/Redeye_Chestplate.png | Redeye Chestplate}}] | ||
|40|| | |40||480||17||/||/||27||17||+ 3 AP Per Second||/||/||/ | ||
|- style="text-align: center; font-weight:bold; vertical-align:top" | |- style="text-align: center; font-weight:bold; vertical-align:top" | ||
! scope="row" | Total | ! scope="row" |Total | ||
!40|| | !40||2100||47||47||32||129||103||/||91||76||73 | ||
|- | |||
! scope="row" |2 Piece | |||
| colspan="11" | + 3% Reduction in being Critically Hit | |||
|- | |- | ||
! scope="row" | 3 Piece | ! scope="row" |3 Piece | ||
| colspan="11" | + | | colspan="11" | + 59 Strength | ||
|- | |- | ||
! scope="row" | 4 Piece | ! scope="row" |4 Piece | ||
| colspan="11" | + | | colspan="11" | + 64 Weaponskill | ||
|- | |- | ||
! scope="row" | 5 Piece | ! scope="row" |5 Piece | ||
| colspan="11" | + | | colspan="11" | + 25% Auto Attack Speed | ||
|- | |- | ||
! scope="row" | 6 Piece | ! scope="row" |6 Piece | ||
| colspan=" | | colspan="11" | + 5% Parry | ||
|} | |} | ||
=== Sentinel Set === | |||
[[File:SentinelMarauder.png|left|top|300x300px|link=]] | |||
=== | |||
{| class="wikitable" | {| class="wikitable" | ||
|- | |- | ||
! scope="col" | | ! scope="col" | | ||
! scope="col" |Rank | ! scope="col" | Rank | ||
! scope="col" |Armor | ! scope="col" | Armor | ||
! scope="col" |Toughness | ! scope="col" | Toughness | ||
! scope="col" |Wounds | ! scope="col" | Wounds | ||
! scope="col" |Initiative | ! scope="col" | Initiative | ||
! scope="col" |Strength | ! scope="col" | Strength | ||
! scope="col" |Weapon Skill | ! scope="col" | Weapon Skill | ||
! scope="col" |Bonus #1 | ! scope="col" | Bonus #1 | ||
! scope="col" | Sp. Resist | |||
! scope="col" | El. Resist | |||
! scope="col" | Co. Resist | |||
|- style="text-align:center" | |- style="text-align:center" | ||
! scope="row" |[https://www.returnofreckoning.com/armory/item/ | ! scope="row" | [https://www.returnofreckoning.com/armory/item/434725 {{#tip-img: /images/e/ea/Sentinel_Tramplers.png | Sentinel Tramplers}}] | ||
| | |40||406||/||15||/||27 | ||
|8||+ 2% Parry||/||/||/ | |||
|- style="text-align:center" | |- style="text-align:center" | ||
! scope="row" |[https://www.returnofreckoning.com/armory/item/ | ! scope="row" | [https://www.returnofreckoning.com/armory/item/434737 {{#tip-img: /images/2/20/Sentinel_Pummelers.png | Sentinel Pummelers}}] | ||
| | |40||406||/||/||10||15 | ||
|23 | |||
| + 21 Melee Power||/||/||/ | |||
|- style="text-align:center" | |- style="text-align:center" | ||
! scope="row" |[https://www.returnofreckoning.com/armory/item/ | ! scope="row" | [https://www.returnofreckoning.com/armory/item/434749 {{#tip-img: /images/5/5b/Sentinel_Midstrap.png | Sentinel Midstrap}}] | ||
| | |40||/||24||9||/||18 | ||
|12||/ | |||
|80||90||95 | |||
|- style="text-align:center" | |||
! scope="row" | [https://www.returnofreckoning.com/armory/item/434761{{#tip-img: /images/e/ee/Sentinel_Hardmantle.png | Sentinel Hardmantle}}] | |||
|40||462||12||/||/||17 | |||
|30||+ 2% Reduced chance to be Parried||/||/||/ | |||
|- style="text-align:center" | |||
! scope="row" | [https://www.returnofreckoning.com/armory/item/434773 {{#tip-img: /images/0/06/Sentinel_Direhelm.png | Sentinel Direhelm}}] | |||
|40||462||/||10||16||27 | |||
|/||+ 2% Melee Critial Chance||/||/||/ | |||
|- style="text-align:center" | |- style="text-align:center" | ||
! scope="row" |[https://www.returnofreckoning.com/armory/item/ | ! scope="row" | [https://www.returnofreckoning.com/armory/item/434785 {{#tip-img: /images/e/e5/Sentinel_Chestplate.png | Sentinel Chestplate}}] | ||
| | |40||518||17||19||/||35 | ||
|/||+ 60 HP Every 4 Seconds | |||
|/||/||/ | |||
|- style="text-align:center" | |- style="text-align:center" | ||
! scope="row" |[https://www.returnofreckoning.com/armory/item/ | ! scope="row" | [https://www.returnofreckoning.com/armory/item/499913 {{#tip-img: /images/f/f1/Sentinel_Rend_Ring.png | Sentinel Rend Ring}}] | ||
| | |40||/||/||/||/||27 | ||
|17||+ 3 AP Per Second||70||70||71 | |||
|- style="text-align: center; font-weight:bold; vertical-align:top" | |- style="text-align: center; font-weight:bold; vertical-align:top" | ||
! scope="row" |Total | ! scope="row" | Total | ||
! | ! 40||2254||53||53||26||166 | ||
!90||/||150||160||166 | |||
|- | |||
! scope="row" | 2 Piece | |||
| colspan="11" | + 58 Strength | |||
|- | |||
! scope="row" | 3 Piece | |||
| colspan="11" | + 64 Wounds | |||
|- | |- | ||
! scope="row" | | ! scope="row" | 4 Piece | ||
| colspan=" | | colspan="11" | + 70 Initiative | ||
|- | |- | ||
! scope="row" | | ! scope="row" | 5 Piece | ||
| colspan=" | | colspan="11" | Arise - On Attacking Target or Being Hit: 10% chance to resist Stuns and Knockdowns by 33% for 15 Seconds | ||
|- | |- | ||
! scope="row" | | ! scope="row" | 6 Piece | ||
| colspan=" | | colspan="11" | + 5% Melee Critial Chance | ||
|- | |- | ||
! | !7 Piece | ||
| colspan=" | | colspan="11" |Fully Mutated - Cooldown of Mutating Release reduced by 20 seconds | ||
|} | |} | ||
== | === Bloodlord Set === | ||
[[File:BloodlordMarauder.png|left|top|300x300px|link=]] | |||
{| class="wikitable" | {| class="wikitable" | ||
|- | |- | ||
! scope="col" | | ! scope="col" | | ||
! scope="col" |Rank | ! scope="col" | Rank | ||
! scope="col" |Armor | ! scope="col" | Armor | ||
! scope="col" |Toughness | ! scope="col" | Toughness | ||
! scope="col" |Wounds | ! scope="col" | Wounds | ||
! scope="col" |Initiative | ! scope="col" | Initiative | ||
! scope="col" |Strength | ! scope="col" | Strength | ||
! | !Weapon Skill | ||
! scope="col" |Bonus #1 | ! scope="col" | Bonus #1 | ||
! scope="col" |Sp. Resist | !Bonus #2 | ||
! scope="col" |El. Resist | ! scope="col" | Sp. Resist | ||
! scope="col" |Co. Resist | ! scope="col" | El. Resist | ||
! scope="col" | Co. Resist | |||
|- style="text-align:center" | |- style="text-align:center" | ||
! scope="row" |[https://www.returnofreckoning.com/armory/item/ | ! scope="row" | [https://www.returnofreckoning.com/armory/item/10593 {{#tip-img: /images/0/0c/Bloodlord_Tramplers.png | Bloodlord Tramplers}}] | ||
|40|| | |40||442||/||10||18||27 | ||
|/||+ 2% Dodge | |||
|/||/||/||/ | |||
|- style="text-align:center" | |- style="text-align:center" | ||
! scope="row" |[https://www.returnofreckoning.com/armory/item/ | ! scope="row" | [https://www.returnofreckoning.com/armory/item/10592 {{#tip-img: /images/a/a1/Bloodlord_Pummelers.png | Bloodlord Pummelers}}] | ||
|40|| | |40||442||/||10||15||26 | ||
|16 | |||
|/ | |||
|/||/||/||/ | |||
|- style="text-align:center" | |- style="text-align:center" | ||
! scope="row" |[https://www.returnofreckoning.com/armory/item/ | ! scope="row" | [https://www.returnofreckoning.com/armory/item/10596 {{#tip-img: /images/3/3e/Bloodlord_Midstrap.png | Bloodlord Midstrap}}] | ||
|40|| | |40||/||/||12||16||22 | ||
|/||+ 2% Parry | |||
| + 1% Dodge | |||
|91||91||91 | |||
|- style="text-align:center" | |- style="text-align:center" | ||
! scope="row" |[https://www.returnofreckoning.com/armory/item/ | ! scope="row" | [https://www.returnofreckoning.com/armory/item/10595 {{#tip-img: /images/a/a8/Bloodlord_Hardmantle.png | Bloodlord Hardmantle}}] | ||
|40|| | |40||514||/||21||10||27 | ||
|/||+ 2% Melee Critial Chance | |||
|/||/||/||/ | |||
|- style="text-align:center" | |- style="text-align:center" | ||
! scope="row" |[https://www.returnofreckoning.com/armory/item/ | ! scope="row" | [https://www.returnofreckoning.com/armory/item/10594 {{#tip-img: /images/1/17/Bloodlord_Direhelm.png | Bloodlord Direhelm}}] | ||
|40|| | |40||514||19||18||/||29 | ||
|/||+ 2% Armor Penetration | |||
|/||/||/||/ | |||
|- style="text-align:center" | |- style="text-align:center" | ||
! scope="row" |[https://www.returnofreckoning.com/armory/item/ | ! scope="row" | [https://www.returnofreckoning.com/armory/item/10591 {{#tip-img: /images/8/86/Bloodlord_Chestplate.png | Bloodlord Chestplate}}] | ||
|40|| | |40||584||/||16||12||30 | ||
|- style="text-align: center; font-weight:bold; vertical-align:top" | |20||+ 2 AP Per Second | ||
! scope="row" |Total | |/ | ||
!40|| | |/||/||/ | ||
|- style="text-align:center" | |||
! scope="row" | [https://www.returnofreckoning.com/armory/item/10681 {{#tip-img: /images/d/df/Bloodlord_Shroud.png | Bloodlord Shroud}}] | |||
|40||/||/||12||16||24 | |||
|/||+ 24 Melee Power | |||
|/||91||91||91 | |||
|- style="text-align: center; font-weight:bold; vertical-align:top" | |||
! scope="row" | Total | |||
! 40||2496||19||99||87||185 | |||
!36||/ | |||
!||182||182||182 | |||
|- | |- | ||
! scope="row" |2 Piece | ! scope="row" | 2 Piece | ||
| colspan=" | | colspan="12" | + 66 Wounds | ||
|- | |- | ||
! scope="row" |3 Piece | ! scope="row" | 3 Piece | ||
| colspan=" | | colspan="12" | + 73 Initiative | ||
|- | |- | ||
! scope="row" |4 Piece | ! scope="row" | 4 Piece | ||
| colspan=" | | colspan="12" | Boost II - On Hit: 5% chance to increase your critical hit rate by 6% for 9 seconds. | ||
|- | |- | ||
! scope="row" |5 Piece | ! scope="row" | 5 Piece | ||
| colspan=" | | colspan="12" | + 5% Melee Critial Chance | ||
|- | |||
! scope="row" | 6 Piece | |||
| colspan="12" | Preservation - On Being Hit : 10% chance to increase Wounds by 100 for 20 seconds | |||
|- | |- | ||
! | !7 Piece | ||
| colspan=" | | colspan="12" |Overwhelming - On Hit: 25% chance to reduce target's Weapon Skill by 80 while increasing your Strength by 80 for 10 seconds | ||
|} | |} | ||
=== Vale Walker Set === | |||
=== | [[File:ValeWalkerMarauder.png|left|top|300x300px|link=]] | ||
{| class="wikitable" | {| class="wikitable" | ||
|- | |- | ||
| Line 1,872: | Line 1,940: | ||
! scope="col" | Initiative | ! scope="col" | Initiative | ||
! scope="col" | Strength | ! scope="col" | Strength | ||
! | !Weapon Skill | ||
! scope="col" | Bonus #1 | ! scope="col" | Bonus #1 | ||
!Bonus #2 | |||
! scope="col" | Sp. Resist | ! scope="col" | Sp. Resist | ||
! scope="col" | El. Resist | ! scope="col" | El. Resist | ||
! scope="col" | Co. Resist | ! scope="col" | Co. Resist | ||
|- style="text-align:center" | |- style="text-align:center" | ||
! scope="row" | | ! scope="row" | {{#tip-img: /images/6/66/Vale_Walker_Tramplers.png | Vale Walker Tramplers}} | ||
|40|| | |40||432||13||/||20||15 | ||
| | |/||3% Dodge | ||
|/||/||/||/ | |||
|- style="text-align:center" | |||
! scope="row" | {{#tip-img: /images/8/88/ValeWalkerPummelers.png | Vale Walker Pummelers}} | |||
|40||432||/||20||11||15 | |||
|/||+2% Melee Crit Chance | |||
|/||/||/||/ | |||
|- style="text-align:center" | |- style="text-align:center" | ||
! scope="row" | | ! scope="row" | {{#tip-img: /images/a/a3/ValewalkerMidstrap.png| Vale Walker Midstrap}} | ||
|40|| | |40||/||/||32||/||/ | ||
|23 | |23||+2% Reduced Armor Penetration | ||
| + | | N/A | ||
|90||90||90 | |||
|- style="text-align:center" | |- style="text-align:center" | ||
! scope="row" | | ! scope="row" | {{#tip-img: /images/4/49/ValeWalkerHardmantle.png | Vale Walker Hardmantle}} | ||
|40|| | |40||494||/||20||/||24 | ||
| | |/||+ 3% Parry | ||
| | |/||30||35||/ | ||
|- style="text-align:center" | |- style="text-align:center" | ||
! scope="row" | | ! scope="row" | {{#tip-img: /images/0/02/ValewalkerDirehelm.png| Vale Walker Direhelm}} | ||
|40||494||24||/||/||20 | |||
|/||+3% Disrupt | |||
|/||40||35||/ | |||
|40|| | |||
|/ | |||
|/||+ | |||
| | |||
|40|| | |||
|- style="text-align:center" | |- style="text-align:center" | ||
! scope="row" | | ! scope="row" | {{#tip-img: /images/2/2e/ValewalkerChestplate.png | Valewalker Chestplate}} | ||
|40|| | |40||556||/||35||/||19 | ||
| | |18||/ | ||
|/ | |/ | ||
|/|| | |/||35||35 | ||
|- style="text-align:center" | |- style="text-align:center" | ||
! scope="row" | | ! scope="row" | {{#tip-img: /images/c/c8/ValeWalkerSpikestrap.png | Vale Walker Spike Strap }} | ||
|40||/||/|| | |40||/||/||/||/||24 | ||
| | |21||+ 48 HP every 4 seconds | ||
| | ||+1% Reduction in being Critically Hit||66||80||80 | ||
|- style="text-align: center; font-weight:bold; vertical-align:top" | |- style="text-align: center; font-weight:bold; vertical-align:top" | ||
! scope="row" | Total | ! scope="row" | Total | ||
! 40|| | ! 40||2408||37||107||31||117 | ||
! | !62||/ | ||
!|| | !||226||275||205 | ||
|- | |- | ||
! scope="row" | 2 Piece | ! scope="row" | 2 Piece | ||
| colspan="12" | + | | colspan="12" | + 62 Wounds | ||
|- | |- | ||
! scope="row" | 3 Piece | ! scope="row" | 3 Piece | ||
| colspan="12" | + | | colspan="12" | + 69 Weaponskill | ||
|- | |- | ||
! scope="row" | 4 Piece | ! scope="row" | 4 Piece | ||
| colspan="12" | | | colspan="12" | 76 Strength | ||
|- | |- | ||
! scope="row" | 5 Piece | ! scope="row" | 5 Piece | ||
| colspan="12" | + 5% | | colspan="12" | + 5% Reduced Chance To Be Parried | ||
|- | |- | ||
! scope="row" | 6 Piece | ! scope="row" | 6 Piece | ||
| colspan="12" | | | colspan="12" | On Hit: 25% chance to reduce target's Weapon Skill by 118 while increasing your Strength by 118 for 10 seconds. | ||
|- | |- | ||
!7 Piece | !7 Piece | ||
| colspan="12" | | | colspan="12" |On Being Attacked: 10% Chance to Increase Parry, Block, Disrupt, Dodge by 7% for 10 seconds. | ||
|} | |} | ||
Latest revision as of 10:01, 23 April 2025
Tier 3 sets
RvR
Devastator Set
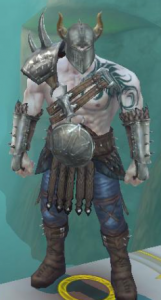
| Rank/Renown | Costs | Armor | Toughness | Wounds | Initiative | Strength | Weapon Skill | Bonus #1 | |
|---|---|---|---|---|---|---|---|---|---|
| Devastator Tramplers | 26/26 | 12 | 264 | 8 | 7 | / | 11 | 20 | / |
| Devastator Pummelers | 27/27 | 8 | 280 | / | / | 4 | 19 | 15 | + 1% Reduced Chance to be Parried |
| Devastator Hardmantle | 28/28 | 16 | 342 | / | 15 | / | 23 | 9 | + 2% Melee Critical Chance |
| Devastator Direhelm | 29/29 | 20 | 324 | / | 10 | 5 | 25 | 17 | / |
| Devastator Chestplate | 29/29 | 25 | 380 | 9 | / | 16 | 26 | / | + 40 HP Every 4 Seconds |
| Total | 29/29 | 81 | 1590 | 17 | 32 | 25 | 104 | 61 | / |
| 2 Piece | + 47 Strength | ||||||||
| 3 Piece | + 240 Corporeal Resistance | ||||||||
| 4 Piece | Corrosion - On Hit: 10% chance to lower target's Armor by 930 for 10 Seconds | ||||||||
| 5 Piece | + 4% Melee Critical Chance | ||||||||
Scenario
Duelist Set
| Rank/Renown | Costs | Armor | Toughness | Wounds | Initiative | Strength | Weapon Skill | Bonus #1 | |
|---|---|---|---|---|---|---|---|---|---|
| Tramplers of the Duelist | 26/26 | 20 | 264 | 8 | 7 | / | 11 | 20 | / |
| Pummelers of the Duelist | 27/27 | 24 | 280 | 12 | / | 7 | 19 | / | + 1% Parry |
| Hardmantle of the Duelist | 28/28 | 28 | 342 | / | 20 | / | 18 | 9 | + 2% Melee Critical Chance |
| Direhelm of the Duelist | 29/29 | 32 | 324 | / | 15 | 9 | 20 | 13 | / |
| Chestplate of the Duelist | 29/29 | 61 | 380 | 16 | / | 19 | 16 | / | + 40 HP Every 4 Seconds |
| Total | 29/29 | 165 | 1590 | 36 | 42 | 35 | 84 | 42 | / |
| 2 Piece | + 47 Toughness | ||||||||
| 3 Piece | + 240 Corporeal Resistance | ||||||||
| 4 Piece | Reactionary - On Defense: 25% Chance to increase Parry, Evade, and Dodge by 10% for 10 seconds | ||||||||
| 5 Piece | + 5% Parry | ||||||||
PQ
Mayhem Set
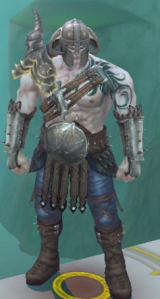
| Rank | Costs | Armor | Toughness | Wounds | Initiative | Strength | Weapon Skill | Bonus #1 | |
|---|---|---|---|---|---|---|---|---|---|
| Tramplers of Mayhem | 22 | 13 | 216 | / | 6 | 7 | 17 | 7 | / |
| Pummelers of Mayhem | 23 | 15 | 224 | / | 10 | / | 15 | 6 | + 1% Parry |
| Hardmantle of Mayhem | 24 | 18 | 261 | 11 | / | / | 18 | 7 | + 2% Reduction in Being Critically Hit |
| Direhelm of Mayhem | 25 | 20 | 260 | / | 10 | 2 | 25 | 8 | / |
| Chestplate of Mayhem | 24 | 40 | 290 | 13 | 7 | / | 20 | / | + 32 HP Every 4 Seconds |
| Total | 25 | 106 | 1251 | 24 | 33 | 9 | 95 | 28 | / |
| 2 Piece | + 37 Strength | ||||||||
| 3 Piece | + 192 Corporeal Resistance | ||||||||
| 4 Piece | + 37 Toughness | ||||||||
| 5 Piece | On Being Hit: 10% chance to increase movement speed by 20% for 10 seconds | ||||||||
PvE
Stalker Set

| Rank | Armor | Toughness | Wounds | Initiative | Strength | Weapon Skill | Bonus #1 | |
|---|---|---|---|---|---|---|---|---|
| Stalker's Tramplers | 26 | 264 | / | 7 | / | 12 | 4 | + 2 % Dodge |
| Stalker's Pummelers | 26 | 280 | / | 8 | / | 23 | 5 | + 1% Melee Critical Chance |
| Stalker's Hardmantle | 28 | 342 | 11 | / | 5 | 18 | 7 | / |
| Stalker's Chestplate | 30 | 380 | / | / | 12 | 19 | 7 | + 2% Disrupt |
| Total | 30 | 1366 | 11 | 15 | 17 | 72 | 23 | / |
| 2 Piece | + 34 Strength | |||||||
| 3 Piece | + 2 Morale Per Second | |||||||
| 4 Piece | + 34 Wounds | |||||||
Tier 4 sets
RvR
Annihilator Set

| Rank/Renown | Costs | Armor | Toughness | Wounds | Initiative | Strength | Weapon Skill | Bonus #1 | |
|---|---|---|---|---|---|---|---|---|---|
| Annihilator Tramplers | 35/35 | 32 | 366 | 21 | / | 13 | 10 | / | + 2% Dodge |
| Annihilator Pummelers | 35/36 | 37 | 366 | / | 14 | 9 | 11 | 23 | / |
| Annihilator Hardmantle | 35/37 | 55 | 424 | 12 | 18 | / | 25 | / | + 1% Reduction in being Critically Hit |
| Annihilator Direhelm | 35/38 | 50 | 424 | 13 | / | 15 | 25 | / | + 2% Disrupt |
| Annihilator Chestplate | 35/39 | 67 | 472 | / | 23 | / | 32 | 15 | + 60 HP Every 4 Seconds |
| Total | 35/39 | 241 | 2052 | 46 | 55 | 37 | 103 | 38 | / |
| 2 Piece | + 53 Toughness | ||||||||
| 3 Piece | + 290 Elemental Resistance | ||||||||
| 4 Piece | + 1 Path of Brutality Abilities | ||||||||
| 5 Piece | + 5% Parry | ||||||||
Conqueror Set

| Rank/Renown | Costs | Armor | Toughness | Wounds | Strength | Weapon Skill | Bonus #1 | Sp. Resist | El. Resist | Co. Resist | |
|---|---|---|---|---|---|---|---|---|---|---|---|
| Conqueror Tramplers | 40/40 | 70 | 392 | / | 10 | 16 | 14 | + 2% Melee Critical Chance | / | / | / |
| Conqueror Pummelers | 40/41 | 81 | 392 | / | 8 | 15 | 25 | + 2% Reduced Chance to be Parried | / | / | / |
| Conqueror Midstrap | 40/42 | 49 | / | 18 | 12 | 6 | / | + 36 Melee Power | 83 | 77 | 83 |
| Conqueror Hardmantle | 40/43 | 111 | 450 | 18 | / | 30 | 12 | + 10 Auto Attack Haste | / | / | / |
| Conqueror Direhelm | 40/44 | 122 | 450 | / | 17 | 30 | 10 | + 2% Reduced Chance to be Blocked | / | / | / |
| Conqueror Chestplate | 40/45 | 147 | 510 | 13 | / | 33 | 19 | + 3 AP Per Second | / | / | / |
| Total | 40/45 | 580 | 2194 | 49 | 47 | 130 | 80 | / | 83 | 77 | 83 |
| 2 Piece | + 57 Strength | ||||||||||
| 3 Piece | + 63 Wounds | ||||||||||
| 4 Piece | + 5% Reduced Chance to be Parried | ||||||||||
| 5 Piece | On Hit : 25% chance to steal 100 Toughness from your target for 10 seconds | ||||||||||
| 6 Piece | + 5% Melee Critical Chance | ||||||||||
Vanquisher Set

| Rank/Renown | Costs | Armor | Weapon Skill | Wounds | Initiative | Strength | Bonus #1 | Sp. Resist | El. Resist | Co. Resist | |
|---|---|---|---|---|---|---|---|---|---|---|---|
| Vanquisher Tramplers | 40/56 | 109 | 418 | 15 | / | 15 | 21 | + 10% Auto Attack Haste | / | / | / |
| Vanquisher Pummelers | 40/56 | 126 | 418 | 10 | 10 | / | 23 | + 2% Reduction in being Critically Hit | / | / | / |
| Vanquisher Midstrap | 40/55 | 76 | / | 13 | 8 | / | 19 | + 36 Melee Power | 87 | 86 | 86 |
| Vanquisher Hardmantle | 40/57 | 172 | 482 | / | 15 | 16 | 23 | + 2% Melee Critical Chance | / | / | / |
| Vanquisher Direhelm | 40/57 | 189 | 482 | 15 | 10 | / | 31 | + 3% Reduced Chance to be Parried | / | / | / |
| Vanquisher Chestplate | 40/58 | 229 | 548 | 11 | 15 | 20 | 39 | / | / | / | / |
| Total | 40/58 | 901 | 2348 | 64 | 58 | 51 | 156 | / | 87 | 86 | 86 |
| 2 Piece | + 62 Strength | ||||||||||
| 3 Piece | + 68 Wounds | ||||||||||
| 4 Piece | Vicious Strikes - On Hit: 15% chance to reduce target's Toughness by 110 while increasing your Weaponskill by 110 for 10 Seconds | ||||||||||
| 5 Piece | + 5% Melee Critial Chance | ||||||||||
| 6 Piece | + 4% Damage | ||||||||||
Invader Set

| Rank/Renown | Costs | Armor | Toughness | Wounds | Initiative | Strength | Weapon Skill | Bonus #1 | Bonus #2 | Sp. Resist | El. Resist | Co. Resist | |
|---|---|---|---|---|---|---|---|---|---|---|---|---|---|
| Invader Tramplers | 40/61 | 25 | 442 | / | / | 18 | 22 | / | +2% Disrupt | + 3 Morale Per Second | / | / | / |
| Invader Pummelers | 40/61 | 21 | 442 | 15 | 17 | / | 25 | / | + 10% Auto Attack Haste | / | / | / | / |
| Invader Midstrap | 40/60 | 15 | / | / | / | / | 18 | 12 | + 2% Parry | + 2% Dodge | 91 | 91 | 91 |
| Invader Hardmantle | 40/62 | 35 | 514 | / | 20 | / | 26 | 12 | + 2% Melee Critial Chance | / | / | / | / |
| Invader Direhelm | 40/62 | 37 | 514 | 13 | / | 18 | 29 | / | + 3% Armor Penetration | / | / | / | / |
| Invader Chestplate | 40/63 | 45 | 584 | / | 12 | 16 | 36 | 21 | + 1 AP Per Second | / | / | / | / |
| Invader Spikestrap | 40/63 | 43 | / | / | 27 | / | 12 | / | + 2% Reduced chance to be Parried | + 2 AP Per Second | 79 | 78 | 78 |
| Total | 40/63 | 221 | 2496 | 28 | 76 | 52 | 168 | 45 | / | / | 170 | 169 | 169 |
| 2 Piece | + 66 Strengh | ||||||||||||
| 3 Piece | + 73 Wounds | ||||||||||||
| 4 Piece | + 5% Reduced chance to be Parried | ||||||||||||
| 5 Piece | + 15% Auto Attack Haste | ||||||||||||
| 6 Piece | Red Frenzy - On Critical Hit: 10% chance to increase your auto attack damage by 25% for 5 seconds. | ||||||||||||
| 7 Piece | Brutal Aggressor - Increases the critical hit rate of all Path Of Brutality abilities by 10% | ||||||||||||
Warlord Set

| Rank/Renown | Costs | Armor | Toughness | Wounds | Initiative | Strength | Weapon Skill | Bonus #1 | Bonus #2 | Sp. Resist | El. Resist | Co. Resist | |
|---|---|---|---|---|---|---|---|---|---|---|---|---|---|
| Warlord Tramplers | 40/71 | 31 | 482 | 15 | 15 | 10 | 26 | / | + 1% Dodge | + 1% Disrupt | / | / | / |
| Warlord Pummelers | 40/71 | 27 | 482 | 18 | 20 | 10 | 20 | / | + 10% Auto Attack Haste | / | / | / | / |
| Warlord Midstrap | 40/70 | 19 | / | / | 18 | 18 | 18 | / | + 2% Dodge | + 2% Parry | 102 | 101 | 101 |
| Warlord Hardmantle | 40/72 | 42 | 572 | 17 | 15 | / | 17 | 30 | + 2% Reduced chance to be Parried | / | / | / | / |
| Warlord Direhelm | 40/72 | 47 | 572 | 18 | 14 | 15 | 24 | / | + 2% Melee Critial Chance | / | / | / | / |
| Warlord Chestplate | 40/73 | 57 | 646 | 20 | 20 | 20 | 33 | / | + 2% Parry | / | / | / | / |
| Warlord Rend Ring | 40/73 | 54 | / | / | 15 | / | 20 | 14 | + 4 AP Per Second | / | 87 | 87 | 86 |
| Warlord Shroud | 40/70 | 24 | / | 17 | 19 | 20 | 18 | / | + 10% Auto Attack Haste | / | 101 | 101 | 102 |
| Total | 40/73 | 301 | 2754 | 105 | 136 | 73 | 176 | 44 | / | / | 290 | 289 | 289 |
| 2 Piece | + 75 Strengh | ||||||||||||
| 3 Piece | + 83 Weapon Skill | ||||||||||||
| 4 Piece | + 15% Auto Attack Haste | ||||||||||||
| 5 Piece | + 99 Melee Power | ||||||||||||
| 6 Piece | + 2 Path of Brutality Abilities | ||||||||||||
| 7 Piece | Depleting - On Hit: 10% chance to remove 50 AP from target | ||||||||||||
| 8 Piece | Gain ability: Sadist | ||||||||||||
Sovereign Set of the Abomination (Primary)
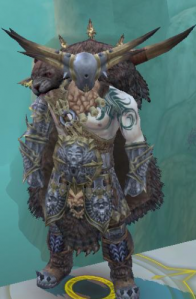
| Rank/Renown | Costs | Armor | Toughness | Wounds | Initiative | Strength | Weapon Skill | Bonus #1 | Bonus #2 | Sp. Resist | El. Resist | Co. Resist | |
|---|---|---|---|---|---|---|---|---|---|---|---|---|---|
| Sovereign Tramplers | 40/76 | 44 | 494 | / | / | 25 | 26 | / | + 2% Disrupt | + 3 Morale per Second | / | / | / |
| Sovereign Pummelers | 40/76 | 38 | 494 | 19 | 21 | / | 28 | / | + 10% Auto Attack Haste | / | / | / | / |
| Sovereign Midstrap | 40/75 | 26 | / | / | 15 | / | 22 | 17 | + 2% Parry | + 2% Dodge | 102 | 101 | 101 |
| Sovereign Hardmantle | 40/77 | 59 | 592 | / | 21 | / | 30 | 20 | + 2% Melee Critial Chance | / | / | / | / |
| Sovereign Direhelm | 40/77 | 65 | 592 | 20 | / | 20 | 33 | / | + 3% Armor Penetration | / | / | / | / |
| Sovereign Chestplate | 40/78 | 79 | 668 | / | 20 | 17 | 38 | 25 | + 1 AP Per Second | / | / | / | / |
| Sovereign Spikestrap | 40/78 | 75 | / | / | 29 | / | 18 | / | + 2 AP Per Second | + 2% Reduced chance to be Parried | 87 | 87 | 86 |
| Sovereign Shroud | 40/75 | 33 | / | / | 20 | 17 | 21 | / | + 2% Melee Critial Chance | / | 101 | 101 | 102 |
| Total | 40/78 | 419 | 2840 | 39 | 126 | 79 | 216 | 62 | / | / | 290 | 289 | 289 |
| 2 Piece | + 80 Strength | ||||||||||||
| 3 Piece | + 88 Wounds | ||||||||||||
| 4 Piece | + 6% Armor Penetration | ||||||||||||
| 5 Piece | + 6% Melee Critial Chance | ||||||||||||
| 6 Piece | + 2 Path of Savagery Abilities | ||||||||||||
| 7 Piece | On Hit: 10% chance to increase target's chance to be critically hit by 7% for 10 Seconds | ||||||||||||
| 8 Piece | Gain ability: Desolation | ||||||||||||
Sovereign Set of the Hulker (Secondary)

| Rank/Renown | Costs | Armor | Toughness | Wounds | Initiative | Strength | Weapon Skill | Bonus #1 | Bonus #2 | Sp. Resist | El. Resist | Co. Resist | |
|---|---|---|---|---|---|---|---|---|---|---|---|---|---|
| Sovereign Tramplers | 40/76 | 44 | 494 | / | 20 | 18 | 28 | / | + 2% Dodge | / | / | / | / |
| Sovereign Pummelers | 40/76 | 38 | 494 | / | 20 | / | 23 | 23 | + 2% Parry | / | / | / | / |
| Sovereign Midstrap | 40/75 | 26 | / | / | 18 | 15 | 21 | / | + 2% Parry | + 2% Dodge | 102 | 101 | 101 |
| Sovereign Hardmantle | 40/77 | 59 | 592 | / | 16 | 25 | 30 | / | + 2% Melee Critial Chance | / | / | / | / |
| Sovereign Direhelm | 40/77 | 65 | 592 | 20 | 16 | 20 | 25 | / | + 10% Auto Attack Haste | / | / | / | / |
| Sovereign Chestplate | 40/78 | 79 | 668 | 20 | 20 | / | 30 | 15 | + 4 AP Per Second | / | / | / | / |
| Sovereign Spikestrap | 40/78 | 75 | / | / | 16 | 20 | 20 | / | + 2% Disrupt | / | 87 | 87 | 86 |
| Sovereign Shroud | 40/75 | 33 | / | / | 18 | / | 20 | 20 | + 2% Melee Critial Chance | / | 101 | 101 | 102 |
| Total | 40/78 | 419 | 2840 | 40 | 144 | 98 | 197 | 58 | / | / | 290 | 289 | 289 |
| 2 Piece | + 80 Strength | ||||||||||||
| 3 Piece | + 88 Toughness | ||||||||||||
| 4 Piece | + 96 Wounds | ||||||||||||
| 5 Piece | + 734 Armor Bonus | ||||||||||||
| 6 Piece | + 2 Path of Monstrosity Abilities | ||||||||||||
| 7 Piece | On Being Attacked: 10% chance to reduce incoming damage by 4% for 10 Secinds | ||||||||||||
| 8 Piece | Gain ability: Inexorable Force | ||||||||||||
RvR Auxiliary
Overlord Set
| Rank | Costs / Costs | Armor | Toughness | Wounds | Strength | Weapon Skill | Bonus #1 | Bonus #2 | |
|---|---|---|---|---|---|---|---|---|---|
| Hardmantle of the Overlord | 40 | 80 / 120 | 475 | 12 | / | 23 | 29 | + 5% Auto Attack Haste | + 1% Reduced Chance to be Parried |
| Direhelm of the Overlord | 40 | 80 / 120 | 475 | / | 12 | 28 | 24 | + 5% Auto Attack Haste | + 1% Reduced Chance to be Parried |
| Total | 40 | 160 / 240 | 950 | 12 | 12 | 51 | 53 | / | / |
| 2 Piece | + 61 Wounds | ||||||||
Imperator Set
| Rank | Costs / Costs | Armor | Toughness | Wounds | Initiative | Strength | Weapon Skill | Bonus #1 | |
|---|---|---|---|---|---|---|---|---|---|
| Hardmantle of the Imperator | 40 | 80 / 120 | 475 | 28 | 10 | / | 12 | 14 | + 2% Reduced Armor Penetration |
| Direhelm of the Imperator | 40 | 80 / 120 | 475 | 28 | 10 | 14 | 12 | / | + 2% Reduction in being Critically Hit |
| Total | 40 | 160 / 240 | 950 | 56 | 20 | 14 | 24 | 14 | / |
| 2 Piece | + 61 Initiative | ||||||||
RvR Accessories
Genesis
Warrior Set
| Rank | Cost | Wounds | Initiative | Strength | Bonus #1 | Bonus #2 | Sp. Resist | El. Resist | Co. Resist | |
|---|---|---|---|---|---|---|---|---|---|---|
| Genesis Aspect of the Warrior | 36 | 1 Genesis Aspect | / | 24 | / | + 36 Melee Power | / | 64 | 64 | 64 |
| Genesis Fragment of the Warrior | 36 | 1 Genesis Fragment | / | / | 14 | + 3% Parry | / | 53 | 53 | 53 |
| Genesis Remnant of the Warrior | 36 | 1 Genesis Remnant | 24 | / | 24 | / | / | 64 | 64 | 64 |
| Genesis Shard of the Warrior | 36 | 1 Genesis Shard | / | / | / | + 2% Dodge | + 2% Disrupt | 55 | 55 | 55 |
| Genesis Cloak of the Warrior | 36 | 1 Genesis Cloak | / | / | 28 | + 4 AP Per Second | / | 53 | 53 | 53 |
| Total | 36 | / | 24 | 24 | 66 | / | / | 289 | 289 | 289 |
| 2 Piece | + 37 Strength | |||||||||
| 3 Piece | + 3% Reduced Chance to be Parried | |||||||||
| 4 Piece | + 37 Weapon Skill | |||||||||
| 5 Piece | + 3% Melee Critical Chance | |||||||||
Undying Set
| Rank | Cost | Toughness | Wounds | Initiative | Bonus #1 | Bonus #2 | Sp. Resist | El. Resist | Co. Resist | |
|---|---|---|---|---|---|---|---|---|---|---|
| Genesis Aspect of the Undying | 36 | 1 Genesis Aspect | 24 | / | 24 | / | / | 64 | 64 | 64 |
| Genesis Fragment of the Undying | 36 | 1 Genesis Fragment | / | 14 | / | + 3% Parry | / | 53 | 53 | 53 |
| Genesis Remnant of the Undying | 36 | 1 Genesis Remnant | 24 | 24 | / | / | / | 64 | 64 | 64 |
| Genesis Shard of the Undying | 36 | 1 Genesis Shard | / | / | / | + 2% Dodge | + 2% Disrupt | 55 | 55 | 55 |
| Genesis Cloak of the Undying | 36 | 1 Genesis Cloak | 28 | / | / | + 4AP Per Second | / | 53 | 53 | 53 |
| Total | 36 | / | 76 | 48 | 24 | / | / | 289 | 289 | 289 |
| 2 Piece | + 37 Wounds | |||||||||
| 3 Piece | + 3% Reduced Armor Penetration | |||||||||
| 4 Piece | + 37 Toughness | |||||||||
| 5 Piece | + 3% Reduced Chance to be Critically Hit | |||||||||
Warrant
Brawler Set
| Rank/Renown | Costs | Wounds | Initiative | Strength | Bonus #1 | Sp. Resist | El. Resist | Co. Resist | |
|---|---|---|---|---|---|---|---|---|---|
| Icon of the Brawler | 36 | 1 | 12 | 13 | 17 | / | 62 | 62 | 62 |
| Mark of the Brawler | 36 | 1 | / | / | 24 | + 1% Parry | 68 | 68 | 68 |
| Cinture of the Brawler | 36 | 1 | / | 15 | 15 | + 18 Melee Power | 60 | 60 | 60 |
| Total | 36 | 3 | 12 | 28 | 56 | / | 190 | 190 | 190 |
| 3 Piece | + 4 Morale Per Second | ||||||||
Assailant Set
| Rank/Renown | Costs | Wounds | Initiative | Strength | Bonus #1 | Bonus #2 | Sp. Resist | El. Resist | Co. Resist | |
|---|---|---|---|---|---|---|---|---|---|---|
| Icon of the Assailant | 36 | 1 | 16 | 16 | 20 | / | / | 69 | 69 | 69 |
| Mark of the Assailant | 36 | 1 | / | / | 19 | + 2% Parry | / | 72 | 72 | 72 |
| Cloak of the Assailant | 36 | 1 | / | / | 16 | + 2 AP Per Second | + 18 Melee Power | 65 | 65 | 65 |
| Total | 36 | 3 | 16 | 16 | 55 | / | / | 206 | 206 | 206 |
| 3 Piece | +3% Reduced Chance to be Parried | |||||||||
Scenario
Mercenary Set
| Rank/Renown | Costs | Armor | Toughness | Wounds | Initiative | Strength | Weapon Skill | Bonus #1 | |
|---|---|---|---|---|---|---|---|---|---|
| Tramplers of the Mercenary | 35/35 | 46 | 366 | 10 | / | / | 21 | 13 | + 2% Dodge |
| Pummelers of the Mercenary | 35/36 | 54 | 366 | / | 14 | 9 | 11 | 23 | / |
| Hardmantle of the Mercenary | 35/37 | 80 | 424 | 12 | / | / | 25 | 18 | + 1% Reduction in being Critically Hit |
| Direhelm of the Mercenary | 35/38 | 73 | 424 | / | 14 | / | 23 | 13 | + 2% Disrupt |
| Chestplate of the Mercenary | 35/39 | 98 | 472 | / | 12 | / | 30 | 17 | + 3 AP Per Second |
| Total | 35/39 | 351 | 2048 | 22 | 40 | 9 | 110 | 84 | / |
| 2 Piece | + 53 Strength | ||||||||
| 3 Piece | + 290 Elemental Resistance | ||||||||
| 4 Piece | + 1 to Path of Savagery Abilities | ||||||||
| 5 Piece | + 5% Melee Critial Chance | ||||||||
Dominator Set
| Rank/Renown | Costs | Armor | Toughness | Wounds | Initiative | Strength | Bonus #1 | Sp. Resist | El. Resist | Co. Resist | |
|---|---|---|---|---|---|---|---|---|---|---|---|
| Dominator Tramplers | 40/40 | 119 | 392 | 14 | / | 10 | 16 | + 2% Reduction in being Critically Hit | / | / | / |
| Dominator Pummelers | 40/41 | 103 | 392 | 15 | 8 | / | 25 | + 2% Parry | / | / | / |
| Dominator Midstrap | 40/42 | 72 | / | 24 | 18 | 12 | 6 | / | 83 | 77 | 83 |
| Dominator Hardmantle | 40/43 | 162 | 450 | 29 | / | 16 | 12 | + 2% Reduced Armor Penetration | / | / | / |
| Dominator Direhelm | 40/44 | 178 | 450 | 30 | 10 | / | 17 | + 2% Disrupt | / | / | / |
| Dominator Chestplate | 40/45 | 216 | 510 | 13 | / | 33 | 19 | + 3 AP Per Second | / | / | / |
| Total | 40/45 | 850 | 2194 | 125 | 36 | 71 | 95 | / | 83 | 77 | 83 |
| 2 Piece | + 57 Strength | ||||||||||
| 3 Piece | + 63 Wounds | ||||||||||
| 4 Piece | + 561 Armor | ||||||||||
| 5 Piece | On Being Hit: 10% chance to form a protective barrier that will absorb up to 183 damage over 5 seconds | ||||||||||
| 6 Piece | + 5% Reduction in Being Critically Hit | ||||||||||
Oppressor Set
| Rank/Renown | Costs | Armor | Toughness | Wounds | Initiative | Strength | Weapon SKill | Bonus #1 | Bonus #2 | Sp. Resist | El. Resist | Co. Resist | |
|---|---|---|---|---|---|---|---|---|---|---|---|---|---|
| Oppressor Tramplers | 40/56 | 182 | 418 | 15 | 10 | / | 18 | / | + 2% Reduction in being Critically Hit | / | / | / | / |
| Oppressor Pummelers | 40/56 | 157 | 418 | 11 | 25 | / | 15 | / | + 2% Parry | / | / | / | / |
| Oppressor Midstrap | 40/55 | 110 | / | / | / | / | 15 | 12 | + 36 Melee Power | + 2% Reduced Armor Penetration | 87 | 86 | 86 |
| Oppressor Hardmantle | 40/57 | 248 | 482 | 15 | 28 | / | 19 | / | + 2% Reduced Armor Penetration | / | / | / | / |
| Oppressor Direhelm | 40/57 | 273 | 482 | 12 | 33 | / | 17 | / | + 2% Parry | / | / | / | / |
| Oppressor Chestplate | 40/58 | 331 | 548 | / | 29 | 16 | 20 | / | + 2% Reduction in being Critically Hit | / | / | / | / |
| Total | 40/58 | 1301 | 2348 | 53 | 125 | 16 | 104 | 12 | / | 87 | 86 | 86 | |
| 2 Piece | + 62 Strength | ||||||||||||
| 3 Piece | + 68 Wounds | ||||||||||||
| 4 Piece | Endure - On Being Hit: 15% chance to reduce attackers Strength, Ballistic Skill and Intelligence by 110 while increasing your Initiative by 110 for 10 Seconds | ||||||||||||
| 5 Piece | + 5% Reduction in being Critically Hit | ||||||||||||
| 6 Piece | + 4% Damage | ||||||||||||
Ranked
Triumphant Set
| Rank/Renown | Costs | Armor | Wounds | Initiative | Strength | Weapon SKill | Bonus #1 | Sp. Resist | El. Resist | Co. Resist | |
|---|---|---|---|---|---|---|---|---|---|---|---|
| Triumphant Tramplers | 40/66 | 648 | 470 | / | 19 | 21 | 19 | + 10% Auto Attack Haste | / | / | / |
| Triumphant Pummelers | 40/66 | 752 | 470 | 14 | / | 23 | 13 | + 2% Reduction in being Critically Hit | / | / | / |
| Triumphant Midstrap | 40/65 | 456 | / | 11 | / | 23 | 13 | + 36 Melee Power | 94 | 94 | 94 |
| Triumphant Hardmantle | 40/67 | 1024 | 550 | 15 | 16 | / | 25 | + 2% Melee Critical Chance | / | / | / |
| Triumphant Direhelm | 40/67 | 1128 | 550 | 13 | / | 34 | 18 | + 3% Reduced chance to be Parried | / | / | / |
| Triumphant Chestplate | 40/68 | 1360 | 616 | 20 | 20 | 39 | 16 | / | / | / | / |
| Triumphant Shroud | 40/65 | 760 | / | 10 | 18 | 23 | 10 | + 2 AP Per Second | 94 | 94 | 94 |
| Total | 40/68 | 6128 | 2656 | 83 | 73 | 163 | 114 | / | 188 | 188 | 188 |
| 2 Piece | + 71 Strength | ||||||||||
| 3 Piece | + 78 Wounds | ||||||||||
| 4 Piece | Vicious Strikes - On Hit: 15% chance to reduce target's Toughness by 130 while increasing your Weaponskill by 130 for 10 Seconds | ||||||||||
| 5 Piece | + 5% Melee Critical Chance | ||||||||||
| 6 Piece | + 4% Damage | ||||||||||
| 7 Piece | On Hit: 10% chance to increase Block Strikethrough and Parry Strikethrough by 7% for 10 Seconds | ||||||||||
Victorious Set
| Rank/Renown | Costs | Armor | Toughness | Wounds | Initiative | Strength | Weapon Skill | Bonus #1 | Bonus #2 | Sp. Resist | El. Resist | Co. Resist | |
|---|---|---|---|---|---|---|---|---|---|---|---|---|---|
| Victorious Tramplers | 40/66 | 648 | 470 | 19 | 14 | / | 18 | / | + 2% Reduction in being Critically Hit | / | / | / | / |
| Victorious Pummelers | 40/66 | 752 | 470 | 11 | 25 | / | 16 | / | + 3% Parry | / | / | / | / |
| Victorious Midstrap | 40/65 | 456 | / | / | / | / | 17 | 12 | + 36 Melee Power | + 3% Reduced Armor Penetration | 94 | 94 | 94 |
| Victorious Hardmantle | 40/67 | 1024 | 550 | 20 | 28 | / | 21 | / | + 2% Reduced Armor Penetration | / | / | / | / |
| Victorious Direhelm | 40/67 | 1128 | 550 | 15 | 36 | / | 20 | / | + 2% Parry | / | / | / | / |
| Victorious Chestplace | 40/68 | 1360 | 616 | / | 29 | 16 | 20 | / | + 3% Reduction in being Critically Hit | / | / | / | / |
| Victorious Shroud | 40/65 | 760 | / | 10 | 21 | 18 | 10 | / | + 2% Parry | / | 94 | 94 | 94 |
| Total | 40/68 | 6128 | 2656 | 75 | 153 | 34 | 122 | 12 | / | 188 | 188 | 188 | |
| 2 Piece | + 71 Strength | ||||||||||||
| 3 Piece | + 78 Wounds | ||||||||||||
| 4 Piece | Endure - On Being Hit: 15% chance to reduce attackers Strength, Ballistic Skill and Intelligence by 130 while increasing your Initiative by 130 for 10 Seconds | ||||||||||||
| 5 Piece | + 5% Reduction in being Critically Hit | ||||||||||||
| 6 Piece | + 4% Damage | ||||||||||||
| 7 Piece | Domination - On Hit: 25% chance to steal 130 Toughness from your target for 10 Seconds | ||||||||||||
PQ
Ruin Set

| Rank | Costs | Armor | Toughness | Wounds | Initiative | Strength | Weapon Skill | Bonus #1 | |
|---|---|---|---|---|---|---|---|---|---|
| Tramplers of Ruin | 34 | 13 | 328 | 11 | 9 | / | 10 | 20 | / |
| Pummelers of Ruin | 35 | 15 | 328 | 10 | / | / | 20 | 8 | + 2% Parry |
| Hardmantle of Ruin | 35 | 18 | 378 | 11 | / | 13 | 27 | / | + 1% Melee Critical Chance |
| Direhelm of Ruin | 36 | 20 | 378 | / | 14 | 11 | 23 | 11 | / |
| Chestplate of Ruin | 36 | 40 | 430 | / | 15 | / | 29 | 14 | + 2 Morale Per Second |
| Total | 36 | 106 | 1851 | 31 | 38 | 24 | 109 | 53 | / |
| 2 Piece | + 48 Strength | ||||||||
| 3 Piece | + 265 Corporeal Resistance | ||||||||
| 4 Piece | + 1 to Path of Savagery Abilities | ||||||||
| 5 Piece | + 63 Toughness | ||||||||
Onslaught Set

| Rank/Renown | Armor | Toughness | Wounds | Initiative | Strength | Weapon Skill | Bonus #1 | |
|---|---|---|---|---|---|---|---|---|
| Onslaught Tramplers | 40/32 | 406 | 14 | 16 | 18 | / | / | + 18 Melee Power |
| Onslaught Pummelers | 40/32 | 406 | / | 16 | 12 | 24 | / | + 10% Auto Attack Haste |
| Onslaught Hardmantle | 40/32 | 462 | 20 | / | / | 25 | 16 | + 2 AP Per Second |
| Onslaught Direhelm | 40/32 | 462 | 18 | 23 | / | 20 | / | + 1% Reduction in Being Critically Hit |
| Onslaught Chestplate | 40/32 | 518 | / | 20 | / | 27 | 16 | + 3% Reduced Armor Penetration |
| Total | 40/32 | 2254 | 52 | 75 | 30 | 95 | 32 | / |
| 2 Piece | + 58 Wounds | |||||||
| 3 Piece | + 64 Strength | |||||||
| 4 Piece | Preservation - On Being Hit : 10% chance to increase Wounds by 100 for 20 seconds | |||||||
| 5 Piece | + 5% Disrupt | |||||||
PvE
Beastlord Set
| Rank/Renown | Costs | Armor | Toughness | Wounds | Strength | Weapon Skill | Bonus #1 | Sp. Resist | El. Resist | Co. Resist | |
|---|---|---|---|---|---|---|---|---|---|---|---|
| Beastlord Rend Ring | 40 | / | / | / | / | 24 | 13 | +1 AP Per Second | 60 | 60 | 64 |
| Beastlord Cloak | 40 | / | / | / | 32 | / | 24 | / | 72 | 84 | 72 |
| Beastlord Hunting Guide | 40 | 5 | / | / | / | / | / | On Use: Increases AP Regeneration for 15s on all party members. 30m cooldown | / | / | / |
| Beastlord Hardmantle | 40 | / | 406 | / | 14 | 24 | 14 | / | / | 30 | 25 |
| Beastlord Direhelm | 40 | / | 406 | 20 | / | 20 | 12 | / | / | 25 | 30 |
| Beastlord Chestplate | 40 | / | 450 | 14 | 30 | / | 15 | / | 30 | / | 30 |
| Total | 40 | / | 1262 | 34 | 75 | 68 | 78 | / | 195 | 257 | 304 |
| 3 Piece | + 55 Weapon Skill | ||||||||||
| 4 Piece | + 60 Strength | ||||||||||
| 5 Piece | + 5% Reduced chance to be Parried | ||||||||||
| 6 Piece | Overwhelming - On Hit: 25% chance to reduce target's Weapon Skill by 80 while increasing your Strength by 80 for 10 seconds | ||||||||||
Rare Fortune Set
| Rank | Armor | Toughness | Wounds | Initiative | Strength | Weapon Skill | Bonus #1 | |
|---|---|---|---|---|---|---|---|---|
| Rare Fortune Tramplers | 37 | 380 | 13 | / | 14 | 24 | / | + 2% Dodge |
| Rare Fortune Pummelers | 37 | 380 | / | 19 | 12 | 21 | 6 | / |
| Rare Fortune Hardmantle | 39 | 430 | 20 | 17 | / | 22 | / | + 1% Reduction in being Critically Hit |
| Rare Fortune Direhelm | 38 | 430 | 17 | / | 18 | 20 | / | + 2% Disrupt |
| Rare Fortune Chestplate | 39 | 480 | / | 27 | / | 22 | 12 | + 3 AP Per Second |
| Total | 39 | 2100 | 50 | 63 | 44 | 109 | 18 | / |
| 2 Piece | + 54 Initiative | |||||||
| 3 Piece | + 59 Strength | |||||||
| 4 Piece | Creeping - On Being Hit: 10% chance to reduce attacker's movement speed by 40% for 5 seconds | |||||||
| 5 Piece | + 5% Reduced chance to be Parried | |||||||
PvE Accessories
The Sundered Rings Set
| Rank | Wounds | Initiative | Toughness | Weapon Skill | Sp. Resist | El. Resist | Co. Resist | |
|---|---|---|---|---|---|---|---|---|
| Cytheril | 35 | / | 17 | 17 | / | 61 | 74 | 51 |
| Foserain | 35 | 14 | / | / | 17 | 51 | 65 | 74 |
| Total | 35 | 14 | 17 | 17 | 17 | 112 | 139 | 125 |
| 2 Piece | + 25 Wounds | |||||||
The Divided Set
| Rank | Wounds | Initiative | Toughness | Weapon Skill | Sp. Resist | El. Resist | Co. Resist | |
|---|---|---|---|---|---|---|---|---|
| The Seeping Larva | 35 | / | 15 | 15 | / | 67 | 77 | 79 |
| Writhing Shackles | 35 | 15 | / | / | 15 | 77 | 79 | 67 |
| Fated Veil | 35 | / | 15 | 15 | / | 79 | 67 | 77 |
| Bloodied Fracture | 35 | 15 | / | / | 15 | 76 | 72 | 72 |
| Total | 35 | 30 | 30 | 30 | 30 | 299 | 295 | 302 |
| 2 Piece | + 3% Dodge | |||||||
| 3 Piece | + 3% Disrupt | |||||||
| 4 Piece | Clarity - Any Ability : 10% chance to reduce the cost of the next ability used within 10 seconds to 0 Action Points | |||||||
The Fortune’s Baubles Set
| Rank | Wounds | Initiative | Toughness | Weapon Skill | Bonus #1 | Sp. Resist | El. Resist | Co. Resist | |
|---|---|---|---|---|---|---|---|---|---|
| Hapless Ha'penny | 35 | / | 8 | 17 | / | + 2% Parry | 46 | 57 | 46 |
| Gorkamork | 35 | 17 | / | / | 8 | + 2% Dodge | 46 | 46 | 57 |
| Wind of Change | 35 | / | 17 | 8 | / | + 2% Disrupt | 57 | 46 | 46 |
| Fullbelly's Lucky Foot | 35 | 8 | / | / | 17 | + 2% Reduced Armor Penetration | 50 | 50 | 50 |
| Total | 35 | 25 | 25 | 25 | 25 | / | 199 | 199 | 199 |
| 2 Piece | + 2 Morale per Second | ||||||||
| 3 Piece | + 2 AP per Second | ||||||||
| 4 Piece | + 52 HP every 4 seconds | ||||||||
The Winds Impervious Set
| Rank/Renown | Wounds | Initiative | Toughness | Weapon Skill | Sp. Resist | El. Resist | Co. Resist | |
|---|---|---|---|---|---|---|---|---|
| Crow Caller Chain | 35 | / | / | 4 | 12 | 104 | 89 | 178 |
| The Obdurate Seal | 35 | 12 | / | 4 | / | 89 | 178 | 104 |
| Wordbreaker Band | 35 | / | 12 | 4 | / | 178 | 104 | 89 |
| Total | 35 | 12 | 12 | 12 | 12 | 371 | 371 | 371 |
| 2 Piece | + 25 Initiative | |||||||
| 3 Piece | + 210 Armor Bonus | |||||||
The Great Oathstones Set
| Rank | Wounds | Initiative | Toughness | Weapon Skill | Bonus #1 | Sp. Resist | El. Resist | Co. Resist | |
|---|---|---|---|---|---|---|---|---|---|
| Oathstone of Karaz-a-Karak | 35 | / | / | 4 | 17 | + 2% Dodge | 47 | 41 | 61 |
| Oathstone of Karak Eight Peaks | 35 | 4 | 17 | / | / | + 2% Dodge | 41 | 61 | 47 |
| Total | 35 | 4 | 17 | 4 | 17 | / | 88 | 102 | 108 |
| 2 Piece | + 15% Auto Attack Haste | ||||||||
The Broken Covenant Set
| Rank | Wounds | Initiative | Toughness | Weapon Skill | Bonus #1 | Sp. Resist | El. Resist | Co. Resist | |
|---|---|---|---|---|---|---|---|---|---|
| The Ascendant Verses | 35 | / | / | 17 | 4 | + 2% Disrupt | 61 | 48 | 40 |
| The Deep Oaths | 35 | 17 | 4 | / | / | + 2% Disrupt | 61 | 40 | 48 |
| Total | 35 | 17 | 4 | 17 | 4 | / | 122 | 88 | 88 |
| 2 Piece | + 3 AP per Second | ||||||||
Da Waaagh! Teef Set
| Rank | Wounds | Initiative | Toughness | Weapon Skill | Sp. Resist | El. Resist | Co. Resist | |
|---|---|---|---|---|---|---|---|---|
| Black Toof | 35 | 17 | 17 | / | / | 44 | 64 | 78 |
| One Tusk | 35 | / | / | 17 | 17 | 93 | 33 | 60 |
| Broke Toof | 35 | / | 17 | 17 | / | 33 | 89 | 64 |
| Moon Fang | 35 | 17 | / | / | 17 | 65 | 57 | 65 |
| Total | 35 | 34 | 34 | 34 | 34 | 235 | 243 | 267 |
| 2 Piece | + 2% Reduction in being Critically Hit | |||||||
| 3 Piece | + 2% Reduced Armor Penetration | |||||||
| 4 Piece | + 20 Additional AP Pool | |||||||
The Blood-soaked Sigils Set
| Rank | Wounds | Initiative | Toughness | Weapon Skill | Bonus #1 | Sp. Resist | El. Resist | Co. Resist | |
|---|---|---|---|---|---|---|---|---|---|
| Strife | 35 | 10 | / | 12 | / | + 2% Parry | 23 | 98 | 28 |
| Torment | 35 | / | 12 | / | 10 | + 2% Parry | 98 | 28 | 23 |
| Total | 35 | 10 | 12 | 12 | 10 | / | 121 | 121 | 51 |
| 2 Piece | + 2% Reduced Chance to be Parried | ||||||||
Instance
Redeye Set
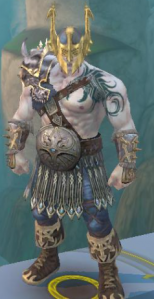
| Rank | Armor | Toughness | Wounds | Initiative | Strength | Weapon Skill | Bonus #1 | Sp. Resist | El. Resist | Co. Resist | |
|---|---|---|---|---|---|---|---|---|---|---|---|
| Redeye Cloak | 40 | / | / | 21 | / | 21 | 17 | / | 91 | 76 | 73 |
| Redeye Tramplers | 40 | 380 | 16 | / | / | 15 | 17 | + 1% Reduction in being Critically Hit | / | / | / |
| Redeye Pummelers | 40 | 380 | / | 13 | 12 | 21 | 12 | / | / | / | / |
| Redeye Hardmantle | 40 | 430 | / | / | 20 | 23 | 13 | + 2% Reduced Armor Penetration | / | / | / |
| Redeye Direhelm | 40 | 430 | 14 | 13 | / | 22 | 27 | / | / | / | / |
| Redeye Chestplate | 40 | 480 | 17 | / | / | 27 | 17 | + 3 AP Per Second | / | / | / |
| Total | 40 | 2100 | 47 | 47 | 32 | 129 | 103 | / | 91 | 76 | 73 |
| 2 Piece | + 3% Reduction in being Critically Hit | ||||||||||
| 3 Piece | + 59 Strength | ||||||||||
| 4 Piece | + 64 Weaponskill | ||||||||||
| 5 Piece | + 25% Auto Attack Speed | ||||||||||
| 6 Piece | + 5% Parry | ||||||||||
Sentinel Set

| Rank | Armor | Toughness | Wounds | Initiative | Strength | Weapon Skill | Bonus #1 | Sp. Resist | El. Resist | Co. Resist | |
|---|---|---|---|---|---|---|---|---|---|---|---|
| Sentinel Tramplers | 40 | 406 | / | 15 | / | 27 | 8 | + 2% Parry | / | / | / |
| Sentinel Pummelers | 40 | 406 | / | / | 10 | 15 | 23 | + 21 Melee Power | / | / | / |
| Sentinel Midstrap | 40 | / | 24 | 9 | / | 18 | 12 | / | 80 | 90 | 95 |
| Sentinel Hardmantle | 40 | 462 | 12 | / | / | 17 | 30 | + 2% Reduced chance to be Parried | / | / | / |
| Sentinel Direhelm | 40 | 462 | / | 10 | 16 | 27 | / | + 2% Melee Critial Chance | / | / | / |
| Sentinel Chestplate | 40 | 518 | 17 | 19 | / | 35 | / | + 60 HP Every 4 Seconds | / | / | / |
| Sentinel Rend Ring | 40 | / | / | / | / | 27 | 17 | + 3 AP Per Second | 70 | 70 | 71 |
| Total | 40 | 2254 | 53 | 53 | 26 | 166 | 90 | / | 150 | 160 | 166 |
| 2 Piece | + 58 Strength | ||||||||||
| 3 Piece | + 64 Wounds | ||||||||||
| 4 Piece | + 70 Initiative | ||||||||||
| 5 Piece | Arise - On Attacking Target or Being Hit: 10% chance to resist Stuns and Knockdowns by 33% for 15 Seconds | ||||||||||
| 6 Piece | + 5% Melee Critial Chance | ||||||||||
| 7 Piece | Fully Mutated - Cooldown of Mutating Release reduced by 20 seconds | ||||||||||
Bloodlord Set
| Rank | Armor | Toughness | Wounds | Initiative | Strength | Weapon Skill | Bonus #1 | Bonus #2 | Sp. Resist | El. Resist | Co. Resist | |
|---|---|---|---|---|---|---|---|---|---|---|---|---|
| Bloodlord Tramplers | 40 | 442 | / | 10 | 18 | 27 | / | + 2% Dodge | / | / | / | / |
| Bloodlord Pummelers | 40 | 442 | / | 10 | 15 | 26 | 16 | / | / | / | / | / |
| Bloodlord Midstrap | 40 | / | / | 12 | 16 | 22 | / | + 2% Parry | + 1% Dodge | 91 | 91 | 91 |
| Bloodlord Hardmantle | 40 | 514 | / | 21 | 10 | 27 | / | + 2% Melee Critial Chance | / | / | / | / |
| Bloodlord Direhelm | 40 | 514 | 19 | 18 | / | 29 | / | + 2% Armor Penetration | / | / | / | / |
| Bloodlord Chestplate | 40 | 584 | / | 16 | 12 | 30 | 20 | + 2 AP Per Second | / | / | / | / |
| Bloodlord Shroud | 40 | / | / | 12 | 16 | 24 | / | + 24 Melee Power | / | 91 | 91 | 91 |
| Total | 40 | 2496 | 19 | 99 | 87 | 185 | 36 | / | 182 | 182 | 182 | |
| 2 Piece | + 66 Wounds | |||||||||||
| 3 Piece | + 73 Initiative | |||||||||||
| 4 Piece | Boost II - On Hit: 5% chance to increase your critical hit rate by 6% for 9 seconds. | |||||||||||
| 5 Piece | + 5% Melee Critial Chance | |||||||||||
| 6 Piece | Preservation - On Being Hit : 10% chance to increase Wounds by 100 for 20 seconds | |||||||||||
| 7 Piece | Overwhelming - On Hit: 25% chance to reduce target's Weapon Skill by 80 while increasing your Strength by 80 for 10 seconds | |||||||||||
Vale Walker Set

| Rank | Armor | Toughness | Wounds | Initiative | Strength | Weapon Skill | Bonus #1 | Bonus #2 | Sp. Resist | El. Resist | Co. Resist | |
|---|---|---|---|---|---|---|---|---|---|---|---|---|
| Vale Walker Tramplers | 40 | 432 | 13 | / | 20 | 15 | / | 3% Dodge | / | / | / | / |
| Vale Walker Pummelers | 40 | 432 | / | 20 | 11 | 15 | / | +2% Melee Crit Chance | / | / | / | / |
| Vale Walker Midstrap | 40 | / | / | 32 | / | / | 23 | +2% Reduced Armor Penetration | N/A | 90 | 90 | 90 |
| Vale Walker Hardmantle | 40 | 494 | / | 20 | / | 24 | / | + 3% Parry | / | 30 | 35 | / |
| Vale Walker Direhelm | 40 | 494 | 24 | / | / | 20 | / | +3% Disrupt | / | 40 | 35 | / |
| Valewalker Chestplate | 40 | 556 | / | 35 | / | 19 | 18 | / | / | / | 35 | 35 |
| Vale Walker Spike Strap | 40 | / | / | / | / | 24 | 21 | + 48 HP every 4 seconds | +1% Reduction in being Critically Hit | 66 | 80 | 80 |
| Total | 40 | 2408 | 37 | 107 | 31 | 117 | 62 | / | 226 | 275 | 205 | |
| 2 Piece | + 62 Wounds | |||||||||||
| 3 Piece | + 69 Weaponskill | |||||||||||
| 4 Piece | 76 Strength | |||||||||||
| 5 Piece | + 5% Reduced Chance To Be Parried | |||||||||||
| 6 Piece | On Hit: 25% chance to reduce target's Weapon Skill by 118 while increasing your Strength by 118 for 10 seconds. | |||||||||||
| 7 Piece | On Being Attacked: 10% Chance to Increase Parry, Block, Disrupt, Dodge by 7% for 10 seconds. | |||||||||||