Mount Gunbad: Difference between revisions
No edit summary |
No edit summary |
||
| (34 intermediate revisions by 2 users not shown) | |||
| Line 6: | Line 6: | ||
|caption=Mount Gunbad loading graphic | |caption=Mount Gunbad loading graphic | ||
|loc=[[The Badlands]] | |loc=[[The Badlands]] | ||
|race=[[ | |race=[[Greenskins]] (formerly [[Dwarf]]) | ||
|boss= | |boss= | ||
|type=Dungeon | |type=Dungeon | ||
| Line 15: | Line 15: | ||
}} | }} | ||
== Mount Gunbad == | == Mount Gunbad == | ||
[[File:Gunbad Entrance New v2.png|thumb|Welcome to Mount Gunbad!]] | |||
'''Mount Gunbad''' is the first level 40 dungeon in Return of Reckoning, and is located in the northwest corner of [[The Badlands]] (entrance at 4k,4k). | '''Mount Gunbad''' is the first level 40 dungeon in Return of Reckoning, and is located in the northwest corner of [[The Badlands]] (entrance at 4k,4k). | ||
| Line 29: | Line 30: | ||
== Your first Gunbad == | == Your first Gunbad == | ||
If it's your first time in the Dungeon, make sure to take the '''Blue Repeatable quests''' given by the NPC in the starting room. | If it's your first time in the Dungeon, make sure to take the '''Blue Repeatable quests''' given by the NPC in the starting room. | ||
These quests will guarantee you | These quests will guarantee you Redeye armor after defeating certain bosses three times. Just in case you don't roll gold bags, this is a great way to ensure you won't have to rely on RNG to get the gear you need! | ||
== Layout == | == Dungeon Layout == | ||
[[File:Gunbad-Detailed-Minimap-Final.jpg|thumb|Mount Gunbad Minimap]] | [[File:Gunbad-Detailed-Minimap-Final.jpg|thumb|Mount Gunbad Minimap]] | ||
| Line 42: | Line 43: | ||
To fight the final boss of each wing, you'll need to kill the bosses prior to it in order to open the magical barriers that allow entrance. | To fight the final boss of each wing, you'll need to kill the bosses prior to it in order to open the magical barriers that allow entrance. | ||
== Lore == | == Lore == | ||
| Line 54: | Line 53: | ||
''While the bulk of the Dwarf armies were still returning from their victorious campaign against the Elves, disaster came over the Worlds Edge Mountains. Earthquakes covered the mountain passes with rubble, isolating temporarily holds and mines. Gunbad Dwarfs fought valiantly when the Greenskins came, but defeat was inevitable. Over two hundred years ago, Dwarfs came back to Gunbad in great numbers. Led by Logazor Brightaxe, they managed to retake the mines, but this victory left Gunbad isolated in the midst of a land still riddled with Orcs and Goblins, which turned it into a tempting and vulnerable goal. It was just a matter of time before Dwarfs were forced to relinquish their dominion over Gunbad once more. After this defeat, Dwarfs haven't had enough strength to retake the mines to the East of the Worlds Edge Mountains.'' | ''While the bulk of the Dwarf armies were still returning from their victorious campaign against the Elves, disaster came over the Worlds Edge Mountains. Earthquakes covered the mountain passes with rubble, isolating temporarily holds and mines. Gunbad Dwarfs fought valiantly when the Greenskins came, but defeat was inevitable. Over two hundred years ago, Dwarfs came back to Gunbad in great numbers. Led by Logazor Brightaxe, they managed to retake the mines, but this victory left Gunbad isolated in the midst of a land still riddled with Orcs and Goblins, which turned it into a tempting and vulnerable goal. It was just a matter of time before Dwarfs were forced to relinquish their dominion over Gunbad once more. After this defeat, Dwarfs haven't had enough strength to retake the mines to the East of the Worlds Edge Mountains.'' | ||
== | == Updated 2025 Boss Guides == | ||
The Dungeon was rebuilt starting in October 2025, shifting into new Lua code and with many new or restored mechanics. You can find a list of those below: | |||
The | |||
You can find a | |||
== Left Wing == | == Left Wing == | ||
| Line 119: | Line 81: | ||
Key Mechanics: | Key Mechanics: | ||
*Focus down Griblik, the Squig boss, first. Once he's dead, | *Damage boost: If Griblik and Ol Greenwingz are close to each other, each will gain a 30% Damage increase to all abilities. | ||
* | **This damage increase is visually marked by a Sword Icon above their heads. | ||
*Your cooldowns will get | *Focus down Griblik, the Squig boss, first. Once he's dead, Ol Greenwingz will join him in a suicide pact and fall next to his Squig brother. | ||
*Undefendable Chomp: Griblik will hit the tank for 20% of the tank's total HP. | |||
*Ol Greenwingz will spawn Eggs during this fight. Avoid using AOE damage here, as these eggs will pop, causing a Green Puddle to appear at the feet of whoever popped them. If these spawn, move the boss away from them. | |||
*Far-reaching Spittle: Ol Greenwingz will periodically hit the furthest player from them for 35% of that player's total HP. | |||
*Healers: Your party's cooldowns will get periodically increased by Ol Greenwingz. All healers, regardless of class, can cleanse this 60 second debuff, so start by cleansing yourself and then your party members. | |||
The gold bags from the Griblik fight will grant the [[Redeye Set|Redeye Gloves/Boots]]. | |||
== Second Boss: Bilebane the Rager ''(Optional)'' == | == Second Boss: Bilebane the Rager ''(Optional)'' == | ||
[[File:Bilebane the Rager.png|thumb|Bilebane the Rager.]] | [[File:Bilebane the Rager.png|thumb|Bilebane the Rager.]] | ||
Bilebane the Rager is technically an optional boss, but almost every group kills him because he's very much | Bilebane the Rager is technically an optional boss, but almost every group kills him because he's very much in the way to the next boss. | ||
Key mechanics: | Key mechanics: | ||
*Tank him facing away from the group. | *Tank him facing away from the group. | ||
*When he raises his arms, use a Taunt or an interrupt to prevent him damaging and knocking back allies. | |||
*Be ready to quickly heal the tank and those in melee range from sudden damage bursts. | *Be ready to quickly heal the tank and those in melee range from sudden damage bursts. | ||
*Bilebane will periodically spew vomit on the Tank. This applies an incoming heal debuff, so healers can cleanse this off quickly to remove it. | |||
Beyond that, he's a very easy boss. Bilebane the Rager drops Gunbad Jewelry, and has a chance to drop the rare purple variants. | Beyond that, he's a very easy boss. Bilebane the Rager drops Gunbad Jewelry, and has a chance to drop the rare purple variants. | ||
| Line 142: | Line 110: | ||
== Third Boss: Garrolath the Poxbearer == | == Third Boss: Garrolath the Poxbearer == | ||
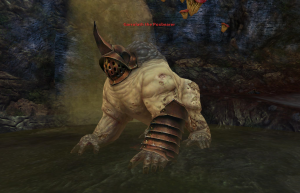
[[File:Garrolath the Poxbearer.png|thumb|Garrolath will | [[File:Garrolath the Poxbearer.png|thumb|Garrolath will reduce your party's outgoing damage. Take a shower at the nearby rushing water to remove this debuff!]] | ||
Garrolath the Poxbearer is the third boss of the Left Wing | Garrolath the Poxbearer is the third boss of the Left Wing. | ||
Before fighting him, be sure to clear out the adds within the room so your party has some room to manuever. | Before fighting him, be sure to clear out the adds within the room so your party has some room to manuever. | ||
| Line 149: | Line 117: | ||
Key Mechanics: | Key Mechanics: | ||
* | *Putrid Stink: As the fight continues, you will gain a stack of Putrid Stink, reducing your outgoing damage by 5% per stack. This can stack up to 15 times. | ||
* | *Take a Shower: By moving your character under the Rushing Water, the shower will remove the Putrid Stink from your body, just like in real life. | ||
** If you wait and remove the stink after gaining 7 stacks or more, you will not only purge the debuff but also convert all debuff stacks into a special buff called Freshly Rejuvenated. | |||
*''' | *Freshly Rejuvenated: Increases your outgoing damage by 7% per stack. While you are under the effects of Freshly Rejuvanted, you cannot be debuffed by Putrid Stink. | ||
*Knockback: The boss will knock the group back at 90% and every 20% HP after that. Position yourself with your back to the wall to avoid being sent far off. | |||
*'''The boss will summon Nurgling champions every 10% of HP he loses.''' When a Nurgling is near him, it will restore 1% of his HP every few seconds. | |||
**The lower Garrolath's HP goes, the more Nurglings he will spawn. You can either move these away from the boss if you have two tanks, or you can quickly AOE them down. | |||
**Timing your Freshly Rejuvenated buff on AOE DPS can help kill these very quickly. | |||
That's all for Garrolath - once dead, grab your bag and move on - an optional boss lies just ahead! Garrolath's Gold Bags include the [[Redeye Set|Redeye Gloves/Boots]]. | |||
== Fourth Boss: Kurga Da Squig Maker == | |||
Kurga Da Squig Maker is an optional small goblin boss located near the Slime Wall to your right as you move forward. | |||
Key Mechanics: | |||
*Knock-up: Kurga will periodically send one player flying into the air. When this player lands, they will deal large damage to all allies nearby. | |||
**Players with detaunt can use this to reduce the damage dealt by this ability. | |||
*Slime Nursery: Green Slime Bubbles will appear as the fight begins. Each of these will spawn a Squig Champion NPC every 5 seconds. Quickly hit the Bubble to pop it and stop the adds spawning. | |||
*Tanks: This boss has a damage boost, so watch for your shatter enchantment / buff option to light up and immediately use it if so. | |||
This boss drops additional Gunbad Jewelry and has a chance of dropping a Purple Seed. | |||
== Fifth Boss: Foul Mouf Da Ungry == | == Fifth Boss: Foul Mouf Da Ungry == | ||
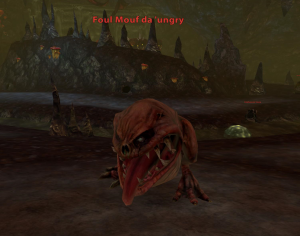
[[File:Foul Mouf da ungry.png|thumb|Foul Mouf | [[File:Foul Mouf da ungry.png|thumb|Foul Mouf grows more and more hangry as you damage him. Feed him a Mushroom to sate his hunger!]] | ||
A large Squig boss stands between you and the final boss of the left wing: '''Foul Mouf Da Ungry!''' | A large Squig boss stands between you and the final boss of the left wing: '''Foul Mouf Da Ungry!''' | ||
Key Mechanics: | Key Mechanics: | ||
* | *Hangry: For every 5% of HP lost, the boss will gain one stack of "Hangry", increasing his damage by 10%. | ||
*'''Tank: You'll | *Mushrooms: Four Mushrooms spawn as the fight begins. Moving the boss to any of these Mushrooms will cause him to eat it, removing any stacks of "Hangry". | ||
**Mushrooms do not respawn unless the fight is restarted, so time their use carefully. | |||
*'''Tank: You'll be in charge of moving the boss to mushrooms when it's time to clear his Hangry stacks. The timing on this is up to you depending on your avoidance and total HP. | |||
* | *Squig Vomit: At every 10% HP lost, the boss will vomit on a random player. This vomit is a DoT that will tick for 15% of that player's HP every few seconds. | ||
**Healers, it's your time to shine. Cleanse this DoT quickly once it applies. (You'll see text letting you know who has it.) | |||
Once the boss is dead, | Once the boss is dead, all barriers blocking the final boss of the wing should be open. The gold bags from this boss grant the [[Redeye Set|Redeye Gloves/Boots]]. | ||
== Sixth Boss: Glomp da Squig Masta == | == Sixth Boss: Glomp da Squig Masta == | ||
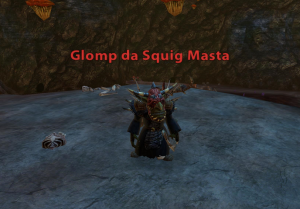
[[File:Glomp da Squig Masta.png|thumb|If his mechanics are working, Glomp is (by far) the hardest boss in Gunbad. Good luck!]] | [[File:Glomp da Squig Masta.png|thumb|If his mechanics are working, Glomp is (by far) the hardest boss in Gunbad. Good luck!]] | ||
Once upon a time, this boss ended more runs of Gunbad than we can count. His new mechanics are much more forgiving, as long as you have some basic awareness. | |||
'''Phase 1 Key Mechanics:''' | '''Phase 1 Key Mechanics:''' | ||
* | *Green Goo: The Boss will randomly select a player to throw Green Goo on. This player is marked with a red light and text which announces the mechanic to them. Once marked, they have 8 seconds to move away from the group and drop the puddle. | ||
**Once the light disappears, there is a further 1-2 delay before the puddle begins to damage. So once the light is gone, you can safely move back into the group. | |||
** | *Tank: This boss doesn't move from his starting location, but he can turn around. | ||
*Healers: Most healers stand up top where the Boss Spawns during this fight, in order to have full line-of-sight around the room. However, watch for Puddles as these can still drop on you here. | *Healers: Most healers stand up top where the Boss Spawns during this fight, in order to have full line-of-sight around the room. However, watch for Puddles as these can still drop on you here. | ||
*This boss will | *Guard-Swap: This boss will select a player at random and say he has his sights on them. This player is marked with a Shield icon, which signifies the tank to Guard Swap to this player. | ||
*At 90%, 60%, and 40%, this boss will summon Squigs to come attack your group. Make sure to have your tank challenge these and AOE them down with your DPS. | *At 90%, 60%, and 40%, this boss will summon Squigs to come attack your group. Make sure to have your tank challenge these and AOE them down with your DPS. | ||
**Once all squigs are defeated, or after 30 seconds, the boss loses his temporary damage immunity and can be hit again. | |||
*Terror: This boss fight causes Terror, meaning you cannot revive anyone who dies. | *Terror: This boss fight causes Terror, meaning you cannot revive anyone who dies. | ||
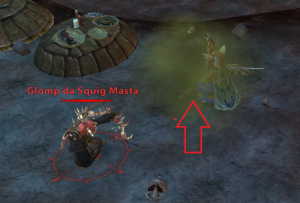
[[File:Glomp Gas Cloud.png|thumb| | [[File:Glomp Gas Cloud.png|thumb|]] | ||
'''Phase 2:''' At 30%, Glomp will hop into his Squig Armor | '''Phase 2:''' At 30%, Glomp will hop into his Squig Armor. '''Your Party should spread out''' during this time and wait for him to begin his damage attack. | ||
*When Glomp says: "''' | *When Glomp says: "''''Ere comes da pain!''", quickly '''get away from the boss''' - he will bounce and deal '''huge damage to anyone nearby him''', and this damage doubles for every player he hits! | ||
*This stomp can instantly kill almost anyone in the party if they're hit more than once. | *This stomp can instantly kill almost anyone in the party if you're fully stacked and they're hit more than once. | ||
*Once he's done stomping, you have a small window to DPS him before he does his next stomp. Rinse and repeat this strategy until the boss is dead. | *Once he's done stomping, you have a small window to DPS him before he does his next stomp. Rinse and repeat this strategy until the boss is dead. | ||
*It's also possible to leave only a couple targets on Glomp and heal through the damage caused by this stomp. You will always have a couple seconds after you see "Ere comes da pain!" to move away. | |||
From 30% down, Glomp poses very little direct damage threat beyond his AOE, so just '''take your time and back off early if you're worried about dying to his stomp.''' Slow and steady gets the boss kill. | From 30% down, Glomp poses very little direct damage threat beyond his AOE, so just '''take your time and back off early if you're worried about dying to his stomp.''' Slow and steady gets the boss kill. | ||
Once he's done, you've cleared | Once he's done, you've cleared the left wing of Gunbad - congratulations! If you win a Gold Bag, you'll find the [[Redeye Set|Redeye Shoulders]] inside. | ||
| Line 215: | Line 191: | ||
The Right Wing of Gunbad includes Four Bosses and one Optional boss. | The Right Wing of Gunbad includes Four Bosses and one Optional boss. | ||
As you cross the bridge that begins this wing, you can skip some of the starting mobs and make your way into the open large room. | |||
The first boss lies ahead, and spawns either as you walk up to the giant treasure chest, or when you aggro the troll just down the hill to the right of it. | |||
== First Boss: Brood Mother Szikalax ''(Optional)'' == | == First Boss: Brood Mother Szikalax ''(Optional)'' == | ||
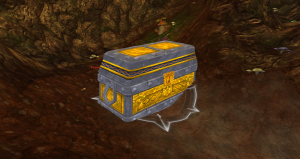
[[File:Brood Mother.png|thumb| Approach the giant treasure chest to trigger the optional ''Brood Mother'' boss fight.]] | |||
Brood Mother Szikalax guards a giant treasure chest and is an optional boss near the start of the Right Wing. | Brood Mother Szikalax guards a giant treasure chest and is an optional boss near the start of the Right Wing. | ||
| Line 228: | Line 208: | ||
== Second boss: Masta Wrangla Glix == | == Second boss: Masta Wrangla Glix == | ||
Masta Wrangla Glix really loves trolls. | Masta Wrangla Glix is a little goblin that really loves trolls. | ||
Key Mechanics: | Key Mechanics: | ||
*Tank: This boss will spawn troll adds | *'''Tank: This boss will spawn troll adds at 80%, 60%, 40%, and 20% HP'''. Pick these up if solo or have the off-tank grab them. | ||
*DPS: You can AOE down the troll adds to keep the pressure light on the tank. | *DPS: You can AOE down the troll adds to keep the pressure light on the tank. | ||
*Healers: The | **They grow up so fast: If the Young Trolls are not killed quickly enough, they will upgrade into Adult Trolls and deal much more damage. | ||
*Healers: The 20% spawn of Trolls are Adult Trolls and hit hardest, so if things are smooth '''save your morales for any burst damage''' near the tail-end of this fight. | |||
This boss drops the [[Redeye Set|Redeye Gloves/Boots]]. | |||
Elder | == Third Boss: Elder Kizzig da Waagha == | ||
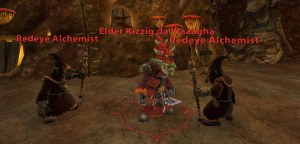
[[File:Elder Kizzig.png|thumb| When fighting Elder Kizzig, be careful not to kill ''Chipfang da Lit'l'', or he'll enrage! ]] | |||
'''Elder Kizzig''' is the first fight in the right wing that will require more effort than a regular tank and spank. You have a couple options here, but most important: | |||
*In this fight, there is a small snotling named ''Chipfang'' that must be kept alive. If it dies (and it dies easily), the Boss will enrage and kill everyone. | *'''In this fight, there is a small snotling named ''Chipfang'' that must be kept alive.''' If it dies (and it dies easily), the Boss will enrage and kill everyone. | ||
This means you have at least two options when fighting this boss: | This means you have at least two options when fighting this boss: | ||
*Either use purely Single Target damage to avoid hurting Chipfang, ''or'': | *Either use purely Single Target damage to avoid hurting Chipfang, ''or'': | ||
*Have an off-tank, Healer, or even DPS | *Have an off-tank, Healer, or even DPS pull Chipfang away from the fight, so your party can AOE safely. With the new food mechanic, any class can do this. | ||
Key Mechanics: | Key Mechanics: | ||
*This boss will | *'''Knockdown: This boss will knock you down every 20% HP lost''', preventing abilities for 2 seconds. | ||
*Elder Krizzig will spawn more Snotlings throughout the fight. You can AOE these down as long as Chipfang is far enough away. | *Elder Krizzig will spawn more Snotlings throughout the fight. You can AOE these down as long as Chipfang is far enough away. | ||
*Chipfang's Chippys: 5 plates of food can be found on the floor near where Elder Kizzig spawns. Interacting with any of these food plates will increase a player's aggro on Chipfang considerably, usually forcing Chipfang to move to them. | |||
*Chipfang's Hunger: Chipfang will periodically get hungry, and will announce this while changing to a new target. He will wait 2 seconds before moving to this target, so have whoever is managing his aggro use a plate of food in this window to easily pull him back as needed. | |||
Elder Krizzig drops [[Redeye Set|Redeye Boots]]. | Elder Krizzig drops [[Redeye Set|Redeye Gloves or Boots]]. | ||
== Fourth Boss: Herald of Solithex == | == Fourth Boss: Herald of Solithex == | ||
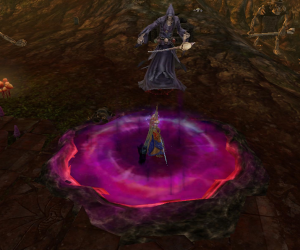
[[File:Herald of Solithex.png|thumb| Avoid the Herald of Solithex' AOE puddles, which use the same graphic as the Sorc's Pit of Shades.]] | |||
The next room contains a number of Gravestones, which will '''spawn Champion Dwarf enemies''' if they are attacked directly or with AOE. There's a cooldown before they can spawn again, so it's recommended to purposefully spawn and kill these adds prior to the next fight to make things easy on your healers. | The next room contains a number of Gravestones, which will '''spawn Champion Dwarf enemies''' if they are attacked directly or with AOE. There's a cooldown before they can spawn again, so it's recommended to purposefully spawn and kill these adds prior to the next fight to make things easy on your healers. | ||
The '''Herald of Solithex''' is a Scythe-wielding Wraith and the second-to-last boss of the Right Wing. Even for new groups, it's a fairly easy boss to kill thanks to a Respawn point nearby that allows dead players to resurrect and quickly hop back to the fight. | |||
The '''Herald of Solithex''' is a Scythe-wielding Wraith and the second-to-last boss of the Right Wing. Even for new groups, it's | |||
Key Mechanics: | Key Mechanics: | ||
*This boss will pull everyone towards it, then soon after spawn a Purple Puddle on the ground. (Visual: The same as the Sorc's Pit of Shades). Quickly step out of these puddles and have your Tank move the boss. | *This boss will pull everyone towards it, then soon after spawn a '''Purple Puddle on the ground'''. (Visual: The same as the Sorc's Pit of Shades). '''Quickly step out of these puddles''' and have your Tank move the boss. | ||
*Tank: This boss can cleave hard, so keep it facing away from your healers and group. Move it each time that it spawns another puddle. | *Tank: This boss can cleave hard, so keep it facing away from your healers and group. Move it each time that it spawns another puddle. | ||
*At 50% Boss Health, a Dwarf Boss will also spawn. | *Heal Debuff: When cleaving, this boss can also apply a 50% incoming Heal Debuff, which is marked by a red broken heart above a player's head. All healers can cleanse this off. | ||
*'''At 50% Boss Health''', a Dwarf Boss named '''Logazor Brightaxe''' will also spawn. While alive, the Herald will take 60% less damage. | |||
*Mourkain Empowerment: While Logazor and the Herald of Solithex are near each other, each will gain a 30% damage increase. | |||
*Killing Logazor quickly will cause a magical backlash on the Herald called ''Slipping Power'', increasing all incoming damage to the boss for the remainder of the fight. | |||
**Alternatively, you can ignore Logazor and burn through the damage reduction, but be aware that Logazor has true damage (listed below), so make sure healers are on their toes in case both hit near each other. | |||
*Undefendable Smash: Logazor will periodically hit his target for 50% of their total HP. His auto-attack damage is quite low, so it is possible to survive this on a non-tank. | |||
If you die during this fight, you can respawn and run down the hill nearby to jump right back into the fight. | If you die during this fight, '''you can respawn''' and run down the hill nearby to jump right back into the fight. | ||
The Herald of Solithex drops [[Redeye Set|Redeye Gloves/Boots]]. | The Herald of Solithex drops [[Redeye Set|Redeye Gloves/Boots]]. | ||
== Fifth Boss: Masta Mixa == | == Fifth Boss: Masta Mixa == | ||
[[File:Masta Mixa.png|thumb| Focus down Masta Mixa's staff when he spawns it, and watch out for the green fists!]] | |||
The final boss of the Right Wing is the Masta Mixa. The new version of this boss has a number of mechanics to watch for: | |||
The | *Gitzappa da Stikk: As the fight begins, the boss will spawn a Staff named Gitzappa that locks down a single player, preventing them from moving or using any abilities. Destroy this quickly to free the locked down player. | ||
*At 50%, Masta Mixa will decide that two stikks are better than one, and will spawn two sticks with lower HP. Like before, destroy both to free the locked player. | |||
*At 20% HP, Masta Mixa desperately tries to one-up himself with three sticks all locking down a player. These have even less HP than before, and must all be destroyed to free the locked player. | |||
*'''Fists of Gork: The boss will summon two giant green fists that will smash the ground and chase one member of your party.''' The targeted player will be announced in chat, so have that person kite the fists so they don't kill your group. | |||
**A new player will be targeted randomly by the fists every ~30 seconds after they first appear. | |||
**Some groups also just heal through these fists. This is possible if your group is strong enough, but watch out in case your healer gets locked down during the second or third Staff phases. | |||
*Reinforcements: As the fight continues, you'll see additional adds appearing, with large groups appearing at 60% and 10% HP. These die very quickly (just a few hits from your DPS is enough) so kill them fast and hop back to the boss. | |||
**The extra adds start out very weak, but if allowed to survive, gradually grow in power. When empowered, the Sword Icon appears above their head to warn that their damage is increasing. Don't let them survive too long! | |||
As long as you don't run the Green fists into the group, or forget to focus down the staff, you should have a pretty easy time burning down this boss. | As long as you '''don't run the Green fists into the group''', or forget to focus down the staff phases, you should have a pretty easy time burning down this boss. | ||
Once Masta Mixa is defeated, two members of your party will get the [[Redeye Set|Redeye Helmet]] within their Gold Bags. Only the middle wing remains! | Once Masta Mixa is defeated, two members of your party will get the [[Redeye Set|Redeye Helmet]] within their Gold Bags. Only the middle wing remains! | ||
== Middle Wing Guide == | == Middle Wing Guide == | ||
The Middle Wing of Gunbad is the final wing, and includes four bosses and one optional boss. (The optional boss in this wing counts as a "Final" boss and can also be used for Guild Coin quest completion.) | The Middle Wing of Gunbad is the final wing, and includes four bosses and one optional boss. (The optional boss in this wing counts as a "Final" boss and can also be used for [[Guild Coin]] quest completion.) | ||
Start by killing the enemies on the straight, narrow path in front of you. The first of these can also be pulled to the range of your camp guards, who will make short work of them. Just before the path turns right, run straight and drop off of this to skip some mobs and save a little time. | Start by killing the enemies on the straight, narrow path in front of you. The first of these can also be pulled to the range of your camp guards, who will make short work of them. Just before the path turns right, run straight and drop off of this to skip some mobs and save a little time. | ||
| Line 294: | Line 289: | ||
== First Boss: Redeye Big Oaf == | == First Boss: Redeye Big Oaf == | ||
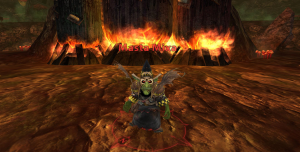
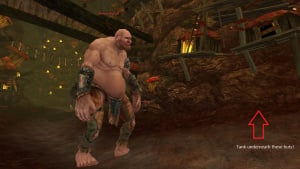
[[File:Redeye Big Oaf.jpg|thumb| | [[File:Redeye Big Oaf.jpg|thumb| The Big Oaf will send you flying into the air, so tank him underneath the Goblin huts to use them as a makeshift roof.]] | ||
The Redeye Big Oaf is a huge Giant and has a few mechanics to make you sweat, but is overall a very easy boss. | The Redeye Big Oaf is a huge Giant and has a few mechanics to make you sweat, but is overall a very easy boss. | ||
Key Mechanics: | Key Mechanics: | ||
*This boss will stomp and send your party flying into the air. By tanking it to the right of where you first see it, you can use the small Goblin hut floors as a roof to prevent your tank flying off. | *This boss will stomp and send your party '''flying into the air.''' By tanking it to the right of where you first see it, you can use the small Goblin hut floors as a roof to prevent your tank flying off. | ||
*This boss cleaves all around it, including behind, so Melee DPS should be guarded here if possible. | *This boss cleaves all around it, including behind, so Melee DPS should be guarded here if possible. | ||
*Healers can choose to stand back at max distance in order to avoid much of the damage pressure here, if they want. | *Healers can choose to stand back at max distance in order to avoid much of the damage pressure here, if they want. | ||
| Line 307: | Line 302: | ||
== Second Boss: Blaz Da' Tamin Masta == | == Second Boss: Blaz Da' Tamin Masta == | ||
As you enter the area before the next boss, Blaz, you'll be introduced to the '''Spider Egg Mechanic.''' (Doesn't that sound fun?) The game wants you to understand that any damage - and we mean ANY - will make these little egg sacs of joy and fun explode, and will send a whole horde of Champion Spider mobs lunging straight at your face! | |||
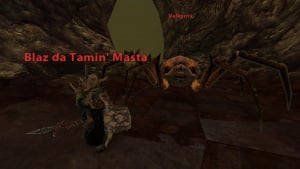
[[File:Blaz da Tamin Masta.jpg|thumb| Focus down Blaz first, and be mindful of the Spider Eggs! ]] | [[File:Blaz da Tamin Masta.jpg|thumb| Focus down Blaz first, and be mindful of the Spider Eggs! ]] | ||
Remember this Egg bit, because it's important on the next fight. As you progress here, most tanks will simply run forward and do large pulls, stacking the mobs together away from Spider Eggs for the DPS to kill. You can also just skip the mobs entirely if you want. | Remember this Egg bit, because it's important on the next fight. As you progress here, most tanks will simply run forward and do large pulls, stacking the mobs together away from Spider Eggs for the DPS to kill. You can also just skip the mobs entirely if you want. | ||
| Line 316: | Line 311: | ||
Key Mechanics: | Key Mechanics: | ||
*You can either Solo tank both bosses together or have an off-tank or strong healer/DPS pull Velkyrix away if your tank has trouble. Most groups tank these with the tank's back to one of the pillars near the bosses. | *You can either Solo tank both bosses together or have an off-tank or strong healer/DPS pull Velkyrix away if your tank has trouble. Most groups tank these with the tank's back to one of the pillars near the bosses. | ||
*Focus down Blaz first. If you kill | *'''Focus down Blaz first.''' If you kill Velkyrrix first, Blaz will enrage and your whole party will curse your name as they die to his enrage damage. Probably. | ||
* | *'''Velkyrrix will spawn Spider Eggs constantly throughout this fight.''' You can either avoid them and go Single Target only, or go full AOE and try to quickly burn the Champion spiders that will pop from the eggs. | ||
*Tank: If you're doing the AOE strat, and even if you aren't, be ready to use your Challenge to AOE taunt the mobs off your healers/ DPS. In Single Target attempts, there's usually at least one person that will accidentally AOE, so be cool and taunt those spiders instantly, because you're a pro and you totally saw that coming. | *Tank: If you're doing the AOE strat, and even if you aren't, be ready to use your Challenge to AOE taunt the mobs off your healers/ DPS. In Single Target attempts, there's usually at least one person that will accidentally AOE, so be cool and taunt those spiders instantly, because you're a pro and you totally saw that coming. | ||
Once Blaz is dead, you need to stop and kill | Once Blaz is dead, you need to stop and kill Velkyrrix. Unlike the Wyvern boss in the Left Wing, Velkyrrix is absolutely ''livid'' that you killed their Gobbo friend and will chase you to the ends of the Dungeon (including the next boss) in order to exact their revenge. Take a moment to burn down Velkyrrix, and the fight is over. | ||
Blaz da Tamin Masta drops the [[Redeye Set|Redeye Gloves]]. | Blaz da Tamin Masta drops the [[Redeye Set|Redeye Gloves/Boots]]. | ||
== Fourth Boss: Arathremia == | == Fourth Boss: Arathremia == | ||
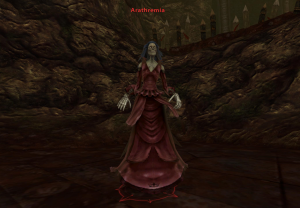
[[File:Arathremia.png|thumb| Be | [[File:Arathremia.png|thumb| Be ready for Arathremia's Cleanse Mechanic and her Ghost adds, which will spawn faster if you kill her quickly.]] | ||
Most groups will run past many of the next mobs, and once you go up the ramp, clear out the Skeleton enemies. On your right you'll see a Wraith named Arathremia, and she's the next boss before the two final bosses of the Middle Wing. | |||
Key Mechanics: | Key Mechanics: | ||
*Tanks: Tank Arathremia towards the left where you first approach her, with your back to the wall. | *Tanks: Tank Arathremia towards the left where you first approach her, with your back to the wall. | ||
*Tanks/DPS: This boss will spawn champion adds as she takes damage, so the faster you burn her, the faster these adds will spawn. High DPS groups may find this fight harder, so if you're solo tanking, plan out which DPS will be your primary AOE damage, and keep them guarded. | *'''Tanks/DPS: This boss will spawn champion adds as she takes damage''', so the faster you burn her, the faster these adds will spawn. High DPS groups may find this fight harder, so if you're solo tanking, plan out which DPS will be your primary AOE damage, and keep them guarded. | ||
*Healers: This boss will CC you multiple times throughout the fight, and may disable one or both of you at the same time as the adds spawn. Pop morales and emergency group heals in these situations to survive. | *'''Healers: This boss will CC you multiple times throughout the fight''', and may disable one or both of you at the same time as the adds spawn. Pop morales and emergency group heals in these situations to survive. | ||
*'''Cleanse: This boss will Mark players for Death''', which puts a skull over their head and kills them after some time passes. Any healer or self-cleanse can remove this. The players affected will also be announced in chat, so keep an eye on it! | |||
If anyone in your group is a [[Scavenging|Scavenger]] and has nothing better to do during this fight, they can also loot the champ mobs after those die for a chance at talisman fragments. Once the boss dies, all the champ mobs will vanish, so get your Scavenge on early. | If anyone in your group is a [[Scavenging|Scavenger]] and has nothing better to do during this fight, they can also loot the champ mobs after those die for a chance at talisman fragments. Once the boss dies, all the champ mobs will vanish, so get your Scavenge on early. | ||
' | ' | ||
With Arathremia defeated, you can either make your way to the final boss, Ard ta Feed, whose portal is up the hill behind her, or take on the Optional Boss '''Wight Lord Solithex''', whose room is located behind you and on the left. | With Arathremia defeated, you can either make your way to the final boss, '''Ard ta Feed''', whose portal is up the hill behind her, or take on the Optional Boss '''Wight Lord Solithex''', whose room is located behind you and on the left. | ||
Arathremia's gold bag rewards the [[Redeye Set|Redeye Gloves/Boots]]. | |||
== Wight Lord Solithex ''(Optional)'' == | == Wight Lord Solithex ''(Optional)'' == | ||
[[File:Wight Lord Solithex.png|thumb|Wight Lord Solithex | [[File:Wight Lord Solithex.png|thumb|Wight Lord Solithex is a fun but challenging fight for new 40 players, and drops the [[Redeye Set|Redeye Belt]].]] | ||
Wight Lord Solithex is one of the | Wight Lord Solithex is a challenging fight but also one of the cooler battles in Gunbad, so if you're taking him on, kudos to you for not skipping out. He's also the only boss that drops the [[Redeye Set|Redeye Belt]], needed to complete the Set Bonus. (This belt is not required for the Ward.) | ||
Positioning matters on this boss, and most groups will have their Healers or Ranged DPS stand up on the ledge behind the Boss as you enter the room. Your Tank and melee DPS will brawl in the middle where the boss starts. | Positioning matters on this boss, and most groups will have their '''Healers or Ranged DPS stand up on the ledge behind the Boss''' as you enter the room. Your Tank and melee DPS will brawl in the middle where the boss starts. | ||
Also: Far in the back of the room, near NPC "Ghoullom" and behind where the healers will stand, is a totem. Remember this location, because it's going to be important at the end of the fight. | Also: Far in the back of the room, near NPC "Ghoullom" and behind where the healers will stand, '''is a totem'''. Remember this location, because it's going to be important at the end of the fight. | ||
Key Mechanics: | Key Mechanics: | ||
*This boss has a lifesteal mechanic. When he says | *'''This boss has a lifesteal mechanic.''' When he says slams his sword into the ground and kneels, use your tank's Taunt or any Interrupt to stop him from healing. You can also move out of the purple AOE to avoid it. | ||
*Tank: Keep the boss facing away from the group, as usual. But also save your AOE Challenge, because you'll need it for upcoming adds, like: | *Tank: Keep the boss facing away from the group, as usual. But also save your AOE Challenge, because you'll need it for upcoming adds, like: | ||
*At 70% HP, the boss will summon four giant Skeleton Champions. The Tank can AOE Challenge these and the DPS should AOE them and then continue on the boss. | *'''At 70% HP, the boss will summon four giant Skeleton Champions.''' The Tank can AOE Challenge these and the DPS should AOE them and then continue on the boss. | ||
*At 40% HP, the boss will spawn four broken pillars inside the arena. Each of these will constantly spawn skeleton mobs, and if you don't destroy them fast, your party will be overrun. Have your DPS all focus down the same pillars together, one at a time, to stop the skeletons from piling up. Your tank can also Challenge here to pull the adds off the group. Once the pillars are handled, AOE down any remaining skeletons. | *'''At 40% HP, the boss will spawn four broken pillars inside the arena.''' Each of these will constantly spawn skeleton mobs, and if you don't destroy them fast, your party will be overrun. | ||
*At 20% HP, the boss will grow huge and glow red, and his movement speed will slow considerably. Here, the tank should kite the boss around the center of the room where they're already tanking, and all DPS should move to the back of the room | **Have your DPS all focus down the same pillars together, one at a time, to stop the skeletons from piling up. Your tank can also Challenge here to pull the adds off the group. Once the pillars are handled, AOE down any remaining skeletons. | ||
*'''At 20% HP, the boss will grow huge and glow red''', and his movement speed will slow considerably. | |||
**Here, the tank should kite the boss around the center of the room where they're already tanking, and all DPS should move to the back of the room to destroy the '''Soulstone Totem''' mentioned earlier. It's now also glowing red, to indicate that you can DPS it down. | |||
*Once the Totem is destroyed, the boss will return to normal, and you can DPS it down to 0! | *Once the Totem is destroyed, the boss will return to normal, and you can DPS it down to 0! | ||
Note: Once you beat this boss, '''do not take the portal it spawns''' if you want to move on to the final boss, Ard Ta Feed. Instead, just run back through the door you entered from. | Note: Once you beat this boss, '''do not take the portal it spawns''' if you want to move on to the final boss, Ard Ta Feed. Instead, just run back through the door you entered from. | ||
Wight Lord Solithex counts as a Final Boss, awarding Credit for the Guild Coin quest to defeat a Dungeon boss, and granting two players who win Gold Bags the [[Redeye Set|Redeye | Wight Lord Solithex counts as a Final Boss, awarding Credit for the [[Guild Coin]] quest to defeat a Dungeon boss, and granting two players who win Gold Bags the [[Redeye Set|Redeye Belt]]. | ||
== Ard 'Ta Feed == | == Ard 'Ta Feed == | ||
| Line 371: | Line 369: | ||
Key Mechanics: | Key Mechanics: | ||
*Buttons: Two members of your party should stand on either side of the large Pillar in this room. The pillar will light up at 80%, 60%, 40%, and 20% boss HP - when you see the lights on it, keep clicking the button until finally both are clicked together, and you see a green laser hitting the boss. | *'''Slime Bubbles:''' At 90%, Squigs will spawn from the Slime Bubbles around the fight. In normal mode, there are 4 bubbles. Have your DPS destroy these quickly. They don't respawn afterward. | ||
*Tank: Hold the boss with your back to the large stone pillar on either the right or left side of the boss. (This way you maintain good line-of-sight with your heals, who may far away on buttons.) | *'''Healing: Ard Ta Feed will heal based on the amount of snack squigs that get near him.''' Heal debuffs will reduce this, but it is generally advised to destroy the Slime Bubbles as this is usually the faster way to kill him. | ||
* | *'''Buttons: Two members of your party should stand on either side of the large Pillar in this room.''' The pillar will light up at 80%, 60%, 40%, and 20% boss HP - when you see the lights on it, keep clicking the button until finally both are clicked together, and you see a green laser hitting the boss. | ||
*'''Tank: Hold the boss with your back to the large stone pillar on either the right or left side of the boss.''' (This way you maintain good line-of-sight with your heals, who may be far away on buttons.) | |||
*Herd of Squigs: In the Hard Mode encounter, a Herd of Squigs will periodically chase one player around. This deals damage and also reduces the AP and Morale of any player next to them. It's recommended to move this player out of the group slightly. | |||
*Knockback: The boss will sometimes cause AOE Knockbacks, so just run back into position if they happen. Your tank should be fine for these if their back is up against the pillar. | *Knockback: The boss will sometimes cause AOE Knockbacks, so just run back into position if they happen. Your tank should be fine for these if their back is up against the pillar. | ||
| Line 384: | Line 383: | ||
== Trivia == | == Trivia == | ||
*There's a '''secret area''' at the very bottom of Gunbad that you can access via a teleporter rift in the starting room. Here you'll find many '''level 50+ Lord NPCs''', all of whom are named after '''Testers''' who supported the ''Return of Reckoning'' Project over the years. | |||
*There's a '''secret area''' at the very bottom of Gunbad that you can access via a teleporter rift in the starting room. | |||
**Here you'll find many '''level 50+ Lord NPCs''', all of whom are named after '''Testers''' who supported the ''Return of Reckoning'' Project over the years. | |||
*The friendly NPC "Ghoullum", who is searching for his "Precious", is, of course, a reference to "Gollum", a character featured in the writings of J.R.R. Tolkien. | |||
== Tome of Knowledge Unlocks == | |||
* [[Mount Gunbad History and Lore]] | |||
* [[Mount Gunbad Bestiary unlocks]] | |||
<small> ''Special thanks to Tothmonra and <Gimle> for creating the Video guide linked on this page.'' | <small> ''Special thanks to Tothmonra and <Gimle> for creating the Video guide linked on this page.'' | ||
Latest revision as of 18:46, 21 November 2025
| Mount Gunbad | |
|---|---|
 Mount Gunbad loading graphic | |
| Location | The Badlands |
| Race(s) | Greenskins (formerly Dwarf) |
| Instance info | |
| Type | Dungeon |
| Advised level | 40 |
| Minimum level | 32 |
| Player limit | 6 |
Mount Gunbad
Mount Gunbad is the first level 40 dungeon in Return of Reckoning, and is located in the northwest corner of The Badlands (entrance at 4k,4k).
- This dungeon grants the Red-eye set, which unlocks the Conqueror Ward.
- Every member of your party will get rewards for every boss kill via PQ Bags: 2 Gold, 2 Purple, and 2 Blue. Gold bags include Red-Eye set pieces.
- Mount Gunbad is also one of the only dungeons that drops rare Eternal Seeds for Cultivating, which have a (tiny) chance to drop from any enemy mob of Hero rank or above.
It is possible to take quests within the dungeon starting at level 32, and experienced guilds / groups should have no problem including players in the mid-high 30's.
Your first Gunbad
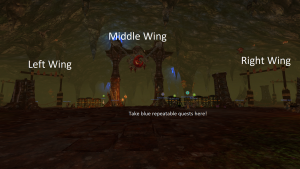
If it's your first time in the Dungeon, make sure to take the Blue Repeatable quests given by the NPC in the starting room.
These quests will guarantee you Redeye armor after defeating certain bosses three times. Just in case you don't roll gold bags, this is a great way to ensure you won't have to rely on RNG to get the gear you need!
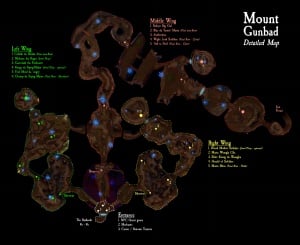
Dungeon Layout
Gunbad features three wings: Left, Right, and Middle. These three can be completed in any order.
Each of the three wings includes at least one Optional Boss, which drops additional loot but can be skipped if the party would like.
To fight the final boss of each wing, you'll need to kill the bosses prior to it in order to open the magical barriers that allow entrance.
Lore
Although Ekrund may have been the richest mine beyond the Worlds Edge Mountains, Gunbad was the greatest and wealthiest of the world - only the biggest fortresses of Karaz Ankor produced more riches.
Located on the eastern slopes of the Worlds Edge Mountains, Gunbad was, and still is the only source of Brynduraz ("shining stone" in Khazalid), a blue gem much valued by Dwarf jewellers. Its gold was so crucial for maintaining the Dwarf army that during the War of Vengeance against the High Elves it wasn't forced to supply troops. But the Dwarfs didn't realize their greatest enemy would come from the East.
While the bulk of the Dwarf armies were still returning from their victorious campaign against the Elves, disaster came over the Worlds Edge Mountains. Earthquakes covered the mountain passes with rubble, isolating temporarily holds and mines. Gunbad Dwarfs fought valiantly when the Greenskins came, but defeat was inevitable. Over two hundred years ago, Dwarfs came back to Gunbad in great numbers. Led by Logazor Brightaxe, they managed to retake the mines, but this victory left Gunbad isolated in the midst of a land still riddled with Orcs and Goblins, which turned it into a tempting and vulnerable goal. It was just a matter of time before Dwarfs were forced to relinquish their dominion over Gunbad once more. After this defeat, Dwarfs haven't had enough strength to retake the mines to the East of the Worlds Edge Mountains.
Updated 2025 Boss Guides
The Dungeon was rebuilt starting in October 2025, shifting into new Lua code and with many new or restored mechanics. You can find a list of those below:
Left Wing
The left wing has Four Bosses and Two Optional Bosses. If mechanics are working properly, this is by far the most difficult wing in the entire dungeon, due purely to its final boss.
At the time of writing this wiki page, the final boss in the Left Wing is bugged and not all mechanics are working properly, which makes it a relatively easy tank-and-spank.
From the entrance, head Left and across the bridge to start your path to the first pair of bosses. Clear the adds and once you enter the first large room, take a left and head to the Healer NPC.
You can drop off behind the healer NPC and survive the fall if you're careful, so do this in order to skip a number of mobs.
Clear the nearby mobs and note that the first boss is just ahead of you!
First Boss: Griblik Da Stinka
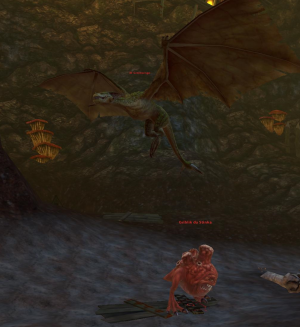
Girblik Da Stinka is actually a dual-boss fight, and your party can handle it a few ways:
- Have a solo tank pull and hold both bosses at once.
- Have an off-tank pull the Wyvern boss and keep it away from Griblik.
- Have a sturdy DPS or Healer pull the Wyvern boss and keep it away from Griblik.
Any of these combinations can work depending on your gear and team composition, so feel free to adapt if you need to. Remember: there's no single "right" way to clear most bosses.
Key Mechanics:
- Damage boost: If Griblik and Ol Greenwingz are close to each other, each will gain a 30% Damage increase to all abilities.
- This damage increase is visually marked by a Sword Icon above their heads.
- Focus down Griblik, the Squig boss, first. Once he's dead, Ol Greenwingz will join him in a suicide pact and fall next to his Squig brother.
- Undefendable Chomp: Griblik will hit the tank for 20% of the tank's total HP.
- Ol Greenwingz will spawn Eggs during this fight. Avoid using AOE damage here, as these eggs will pop, causing a Green Puddle to appear at the feet of whoever popped them. If these spawn, move the boss away from them.
- Far-reaching Spittle: Ol Greenwingz will periodically hit the furthest player from them for 35% of that player's total HP.
- Healers: Your party's cooldowns will get periodically increased by Ol Greenwingz. All healers, regardless of class, can cleanse this 60 second debuff, so start by cleansing yourself and then your party members.
The gold bags from the Griblik fight will grant the Redeye Gloves/Boots.
Second Boss: Bilebane the Rager (Optional)
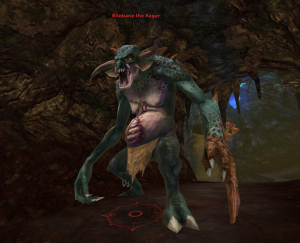
Bilebane the Rager is technically an optional boss, but almost every group kills him because he's very much in the way to the next boss.
Key mechanics:
- Tank him facing away from the group.
- When he raises his arms, use a Taunt or an interrupt to prevent him damaging and knocking back allies.
- Be ready to quickly heal the tank and those in melee range from sudden damage bursts.
- Bilebane will periodically spew vomit on the Tank. This applies an incoming heal debuff, so healers can cleanse this off quickly to remove it.
Beyond that, he's a very easy boss. Bilebane the Rager drops Gunbad Jewelry, and has a chance to drop the rare purple variants.
Now, head into the next room to find...
Third Boss: Garrolath the Poxbearer
Garrolath the Poxbearer is the third boss of the Left Wing.
Before fighting him, be sure to clear out the adds within the room so your party has some room to manuever.
Key Mechanics:
- Putrid Stink: As the fight continues, you will gain a stack of Putrid Stink, reducing your outgoing damage by 5% per stack. This can stack up to 15 times.
- Take a Shower: By moving your character under the Rushing Water, the shower will remove the Putrid Stink from your body, just like in real life.
- If you wait and remove the stink after gaining 7 stacks or more, you will not only purge the debuff but also convert all debuff stacks into a special buff called Freshly Rejuvenated.
- Freshly Rejuvenated: Increases your outgoing damage by 7% per stack. While you are under the effects of Freshly Rejuvanted, you cannot be debuffed by Putrid Stink.
- Knockback: The boss will knock the group back at 90% and every 20% HP after that. Position yourself with your back to the wall to avoid being sent far off.
- The boss will summon Nurgling champions every 10% of HP he loses. When a Nurgling is near him, it will restore 1% of his HP every few seconds.
- The lower Garrolath's HP goes, the more Nurglings he will spawn. You can either move these away from the boss if you have two tanks, or you can quickly AOE them down.
- Timing your Freshly Rejuvenated buff on AOE DPS can help kill these very quickly.
That's all for Garrolath - once dead, grab your bag and move on - an optional boss lies just ahead! Garrolath's Gold Bags include the Redeye Gloves/Boots.
Fourth Boss: Kurga Da Squig Maker
Kurga Da Squig Maker is an optional small goblin boss located near the Slime Wall to your right as you move forward.
Key Mechanics:
- Knock-up: Kurga will periodically send one player flying into the air. When this player lands, they will deal large damage to all allies nearby.
- Players with detaunt can use this to reduce the damage dealt by this ability.
- Slime Nursery: Green Slime Bubbles will appear as the fight begins. Each of these will spawn a Squig Champion NPC every 5 seconds. Quickly hit the Bubble to pop it and stop the adds spawning.
- Tanks: This boss has a damage boost, so watch for your shatter enchantment / buff option to light up and immediately use it if so.
This boss drops additional Gunbad Jewelry and has a chance of dropping a Purple Seed.
Fifth Boss: Foul Mouf Da Ungry
A large Squig boss stands between you and the final boss of the left wing: Foul Mouf Da Ungry!
Key Mechanics:
- Hangry: For every 5% of HP lost, the boss will gain one stack of "Hangry", increasing his damage by 10%.
- Mushrooms: Four Mushrooms spawn as the fight begins. Moving the boss to any of these Mushrooms will cause him to eat it, removing any stacks of "Hangry".
- Mushrooms do not respawn unless the fight is restarted, so time their use carefully.
- Tank: You'll be in charge of moving the boss to mushrooms when it's time to clear his Hangry stacks. The timing on this is up to you depending on your avoidance and total HP.
- Squig Vomit: At every 10% HP lost, the boss will vomit on a random player. This vomit is a DoT that will tick for 15% of that player's HP every few seconds.
- Healers, it's your time to shine. Cleanse this DoT quickly once it applies. (You'll see text letting you know who has it.)
Once the boss is dead, all barriers blocking the final boss of the wing should be open. The gold bags from this boss grant the Redeye Gloves/Boots.
Sixth Boss: Glomp da Squig Masta
Once upon a time, this boss ended more runs of Gunbad than we can count. His new mechanics are much more forgiving, as long as you have some basic awareness.
Phase 1 Key Mechanics:
- Green Goo: The Boss will randomly select a player to throw Green Goo on. This player is marked with a red light and text which announces the mechanic to them. Once marked, they have 8 seconds to move away from the group and drop the puddle.
- Once the light disappears, there is a further 1-2 delay before the puddle begins to damage. So once the light is gone, you can safely move back into the group.
- Tank: This boss doesn't move from his starting location, but he can turn around.
- Healers: Most healers stand up top where the Boss Spawns during this fight, in order to have full line-of-sight around the room. However, watch for Puddles as these can still drop on you here.
- Guard-Swap: This boss will select a player at random and say he has his sights on them. This player is marked with a Shield icon, which signifies the tank to Guard Swap to this player.
- At 90%, 60%, and 40%, this boss will summon Squigs to come attack your group. Make sure to have your tank challenge these and AOE them down with your DPS.
- Once all squigs are defeated, or after 30 seconds, the boss loses his temporary damage immunity and can be hit again.
- Terror: This boss fight causes Terror, meaning you cannot revive anyone who dies.
Phase 2: At 30%, Glomp will hop into his Squig Armor. Your Party should spread out during this time and wait for him to begin his damage attack.
- When Glomp says: "''Ere comes da pain!", quickly get away from the boss - he will bounce and deal huge damage to anyone nearby him, and this damage doubles for every player he hits!
- This stomp can instantly kill almost anyone in the party if you're fully stacked and they're hit more than once.
- Once he's done stomping, you have a small window to DPS him before he does his next stomp. Rinse and repeat this strategy until the boss is dead.
- It's also possible to leave only a couple targets on Glomp and heal through the damage caused by this stomp. You will always have a couple seconds after you see "Ere comes da pain!" to move away.
From 30% down, Glomp poses very little direct damage threat beyond his AOE, so just take your time and back off early if you're worried about dying to his stomp. Slow and steady gets the boss kill.
Once he's done, you've cleared the left wing of Gunbad - congratulations! If you win a Gold Bag, you'll find the Redeye Shoulders inside.
Right Wing Guide
The Right Wing of Gunbad includes Four Bosses and one Optional boss.
As you cross the bridge that begins this wing, you can skip some of the starting mobs and make your way into the open large room.
The first boss lies ahead, and spawns either as you walk up to the giant treasure chest, or when you aggro the troll just down the hill to the right of it.
First Boss: Brood Mother Szikalax (Optional)
Brood Mother Szikalax guards a giant treasure chest and is an optional boss near the start of the Right Wing.
Key Mechanics:
- Tank: As always, face the boss away from group.
- The boss will spawn additional spider mobs which tank can Challenge. DPS can AOE these down quickly.
This boss drops Gunbad Jewelry.
Second boss: Masta Wrangla Glix
Masta Wrangla Glix is a little goblin that really loves trolls.
Key Mechanics:
- Tank: This boss will spawn troll adds at 80%, 60%, 40%, and 20% HP. Pick these up if solo or have the off-tank grab them.
- DPS: You can AOE down the troll adds to keep the pressure light on the tank.
- They grow up so fast: If the Young Trolls are not killed quickly enough, they will upgrade into Adult Trolls and deal much more damage.
- Healers: The 20% spawn of Trolls are Adult Trolls and hit hardest, so if things are smooth save your morales for any burst damage near the tail-end of this fight.
This boss drops the Redeye Gloves/Boots.
Third Boss: Elder Kizzig da Waagha
Elder Kizzig is the first fight in the right wing that will require more effort than a regular tank and spank. You have a couple options here, but most important:
- In this fight, there is a small snotling named Chipfang that must be kept alive. If it dies (and it dies easily), the Boss will enrage and kill everyone.
This means you have at least two options when fighting this boss:
- Either use purely Single Target damage to avoid hurting Chipfang, or:
- Have an off-tank, Healer, or even DPS pull Chipfang away from the fight, so your party can AOE safely. With the new food mechanic, any class can do this.
Key Mechanics:
- Knockdown: This boss will knock you down every 20% HP lost, preventing abilities for 2 seconds.
- Elder Krizzig will spawn more Snotlings throughout the fight. You can AOE these down as long as Chipfang is far enough away.
- Chipfang's Chippys: 5 plates of food can be found on the floor near where Elder Kizzig spawns. Interacting with any of these food plates will increase a player's aggro on Chipfang considerably, usually forcing Chipfang to move to them.
- Chipfang's Hunger: Chipfang will periodically get hungry, and will announce this while changing to a new target. He will wait 2 seconds before moving to this target, so have whoever is managing his aggro use a plate of food in this window to easily pull him back as needed.
Elder Krizzig drops Redeye Gloves or Boots.
Fourth Boss: Herald of Solithex
The next room contains a number of Gravestones, which will spawn Champion Dwarf enemies if they are attacked directly or with AOE. There's a cooldown before they can spawn again, so it's recommended to purposefully spawn and kill these adds prior to the next fight to make things easy on your healers.
The Herald of Solithex is a Scythe-wielding Wraith and the second-to-last boss of the Right Wing. Even for new groups, it's a fairly easy boss to kill thanks to a Respawn point nearby that allows dead players to resurrect and quickly hop back to the fight.
Key Mechanics:
- This boss will pull everyone towards it, then soon after spawn a Purple Puddle on the ground. (Visual: The same as the Sorc's Pit of Shades). Quickly step out of these puddles and have your Tank move the boss.
- Tank: This boss can cleave hard, so keep it facing away from your healers and group. Move it each time that it spawns another puddle.
- Heal Debuff: When cleaving, this boss can also apply a 50% incoming Heal Debuff, which is marked by a red broken heart above a player's head. All healers can cleanse this off.
- At 50% Boss Health, a Dwarf Boss named Logazor Brightaxe will also spawn. While alive, the Herald will take 60% less damage.
- Mourkain Empowerment: While Logazor and the Herald of Solithex are near each other, each will gain a 30% damage increase.
- Killing Logazor quickly will cause a magical backlash on the Herald called Slipping Power, increasing all incoming damage to the boss for the remainder of the fight.
- Alternatively, you can ignore Logazor and burn through the damage reduction, but be aware that Logazor has true damage (listed below), so make sure healers are on their toes in case both hit near each other.
- Undefendable Smash: Logazor will periodically hit his target for 50% of their total HP. His auto-attack damage is quite low, so it is possible to survive this on a non-tank.
If you die during this fight, you can respawn and run down the hill nearby to jump right back into the fight.
The Herald of Solithex drops Redeye Gloves/Boots.
Fifth Boss: Masta Mixa
The final boss of the Right Wing is the Masta Mixa. The new version of this boss has a number of mechanics to watch for:
- Gitzappa da Stikk: As the fight begins, the boss will spawn a Staff named Gitzappa that locks down a single player, preventing them from moving or using any abilities. Destroy this quickly to free the locked down player.
- At 50%, Masta Mixa will decide that two stikks are better than one, and will spawn two sticks with lower HP. Like before, destroy both to free the locked player.
- At 20% HP, Masta Mixa desperately tries to one-up himself with three sticks all locking down a player. These have even less HP than before, and must all be destroyed to free the locked player.
- Fists of Gork: The boss will summon two giant green fists that will smash the ground and chase one member of your party. The targeted player will be announced in chat, so have that person kite the fists so they don't kill your group.
- A new player will be targeted randomly by the fists every ~30 seconds after they first appear.
- Some groups also just heal through these fists. This is possible if your group is strong enough, but watch out in case your healer gets locked down during the second or third Staff phases.
- Reinforcements: As the fight continues, you'll see additional adds appearing, with large groups appearing at 60% and 10% HP. These die very quickly (just a few hits from your DPS is enough) so kill them fast and hop back to the boss.
- The extra adds start out very weak, but if allowed to survive, gradually grow in power. When empowered, the Sword Icon appears above their head to warn that their damage is increasing. Don't let them survive too long!
As long as you don't run the Green fists into the group, or forget to focus down the staff phases, you should have a pretty easy time burning down this boss.
Once Masta Mixa is defeated, two members of your party will get the Redeye Helmet within their Gold Bags. Only the middle wing remains!
Middle Wing Guide
The Middle Wing of Gunbad is the final wing, and includes four bosses and one optional boss. (The optional boss in this wing counts as a "Final" boss and can also be used for Guild Coin quest completion.)
Start by killing the enemies on the straight, narrow path in front of you. The first of these can also be pulled to the range of your camp guards, who will make short work of them. Just before the path turns right, run straight and drop off of this to skip some mobs and save a little time.
Once below, you'll need to pass a number of ranged mobs and Hero Giants - most groups hug the left wall here to skip the Giants, but you can also farm these if you want the rare chance of a Purple Seed drop.
As you pass the last of these, you'll see a large Giant ahead of you... the first boss of the Middle Wing awaits!
First Boss: Redeye Big Oaf
The Redeye Big Oaf is a huge Giant and has a few mechanics to make you sweat, but is overall a very easy boss.
Key Mechanics:
- This boss will stomp and send your party flying into the air. By tanking it to the right of where you first see it, you can use the small Goblin hut floors as a roof to prevent your tank flying off.
- This boss cleaves all around it, including behind, so Melee DPS should be guarded here if possible.
- Healers can choose to stand back at max distance in order to avoid much of the damage pressure here, if they want.
Sometimes this boss will bug out and vanish (likely teleporting itself to the high high vistas it thinks your tank has gone to) - you can solve this by having your tank move around a bit, which should remind the Giant that his people need him down below.
Once the Redeye Big Oaf is defeated, two members of your party will get Gold Bags that contain the Redeye Boots or Gloves.
Second Boss: Blaz Da' Tamin Masta
As you enter the area before the next boss, Blaz, you'll be introduced to the Spider Egg Mechanic. (Doesn't that sound fun?) The game wants you to understand that any damage - and we mean ANY - will make these little egg sacs of joy and fun explode, and will send a whole horde of Champion Spider mobs lunging straight at your face!
Remember this Egg bit, because it's important on the next fight. As you progress here, most tanks will simply run forward and do large pulls, stacking the mobs together away from Spider Eggs for the DPS to kill. You can also just skip the mobs entirely if you want.
Blaz Da' Tamin Masta is a dual-boss fight, and features both Blaz, the small Goblin boss, and Velkyrix, a giant Spider Momma who is ready to not only lay the smack down on your tank but also to lay a whole bunch of eggs in the hopes you might pop some.
Key Mechanics:
- You can either Solo tank both bosses together or have an off-tank or strong healer/DPS pull Velkyrix away if your tank has trouble. Most groups tank these with the tank's back to one of the pillars near the bosses.
- Focus down Blaz first. If you kill Velkyrrix first, Blaz will enrage and your whole party will curse your name as they die to his enrage damage. Probably.
- Velkyrrix will spawn Spider Eggs constantly throughout this fight. You can either avoid them and go Single Target only, or go full AOE and try to quickly burn the Champion spiders that will pop from the eggs.
- Tank: If you're doing the AOE strat, and even if you aren't, be ready to use your Challenge to AOE taunt the mobs off your healers/ DPS. In Single Target attempts, there's usually at least one person that will accidentally AOE, so be cool and taunt those spiders instantly, because you're a pro and you totally saw that coming.
Once Blaz is dead, you need to stop and kill Velkyrrix. Unlike the Wyvern boss in the Left Wing, Velkyrrix is absolutely livid that you killed their Gobbo friend and will chase you to the ends of the Dungeon (including the next boss) in order to exact their revenge. Take a moment to burn down Velkyrrix, and the fight is over.
Blaz da Tamin Masta drops the Redeye Gloves/Boots.
Fourth Boss: Arathremia
Most groups will run past many of the next mobs, and once you go up the ramp, clear out the Skeleton enemies. On your right you'll see a Wraith named Arathremia, and she's the next boss before the two final bosses of the Middle Wing.
Key Mechanics:
- Tanks: Tank Arathremia towards the left where you first approach her, with your back to the wall.
- Tanks/DPS: This boss will spawn champion adds as she takes damage, so the faster you burn her, the faster these adds will spawn. High DPS groups may find this fight harder, so if you're solo tanking, plan out which DPS will be your primary AOE damage, and keep them guarded.
- Healers: This boss will CC you multiple times throughout the fight, and may disable one or both of you at the same time as the adds spawn. Pop morales and emergency group heals in these situations to survive.
- Cleanse: This boss will Mark players for Death, which puts a skull over their head and kills them after some time passes. Any healer or self-cleanse can remove this. The players affected will also be announced in chat, so keep an eye on it!
If anyone in your group is a Scavenger and has nothing better to do during this fight, they can also loot the champ mobs after those die for a chance at talisman fragments. Once the boss dies, all the champ mobs will vanish, so get your Scavenge on early. ' With Arathremia defeated, you can either make your way to the final boss, Ard ta Feed, whose portal is up the hill behind her, or take on the Optional Boss Wight Lord Solithex, whose room is located behind you and on the left.
Arathremia's gold bag rewards the Redeye Gloves/Boots.
Wight Lord Solithex (Optional)
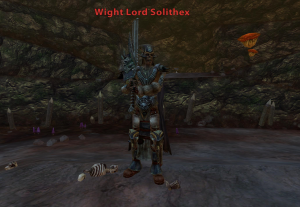
Wight Lord Solithex is a challenging fight but also one of the cooler battles in Gunbad, so if you're taking him on, kudos to you for not skipping out. He's also the only boss that drops the Redeye Belt, needed to complete the Set Bonus. (This belt is not required for the Ward.)
Positioning matters on this boss, and most groups will have their Healers or Ranged DPS stand up on the ledge behind the Boss as you enter the room. Your Tank and melee DPS will brawl in the middle where the boss starts.
Also: Far in the back of the room, near NPC "Ghoullom" and behind where the healers will stand, is a totem. Remember this location, because it's going to be important at the end of the fight.
Key Mechanics:
- This boss has a lifesteal mechanic. When he says slams his sword into the ground and kneels, use your tank's Taunt or any Interrupt to stop him from healing. You can also move out of the purple AOE to avoid it.
- Tank: Keep the boss facing away from the group, as usual. But also save your AOE Challenge, because you'll need it for upcoming adds, like:
- At 70% HP, the boss will summon four giant Skeleton Champions. The Tank can AOE Challenge these and the DPS should AOE them and then continue on the boss.
- At 40% HP, the boss will spawn four broken pillars inside the arena. Each of these will constantly spawn skeleton mobs, and if you don't destroy them fast, your party will be overrun.
- Have your DPS all focus down the same pillars together, one at a time, to stop the skeletons from piling up. Your tank can also Challenge here to pull the adds off the group. Once the pillars are handled, AOE down any remaining skeletons.
- At 20% HP, the boss will grow huge and glow red, and his movement speed will slow considerably.
- Here, the tank should kite the boss around the center of the room where they're already tanking, and all DPS should move to the back of the room to destroy the Soulstone Totem mentioned earlier. It's now also glowing red, to indicate that you can DPS it down.
- Once the Totem is destroyed, the boss will return to normal, and you can DPS it down to 0!
Note: Once you beat this boss, do not take the portal it spawns if you want to move on to the final boss, Ard Ta Feed. Instead, just run back through the door you entered from.
Wight Lord Solithex counts as a Final Boss, awarding Credit for the Guild Coin quest to defeat a Dungeon boss, and granting two players who win Gold Bags the Redeye Belt.
Ard 'Ta Feed
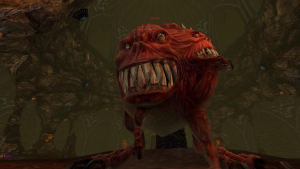
Ard Ta Feed is a monstrously giant Squig whose name is also a simple statement left by Goblins who tried to offer it other food - and were promptly eaten themselves.
If this boss has all mechanics working properly, it can be a tricky fight. However, if the mechanics are broken, like at the time of writing this guide, then this boss is a very simple and straightforward kill.
Before you start the fight, pick two party members who will be assigned to "Buttons". The button mechanic requires both members of your party to click one button each at the same time, which will pacify the boss and reduce his damage on your group.
Key Mechanics:
- Slime Bubbles: At 90%, Squigs will spawn from the Slime Bubbles around the fight. In normal mode, there are 4 bubbles. Have your DPS destroy these quickly. They don't respawn afterward.
- Healing: Ard Ta Feed will heal based on the amount of snack squigs that get near him. Heal debuffs will reduce this, but it is generally advised to destroy the Slime Bubbles as this is usually the faster way to kill him.
- Buttons: Two members of your party should stand on either side of the large Pillar in this room. The pillar will light up at 80%, 60%, 40%, and 20% boss HP - when you see the lights on it, keep clicking the button until finally both are clicked together, and you see a green laser hitting the boss.
- Tank: Hold the boss with your back to the large stone pillar on either the right or left side of the boss. (This way you maintain good line-of-sight with your heals, who may be far away on buttons.)
- Herd of Squigs: In the Hard Mode encounter, a Herd of Squigs will periodically chase one player around. This deals damage and also reduces the AP and Morale of any player next to them. It's recommended to move this player out of the group slightly.
- Knockback: The boss will sometimes cause AOE Knockbacks, so just run back into position if they happen. Your tank should be fine for these if their back is up against the pillar.
Once the boss is defeated, two of your party members will get gold bags containing the Redeye Chestpiece, and with that, your conquest of Gunbad is complete! You can either take the portal the boss spawns to return to the entrance, or go through the room in the back to return to your Capital City.
Congratulations on clearing the Mount Gunbad Dungeon!
Trivia
- There's a secret area at the very bottom of Gunbad that you can access via a teleporter rift in the starting room.
- Here you'll find many level 50+ Lord NPCs, all of whom are named after Testers who supported the Return of Reckoning Project over the years.
- The friendly NPC "Ghoullum", who is searching for his "Precious", is, of course, a reference to "Gollum", a character featured in the writings of J.R.R. Tolkien.
Tome of Knowledge Unlocks
Special thanks to Tothmonra and <Gimle> for creating the Video guide linked on this page.
