Open RvR Guide: Difference between revisions
| (90 intermediate revisions by 2 users not shown) | |||
| Line 1: | Line 1: | ||
==<span style="color:#cc8400"><big> Open RvR Guide</big> </span> == | ==<span style="color:#cc8400"><big> Open RvR Guide</big> </span> == | ||
'''Open RvR''', or ''Realm Versus Realm'', allows for both small-scale and massive battles of hundreds of players as each Realm attempts to gather supply, control objectives, and ultimately either siege or defend Keeps and Fortresses. | '''Open RvR''', or ''Realm Versus Realm'', allows for both small-scale and massive battles of hundreds of players as each Realm attempts to gather supply, control objectives, and ultimately either siege or defend Keeps and [[Fortresses]]. | ||
By capturing enough Keeps, realms can eventually push to attack an enemy Fortress. The Realm which captures the most enemy Fortresses over a 3-day window will then launch | By capturing enough Keeps, realms can eventually push to attack an enemy [[Fortresses|Fortress]]. The Realm which captures the most enemy Fortresses over a 3-day window will then [https://wiki.returnofreckoning.com/City_Sieges {{#tip-img:https://wiki.returnofreckoning.com/images/4/4f/Campaign_Status.png | launch a siege}}] on their enemy's [[City_Sieges|Capital City]]. | ||
This guide includes all the basics of the Open RvR Campaign, so please use it as a reference if you're learning or want to understand more of how the system works! | This guide includes all the basics of the Open RvR Campaign, so please use it as a reference if you're learning or want to understand more of how the system works! | ||
| Line 9: | Line 9: | ||
== <span style="color:#cc8400"><big>Supply Line / Active Zones</big></span> == | == <span style="color:#cc8400"><big>Supply Line / Active Zones</big></span> == | ||
[[File:Pairing Example.png|thumb|You can see active zones by checking your map, or with the useful [https://www.returnofreckoning.com/forum/viewtopic.php?t=22771| State of Realm add-on], as shown here.]] | [[File:Pairing Example.png|thumb|You can see active zones by checking your map, or with the useful [https://www.returnofreckoning.com/forum/viewtopic.php?t=22771| State of Realm add-on], as shown here.]] | ||
Return of Reckoning features three "Pairings", which are sets of zones where battles take place. Those are: | Return of Reckoning features three "Pairings", which are sets of zones where battles take place. Those are: | ||
| Line 14: | Line 15: | ||
*Empire VS Chaos | *Empire VS Chaos | ||
*Dwarfs VS Greenskins | *Dwarfs VS Greenskins | ||
*High Elves VS Dark Elves | *High Elves VS Dark Elves | ||
| Line 24: | Line 25: | ||
If there's a Tie on Fortress Captures, the game will lock Two Pairings and leave only one open, in an attempt to force all fighting there and encourage a tiebreaker. | If there's a Tie on Fortress Captures, the game will lock Two Pairings and leave only one open, in an attempt to force all fighting there and encourage a tiebreaker. | ||
== <span style="color:#cc8400"><big>RvR Tiers</big></span> == | == <span style="color:#cc8400"><big>RvR Tiers</big></span> == | ||
===<big>Tier 1</big> === | ===<big>Tier 1</big> === | ||
Tier 1 has no keeps. Tier 1 is solely fought over Battlefield Objectives, with 50 supplies (each contributing 2%) and capture of all Battlefield Objectives required to lock a zone. | Tier 1 has no keeps. Tier 1 is solely fought over Battlefield Objectives, with 50 supplies (each contributing 2%) and capture of all Battlefield Objectives required to lock a zone. Players level 1-15 can battle here. | ||
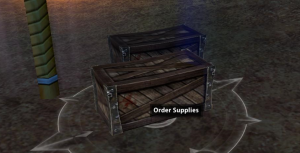
[[File:Supplies Example.png|thumb|In every Tier, Supplies appear as boxes around held Battlefield Objectives.]] | [[File:Supplies Example.png|thumb|In every Tier, Supplies appear as boxes around held Battlefield Objectives.]] | ||
| Line 36: | Line 36: | ||
With the Lord defeated, the keep must be held by attackers while their realm also captures three out of four Battlefield Objectives, and holds them for a minute or two to lock the Zone and move the fight to the next Tier. | With the Lord defeated, the keep must be held by attackers while their realm also captures three out of four Battlefield Objectives, and holds them for a minute or two to lock the Zone and move the fight to the next Tier. | ||
In ''Return of Reckoning'', all players level 16-40 can participate in Tier 2, as well as Tiers 3 and 4, with lower level players receiving a special bolster to help them compete. | |||
===<big>Tiers 3 and 4</big> === | ===<big>Tiers 3 and 4</big> === | ||
| Line 44: | Line 46: | ||
== <span style="color:#cc8400"><big>Battlefield Objectives & Resources </big></span> == | == <span style="color:#cc8400"><big>Battlefield Objectives & Resources </big></span> == | ||
Controlling Battlefield Objectives causes supplies to appear around these flags for your realm. Once your faction holds at least two Battlefield Objectives, supplies will spawn every 40 seconds at each. Higher ranked keeps require more than two Battlefield Objectives to be held, with Three Objectives needed for a 3-star Keep, and all Four for a Four-star keep. | Controlling Battlefield Objectives causes supplies to appear around these flags for your realm. Once your faction holds at least two Battlefield Objectives, supplies will spawn every 40 seconds at each. | ||
Higher ranked keeps require more than two Battlefield Objectives to be held, with Three Objectives needed for a 3-star Keep, and all Four for a Four-star keep. | |||
=== <big>Capturing</big></span> === | === <big>Capturing</big></span> === | ||
Battlefield Objectives will capture for your realm faster if more people are around the Objective. You'll see a timer counting down when on an objective, and once this timer finishes, the objective will be captured for your faction. | Battlefield Objectives will capture for your realm faster if more people are around the Objective. You'll see a timer counting down when on an objective, and once this timer finishes, the objective will be temporarily captured for your faction. | ||
If a member of your Realm is not present at the Objective, it will revert to a Neutral state after a short window of time. (Usually ~2 minutes.) | |||
=== <big>Supplies</big></span> === | |||
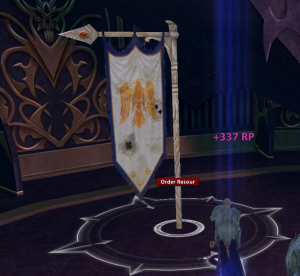
[[File:Resource drop.png|thumb|Bring supplies to your Keep and turn them in at the Resource Drop flag to help your realm, and gain exp, renown, and influence for your party!]] | [[File:Resource drop.png|thumb|Bring supplies to your Keep and turn them in at the Resource Drop flag to help your realm, and gain exp, renown, and influence for your party!]] | ||
Supplies will spawn randomly around your Objective flags roughly every 40 seconds. When carrying supplies, a character will have a large beam of light around their character, which is blue for Order and Red for Destruction. | Supplies will spawn randomly around your Objective flags roughly every 40 seconds. When carrying supplies, a character will have a large beam of light around their character, which is blue for Order and Red for Destruction. | ||
Once you have supplies, bring them to either your Keep or your Warcamp and look for the Resource turn-in flag to contribute them to the fight. This will grant experience, [[Renown]], and Influence for all members of your party who are nearby. | Once you have supplies, bring them to either your Keep or your Warcamp and look for the Resource turn-in flag to contribute them to the fight. This will grant experience, [[Renown]], and Influence for all members of your party who are nearby. | ||
No matter where you turn them in, supplies will grant the same Exp/Renown/Influence numbers. Holding more objectives also boosts this number, increasing it for each objective held. If you're trying to rank up your keep, it's fastest to turn supplies in directly at the Keep, as long as the route is safe. | |||
When increasing your Keep Rank, the value of supplies depends upon the following factors: | |||
* Rank of the keep. | * Rank of the keep. | ||
* Number of players present in the area, to a limit which depends on the current keep rank. The more players are present, the more deliveries are worth. | * Number of players present in the area, to a limit which depends on the current keep rank. The more players are present, the more deliveries are worth. | ||
* The internal population imbalance scaler (referred to as internal or delayed AAO.) | * The internal population imbalance scaler (referred to as internal or delayed AAO.) | ||
* Distance of the host Battlefield Objective from the target. Supplies from further away are worth more. | * Distance of the host Battlefield Objective from the target. Supplies from further away are worth more. | ||
* Destination. Supplies returned | * Destination. Supplies returned to the warcamp contribute only 50%. | ||
If you leave the RvR area while carrying supplies, you'll see a warning to return, and the supplies will decay if held for too long outside of the RvR lake. | If you leave the RvR area while carrying supplies, you'll see a warning to return, and the supplies will decay if held for too long outside of the RvR lake. | ||
Supplies can be dropped when a player is attacked. The base chance to drop supplies is 50%. | '''Supplies can be dropped''' when a player is attacked. The base chance to drop supplies is 50%. | ||
Allied players can also interact with dropped supplies to pick them up, becoming the new carrier. If dropped supplies are not claimed quickly enough, they'll eventually decay. | |||
=== <big>Enemy Supplies</big></span> === | === <big>Enemy Supplies</big></span> === | ||
| Line 80: | Line 88: | ||
== <span style="color:#cc8400"><big>Keeps</big></span> == | == <span style="color:#cc8400"><big>Keeps</big></span> == | ||
Each Realm owns a keep in each contestable zone in Tiers 2, 3 and 4. Keeps form the focal point of the campaign in those zones, and a zone can be won (locked) by a realm when they capture the opposing realm's keep and | Each Realm owns a keep in each contestable zone in Tiers 2, 3 and 4. Keeps form the focal point of the campaign in those zones, and a zone can be won (locked) by a realm when they capture the opposing realm's keep and hold three battlefield objectives while maintaining that captured keep. | ||
=== <big>Keep Rank</big></span> === | === <big>Keep Rank</big></span> === | ||
All Keeps begin at Rank 0, and can be leveled up via Supplies all the way to Rank 5. Each Rank grants benefits, which are listed below in more detail. | All Keeps begin at Rank 0, and can be leveled up via Supplies all the way to Rank 5. Each Rank grants benefits, which are listed below in more detail. | ||
| Line 93: | Line 102: | ||
=== <big>Keep Upgrades (Star Ranks 0-5)</big></span> === | === <big>Keep Upgrades (Star Ranks 0-5)</big></span> === | ||
=== Zero Stars (Base Keep): === | === Zero Stars (Base Keep): === | ||
| Line 98: | Line 108: | ||
Fresh keeps begin at Rank 0 and have no deployable siege weapons or defensive bonuses. | Fresh keeps begin at Rank 0 and have no deployable siege weapons or defensive bonuses. | ||
During this period, focus on controlling Battlefield Objectives, winning skirmish fights with enemies, and running Supply to your Keep. | During this period, focus on controlling at least two Battlefield Objectives, winning skirmish fights with enemies, and running Supply to your Keep. | ||
Even if you're outnumbered or numbers are even, it | ''' Strategic Advice: ''' Even if you're outnumbered or numbers are even, it is still helpful to Rank up your keep thanks to the Defensive bonuses, listed below. For Warbands, moving between Battle Objectives and gathering large amounts of supplies while killing enemy players is generally an effective strategy at this stage. | ||
The Keep for each Realm is '''randomly selected''' when the Zone opens, so consider which Objectives will be most useful to capture - or to deny your enemies in order to stop their progression. | |||
[[File:Keep_star.png|thumb|By increasing the Star Rank of your keep, your realm will benefit from both increased Siege Weapon amounts and additional defensive bonuses.]] | [[File:Keep_star.png|thumb|By increasing the Star Rank of your keep, your realm will benefit from both increased Siege Weapon amounts and additional defensive bonuses.]] | ||
''' Note: ''' '''High [[Renown|Renown Rank]] players ''' can drop a Supply crate when they are killed, so defending delivery routes and winning skirmishes at Battlefield Objectives can also be a good way to secure supplies. | |||
=== One Star Keep: === | === One Star Keep: === | ||
| Line 133: | Line 147: | ||
''' Strategic Advice: '''Because the Postern is locked, blockading the Bottom Floor and forcing the enemy into a tiny chokepoint is recommended, as you can also place Oil here to quickly kill them. | |||
Because the Postern is locked, blockading the Bottom Floor and forcing the enemy into a tiny chokepoint is recommended, as you can also place Oil here to quickly kill them. | |||
''' Note: ''' | ''' Note: ''' | ||
Organization with other players will be fully required at this point to progress and maintain your realm's progression in the zone | At Rank 3, your Keep Requires 3 or more battle objectives to be under your Realm's control in order to generate supplies. Organization with other players will be fully required at this point to progress and maintain your realm's progression in the zone. | ||
=== Four Star Keep: === | === Four Star Keep: === | ||
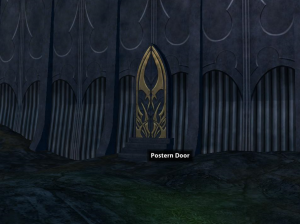
[[File:Postern Example.png|thumb|Look for Postern Doors at both a Keep's outer walls and behind the inner sanctum for additional ways to defend or attack.]] | |||
'''Siege Allowed:''' | '''Siege Allowed:''' | ||
*2 Rams (Requires Guild Rank 20 to Spawn) | *2 Rams (Requires Guild Rank 20 to Spawn) | ||
| Line 151: | Line 163: | ||
''' Strategic Advice: ''' As both Postern doors are locked on 4-star keeps, it is highly recommended to blockade and funnel the Main Gates to prevent the enemy from entering. Placing Oil during this strategy is highly effective, and will kill huge amounts of enemies if near the door. | |||
''' Note: ''' Once Rank 4, your Keep Requires all 4 battlefield objectives to be under control to open supply lines and generate supplies. | |||
=== Five Star Keep: === | === Five Star Keep: === | ||
The zone will automatically lock once the keep hits 5 stars and that realm holds all 4 Battle Objectives. | The zone will automatically lock once the keep hits 5 stars and that realm holds all 4 Battle Objectives. | ||
''' Note: ''' The keep will be reset back to 4 Stars if the enemy captures all 4 Battle Objectives, denying your Realm the lock for the zone. | |||
=== <big>Keep Doors</big></span> === | === <big>Keep Doors</big></span> === | ||
| Line 172: | Line 186: | ||
== <span style="color:#cc8400"><big>Siege Weapons</big></span> == | == <span style="color:#cc8400"><big>Siege Weapons</big></span> == | ||
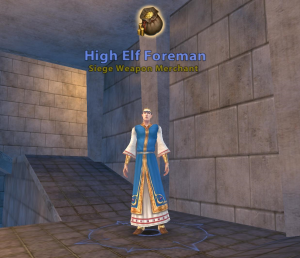
''''' | '''Siege weapons''' can be bought from your realm's Foreman, located in the gatehouse of the keeps outer wall. You only need to purchase each once, with the exception of Boiling Oil, which is consumed upon use. | ||
Every Race has different weapons available, and there are no race restrictions to purchase or deploy. (You can use Empire/Chaos Siege weapons in Dwarf/Greenskin pairings, for example.) | |||
[[File:Siege merchant.png|thumb|Buy Siege weapons from the Weapon merchant, located in Warcamps or the Gatehouse (just above the outer doors) of most Keeps.]] | |||
To use a siege weapon: | |||
* '''Be within range of a Keep owned by your Realm''' | |||
* '''Click the Siege item you'd like to deploy''' in your inventory, or keybind it and press the bound key. | |||
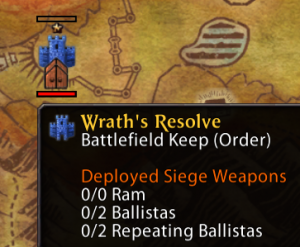
There's a limit on Siege weapon amounts per realm, which you can see by hovering over your keep when looking at your Map. (More on this above, under the "Keep Ranks" section.) | |||
'''To move a Siege Weapon''', simply '''Mount up and then right click the weapon''' once it's deployed. If you're attacked and dismounted, the weapon will also stop moving, so re-mount, then right click it again to reset the tow. | |||
The following siege weapons are available: | |||
==== <big>Cannons</big></span> ==== | ==== <big>Cannons</big></span> ==== | ||
Single Target Cannons are most useful for damaging enemy Siege weapons, like Oil. (Examples: Heavy Dwarf Cannon, Heavy Chaos Hellcannon.) | |||
AOE versions, like the Heavy High Elf/Dark Elf Ballistas and the Heavy Greenskin Supa-Chucka, deal damage in a line. | |||
To fire, right click the cannon after it has been deployed (make sure you are unmounted and it is no longer being towed), and click the crosshair button. The closer the crosshairs get to the center of the screen, the more damage your shot will do. | |||
Allied players can replenish your ammunition on Cannons by turning in supplies at Keeps or Warcamps while a siege is ongoing. If you're defending, there are also built-in Siege weapons on most keep walls, which cannot move but also have infinite shots. | |||
==== <big>Artillery</big></span> ==== | ==== <big>Artillery</big></span> ==== | ||
Artillery | Artillery is useful for damaging enemy players. These weapons can also snare enemies and may deal increased damage if you hit large groups of players at once. | ||
[[File:Wind example.png|thumb|AOE Artillery is great for hitting clumps of enemy players. Take note of the Wind, which will slightly adjust where your shot lands.]] | |||
Artillery weapons include: Heavy Empire Hellblaster, Heavy Dwarf Organ Gun, Heavy High Elf Bolt Thrower, Heavy Chaos Tri-Barrel, Heavy Greenskin Rock Lobba and Heavy Dark Elf Bolt Thrower. | |||
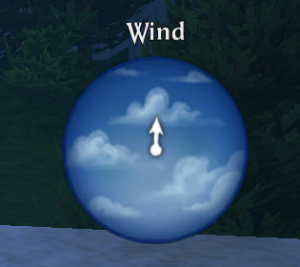
To fire, right click while unmounted and select the middle target option. AOE damage artillery will have a "Wind" effect you should watch for, which will slightly adjust where your damage hits in the direction of the wind. | |||
As with Cannons, allied players in the zone can replenish your ammunition by turning in supplies to a Keep or Warcamp during a siege. | |||
==== <big>Rams</big></span> ==== | ==== <big>Rams</big></span> ==== | ||
'''Rams''' are used to destroy enemy Keep Doors. | |||
*To place the Ram, the person towing should run straight into the enemy door, wait a moment for the ram to catch up, and then dismount and right click the Ram to fully 'set' it. | |||
*Sometimes Rams can be placed incorrectly or simply bug out - to reset the ram, just Mount up, tow the Ram away a short distance, then place it again on the door. It's also wise to move a Ram if it's taking significant damage from enemy players. | |||
If a Ram is not placed on an enemy door within 10 minutes of being spawned, or if the person who spawned it moves far away from it, it will take heavy damage and eventually destroy itself. | |||
Once a Ram is set on a Door, the first person to use it will begin a "Swing" mini-game, which shows a power bar. All four players on the ram want to click when the power slider is as close to the end of the power meter as possible, which will deal 100% damage. | |||
However, if they miss, it will only deal 50% damage, so it's fine to aim for consistent 95% swings if your frames skip a bit or you keep hitting 50's. | |||
'''Destroying a Ram:''' If you're being sieged, you can damage an enemy ram most significantly with Melee damage. As long as your keep doors are above 50%, you can poke out through the main gate and damage the ram. This strategy is most effective when paired with Boiling Oil. (Info below.) | |||
'''Note:''' In Tier 4, Rams can only be spawned by members of Guilds that are at least level 20. | |||
==== <big>Oil</big></span> ==== | ==== <big>Oil</big></span> ==== | ||
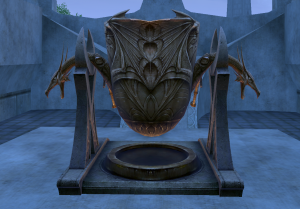
[[File:Elf oil.png|thumb|Place boiling oil at the top of outer and inner gatehouses. This is one of the most effective defensive weapons your realm has, so use it wisely!]] | |||
Boiling Oil is one of the most effective ways to kill huge amounts of enemies in the game. When placed at the top of a gatehouse and poured, this oil will deal repeated ticks of 3,000 true damage, meaning it cannot be reduced by toughness or blocked/parried/etc. | |||
*Keeping your oil protected - or quickly destroying enemy oil - is key to a siege length. | |||
*'''Oil is extremely weak to melee attacks''', but will block most ranged physical attacks, so use your siege weapons, ranged attacks that deal magic damage, or send Melee DPS in to destroy it. | |||
*When Destroyed, Oil has a timer of '''3 minutes''' before it may be placed again. | |||
*Besides delaying a siege in order for defenders to increase their numbers, Oil is also very effective for "Funnel" strategies at keeps, where defenders will blockade the main gate and force the attackers to bunch up as they attempt to push through. | |||
If an Oil is saved and poured as the enemy realm smashes together in front of the door, one pour can kill huge amounts of enemies, and well-timed oils can wipe whole sieges if done properly. | |||
Attackers can counter funnels by using Postern doors, but remember that 3-star and 4-star keeps will force you to use at least one main gate. | |||
You won't normally get Renown for killing enemies with Oil, but players near the doors or walls damaging players killed by oil will still get rewards. | |||
*Tanks can use a "Deflect Oil" ability to slightly reduce the incoming oil damage for their group. To survive oil damage, you'll still need considerable heals focused on you, even with this. | |||
==== <big>Orcapults</big></span> ==== | ==== <big>Orcapults</big></span> ==== | ||
Orcapults are a special variety of artillery | Orcapults are a special variety of artillery: instead of firing a projectile, it fires ''you!'' | ||
*To acquire an Orcapult, you must complete a repeatable quest in Karaz-a-Karak ('''Doorstep to Home''', from King Belegar Ironhammer at (28538, 26552)) or Karak Eight Peaks ('''Best Bashin' We'z Gunna Get''', from Grumlok at (32655, 41410)). | |||
*Orcapults decay over a 7 day period after they are redeemed, but you can keep repeating the Quest to get more. | |||
== <span style="color:#cc8400"><big>Land Of The Dead</big></span> == | |||
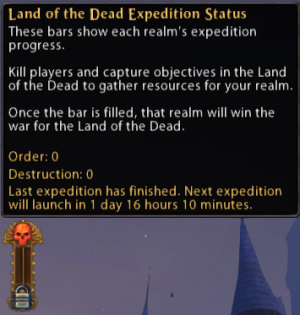
[[File:LoTD.png|thumb|This is the tracker for knowing when the next expedition will take place.]] | |||
Land of the Dead Expeditions become available to players at Career Rank 40. The searing sands of the desert play host to a large scale ORvR battle between both realms - and angry Tomb Kings - with Battlefield Objectives and PvE bosses to conquer and claim. | |||
The two zones consist of, [https://wiki.returnofreckoning.com/Necropolis_of_Zandri {{#tip-img: https://wiki.returnofreckoning.com/images/archive/b/b1/20220916145535%21Zandri.jpg| The Necropolis of Zandri}}] (ORvR Zone) and The Garden Of Qu'aph (Arena) | |||
This battle will only take place once per week. At Career Rank 40 a new resource tracker will become available on your screen, hovering over the tracker will let you know how much time is left before the next expedition takes place. | |||
The [[Necropolis of Zandri|Necropolis of Zandri]] is only available when there's an ongoing expedition. 15 minutes before an expedition starts players can sign up at the Expedition Quartermaster, located just next to the flight master in either main city. | |||
Spots in the expedition are limited, and the players that have collected the most Expedition Resources from RvR during the week will have priority. Expedition Resources are bound to account + realm. | |||
If you leave land of the dead or crash, you will keep a reservation for 5 minutes, if you don't get back in that time someone else in queue will get your spot. | |||
''' Currently editing this section ''' | |||
L | |||
O | |||
T | |||
D | |||
Latest revision as of 15:00, 16 September 2022
Open RvR Guide
Open RvR, or Realm Versus Realm, allows for both small-scale and massive battles of hundreds of players as each Realm attempts to gather supply, control objectives, and ultimately either siege or defend Keeps and Fortresses.
By capturing enough Keeps, realms can eventually push to attack an enemy Fortress. The Realm which captures the most enemy Fortresses over a 3-day window will then launch a siege on their enemy's Capital City.
This guide includes all the basics of the Open RvR Campaign, so please use it as a reference if you're learning or want to understand more of how the system works!
Supply Line / Active Zones
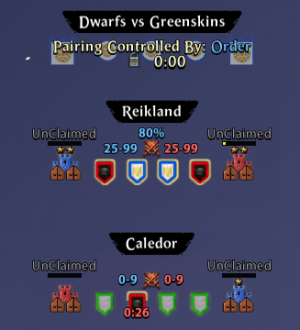
Return of Reckoning features three "Pairings", which are sets of zones where battles take place. Those are:
- Empire VS Chaos
- Dwarfs VS Greenskins
- High Elves VS Dark Elves
Besides Tier 1 (more info below), only one zone in a pairing will be active, and sometimes entire Pairings may be temporarily locked. The first zone active in each pairing is tier 2, which will progress to Tier 3 once locked, and then into Tier 4 once that is locked.
In Tier 4, a "Tug-of-war" campaign begins, with each Realm pushing the fight closer to the enemy Fortress by capturing a Zone. The campaign cannot move back into Tier 3, but the Tug-of-War can result in the battle constantly shifting back and forth between Tier 4 zones. When one realm finally captures a Fortress, that realm will gain a point for their Campaign status, and the Pairing will either lock or fully reset back to Tier 2.
If there's a Tie on Fortress Captures, the game will lock Two Pairings and leave only one open, in an attempt to force all fighting there and encourage a tiebreaker.
RvR Tiers
Tier 1
Tier 1 has no keeps. Tier 1 is solely fought over Battlefield Objectives, with 50 supplies (each contributing 2%) and capture of all Battlefield Objectives required to lock a zone. Players level 1-15 can battle here.
Tier 2
Tier 2 introduces keeps with a single door which attackers must breach with a ram. Defenders have access to place Boiling Oil at the inner door. Once the door is destroyed, attackers must defeat the enemy Keep Lord.
With the Lord defeated, the keep must be held by attackers while their realm also captures three out of four Battlefield Objectives, and holds them for a minute or two to lock the Zone and move the fight to the next Tier.
In Return of Reckoning, all players level 16-40 can participate in Tier 2, as well as Tiers 3 and 4, with lower level players receiving a special bolster to help them compete.
Tiers 3 and 4
Tiers 3 and 4 feature larger keeps with outer walls, and Defenders may place oil at both the Outer wall and the Inner here.
Attackers must breach both the Outer Door and the Inner Door with a ram before engaging the Lord. Like previous tiers, attackers must then maintain control of the captured keep while also sending a force to hold at least three Battlefield Objectives to lock the Zone.
Battlefield Objectives & Resources
Controlling Battlefield Objectives causes supplies to appear around these flags for your realm. Once your faction holds at least two Battlefield Objectives, supplies will spawn every 40 seconds at each.
Higher ranked keeps require more than two Battlefield Objectives to be held, with Three Objectives needed for a 3-star Keep, and all Four for a Four-star keep.
Capturing
Battlefield Objectives will capture for your realm faster if more people are around the Objective. You'll see a timer counting down when on an objective, and once this timer finishes, the objective will be temporarily captured for your faction.
If a member of your Realm is not present at the Objective, it will revert to a Neutral state after a short window of time. (Usually ~2 minutes.)
Supplies
Supplies will spawn randomly around your Objective flags roughly every 40 seconds. When carrying supplies, a character will have a large beam of light around their character, which is blue for Order and Red for Destruction.
Once you have supplies, bring them to either your Keep or your Warcamp and look for the Resource turn-in flag to contribute them to the fight. This will grant experience, Renown, and Influence for all members of your party who are nearby.
No matter where you turn them in, supplies will grant the same Exp/Renown/Influence numbers. Holding more objectives also boosts this number, increasing it for each objective held. If you're trying to rank up your keep, it's fastest to turn supplies in directly at the Keep, as long as the route is safe.
When increasing your Keep Rank, the value of supplies depends upon the following factors:
- Rank of the keep.
- Number of players present in the area, to a limit which depends on the current keep rank. The more players are present, the more deliveries are worth.
- The internal population imbalance scaler (referred to as internal or delayed AAO.)
- Distance of the host Battlefield Objective from the target. Supplies from further away are worth more.
- Destination. Supplies returned to the warcamp contribute only 50%.
If you leave the RvR area while carrying supplies, you'll see a warning to return, and the supplies will decay if held for too long outside of the RvR lake.
Supplies can be dropped when a player is attacked. The base chance to drop supplies is 50%.
Allied players can also interact with dropped supplies to pick them up, becoming the new carrier. If dropped supplies are not claimed quickly enough, they'll eventually decay.
Enemy Supplies
You can confiscate enemy supplies by interacting with them, which will destroy the supplies and prevent the enemy Realm from gathering them.
Additionally, all allies close to enemy supply will gain a small amount of Experience, Renown, and Influence for each. This is given to all allies, including those outside your party. The range is tiny, so make sure everyone is very close first before capturing them.
Keeps
Each Realm owns a keep in each contestable zone in Tiers 2, 3 and 4. Keeps form the focal point of the campaign in those zones, and a zone can be won (locked) by a realm when they capture the opposing realm's keep and hold three battlefield objectives while maintaining that captured keep.
Keep Rank
All Keeps begin at Rank 0, and can be leveled up via Supplies all the way to Rank 5. Each Rank grants benefits, which are listed below in more detail.
The yellow bar above a keep on your Zone Map will show you how close you are to the next Rank.
Progress to the next Keep Rank can be lost if a Realm does not maintain at least one Battlefield Objective on the map. Additionally, it is possible for 5-star Keeps to fall back to Rank 4, if that realm loses control of all four Battlefield Objectives.
Spawning any sort of Siege weapon will require you to be near your Realm's Keep. Once Siege, like a Ram or Cannon is spawned, you can mount up and click the siege to begin towing it, which will cause it to follow you. Dismount and right click to activate the Siege Weapon once it's in place.
Keep Upgrades (Star Ranks 0-5)
Zero Stars (Base Keep):
Fresh keeps begin at Rank 0 and have no deployable siege weapons or defensive bonuses.
During this period, focus on controlling at least two Battlefield Objectives, winning skirmish fights with enemies, and running Supply to your Keep.
Strategic Advice: Even if you're outnumbered or numbers are even, it is still helpful to Rank up your keep thanks to the Defensive bonuses, listed below. For Warbands, moving between Battle Objectives and gathering large amounts of supplies while killing enemy players is generally an effective strategy at this stage.
The Keep for each Realm is randomly selected when the Zone opens, so consider which Objectives will be most useful to capture - or to deny your enemies in order to stop their progression.
Note: High Renown Rank players can drop a Supply crate when they are killed, so defending delivery routes and winning skirmishes at Battlefield Objectives can also be a good way to secure supplies.
One Star Keep:
Siege Allowed:
- 2 Single Target Weapons (Cannons)
- 2 AOE Target Weapons (Artillery)
Two Star Keep:
Siege Allowed:
- 1 Ram (Requires Guild Rank 20 to Spawn)
- 3 Single Target Weapons (Cannons)
- 3 AOE Target Weapons (Artillery)
Three Star Keep:
Siege Allowed:
- 1 Ram (Requires Guild Rank 20 to Spawn)
- 5 Single Target Weapons (Cannons)
- 4 AOE Target Weapons (Artillery)
Defense Bonus:
- Inner Postern may not be used by Attackers. (Only enemy Melee DPS with "Bypass" can enter this door. Defenders may enter and exit freely.)
Strategic Advice: Because the Postern is locked, blockading the Bottom Floor and forcing the enemy into a tiny chokepoint is recommended, as you can also place Oil here to quickly kill them.
Note: At Rank 3, your Keep Requires 3 or more battle objectives to be under your Realm's control in order to generate supplies. Organization with other players will be fully required at this point to progress and maintain your realm's progression in the zone.
Four Star Keep:
Siege Allowed:
- 2 Rams (Requires Guild Rank 20 to Spawn)
- 5 Single Target Weapons (Cannons)
- 4 AOE Target Weapons (Artillery)
Defense Bonus:
- Both Outer AND Inner Postern may not be used by Attackers. (Only enemy Melee DPS with "Bypass" can enter these doors. Defenders may enter and exit both freely.)
Strategic Advice: As both Postern doors are locked on 4-star keeps, it is highly recommended to blockade and funnel the Main Gates to prevent the enemy from entering. Placing Oil during this strategy is highly effective, and will kill huge amounts of enemies if near the door.
Note: Once Rank 4, your Keep Requires all 4 battlefield objectives to be under control to open supply lines and generate supplies.
Five Star Keep:
The zone will automatically lock once the keep hits 5 stars and that realm holds all 4 Battle Objectives.
Note: The keep will be reset back to 4 Stars if the enemy captures all 4 Battle Objectives, denying your Realm the lock for the zone.
Keep Doors
The entrance to a keep is barred by doors, which can only be damaged by Siege Weaponry.
Once a door is damaged, the keep will enter an "attacked" state. When a Keep is under attack, any Supplies turned in will heal the Door, at a rate of 2% per Supply.
Once a Keep Door falls below 50% health, members of the owning Realm can no longer use it and must instead use the postern doors.
After 10 minutes without being damaged, a keep will return to a "Safe" state. If any Doors were destroyed during an attack, they will automatically be recovered at full health if a supply is turned in following this 10-minute period.
Siege Weapons
Siege weapons can be bought from your realm's Foreman, located in the gatehouse of the keeps outer wall. You only need to purchase each once, with the exception of Boiling Oil, which is consumed upon use.
Every Race has different weapons available, and there are no race restrictions to purchase or deploy. (You can use Empire/Chaos Siege weapons in Dwarf/Greenskin pairings, for example.)
To use a siege weapon:
- Be within range of a Keep owned by your Realm
- Click the Siege item you'd like to deploy in your inventory, or keybind it and press the bound key.
There's a limit on Siege weapon amounts per realm, which you can see by hovering over your keep when looking at your Map. (More on this above, under the "Keep Ranks" section.)
To move a Siege Weapon, simply Mount up and then right click the weapon once it's deployed. If you're attacked and dismounted, the weapon will also stop moving, so re-mount, then right click it again to reset the tow.
The following siege weapons are available:
Cannons
Single Target Cannons are most useful for damaging enemy Siege weapons, like Oil. (Examples: Heavy Dwarf Cannon, Heavy Chaos Hellcannon.)
AOE versions, like the Heavy High Elf/Dark Elf Ballistas and the Heavy Greenskin Supa-Chucka, deal damage in a line.
To fire, right click the cannon after it has been deployed (make sure you are unmounted and it is no longer being towed), and click the crosshair button. The closer the crosshairs get to the center of the screen, the more damage your shot will do.
Allied players can replenish your ammunition on Cannons by turning in supplies at Keeps or Warcamps while a siege is ongoing. If you're defending, there are also built-in Siege weapons on most keep walls, which cannot move but also have infinite shots.
Artillery
Artillery is useful for damaging enemy players. These weapons can also snare enemies and may deal increased damage if you hit large groups of players at once.
Artillery weapons include: Heavy Empire Hellblaster, Heavy Dwarf Organ Gun, Heavy High Elf Bolt Thrower, Heavy Chaos Tri-Barrel, Heavy Greenskin Rock Lobba and Heavy Dark Elf Bolt Thrower.
To fire, right click while unmounted and select the middle target option. AOE damage artillery will have a "Wind" effect you should watch for, which will slightly adjust where your damage hits in the direction of the wind.
As with Cannons, allied players in the zone can replenish your ammunition by turning in supplies to a Keep or Warcamp during a siege.
Rams
Rams are used to destroy enemy Keep Doors.
- To place the Ram, the person towing should run straight into the enemy door, wait a moment for the ram to catch up, and then dismount and right click the Ram to fully 'set' it.
- Sometimes Rams can be placed incorrectly or simply bug out - to reset the ram, just Mount up, tow the Ram away a short distance, then place it again on the door. It's also wise to move a Ram if it's taking significant damage from enemy players.
If a Ram is not placed on an enemy door within 10 minutes of being spawned, or if the person who spawned it moves far away from it, it will take heavy damage and eventually destroy itself.
Once a Ram is set on a Door, the first person to use it will begin a "Swing" mini-game, which shows a power bar. All four players on the ram want to click when the power slider is as close to the end of the power meter as possible, which will deal 100% damage.
However, if they miss, it will only deal 50% damage, so it's fine to aim for consistent 95% swings if your frames skip a bit or you keep hitting 50's.
Destroying a Ram: If you're being sieged, you can damage an enemy ram most significantly with Melee damage. As long as your keep doors are above 50%, you can poke out through the main gate and damage the ram. This strategy is most effective when paired with Boiling Oil. (Info below.)
Note: In Tier 4, Rams can only be spawned by members of Guilds that are at least level 20.
Oil
Boiling Oil is one of the most effective ways to kill huge amounts of enemies in the game. When placed at the top of a gatehouse and poured, this oil will deal repeated ticks of 3,000 true damage, meaning it cannot be reduced by toughness or blocked/parried/etc.
- Keeping your oil protected - or quickly destroying enemy oil - is key to a siege length.
- Oil is extremely weak to melee attacks, but will block most ranged physical attacks, so use your siege weapons, ranged attacks that deal magic damage, or send Melee DPS in to destroy it.
- When Destroyed, Oil has a timer of 3 minutes before it may be placed again.
- Besides delaying a siege in order for defenders to increase their numbers, Oil is also very effective for "Funnel" strategies at keeps, where defenders will blockade the main gate and force the attackers to bunch up as they attempt to push through.
If an Oil is saved and poured as the enemy realm smashes together in front of the door, one pour can kill huge amounts of enemies, and well-timed oils can wipe whole sieges if done properly.
Attackers can counter funnels by using Postern doors, but remember that 3-star and 4-star keeps will force you to use at least one main gate.
You won't normally get Renown for killing enemies with Oil, but players near the doors or walls damaging players killed by oil will still get rewards.
- Tanks can use a "Deflect Oil" ability to slightly reduce the incoming oil damage for their group. To survive oil damage, you'll still need considerable heals focused on you, even with this.
Orcapults
Orcapults are a special variety of artillery: instead of firing a projectile, it fires you!
- To acquire an Orcapult, you must complete a repeatable quest in Karaz-a-Karak (Doorstep to Home, from King Belegar Ironhammer at (28538, 26552)) or Karak Eight Peaks (Best Bashin' We'z Gunna Get, from Grumlok at (32655, 41410)).
- Orcapults decay over a 7 day period after they are redeemed, but you can keep repeating the Quest to get more.
Land Of The Dead
Land of the Dead Expeditions become available to players at Career Rank 40. The searing sands of the desert play host to a large scale ORvR battle between both realms - and angry Tomb Kings - with Battlefield Objectives and PvE bosses to conquer and claim.
The two zones consist of, The Necropolis of Zandri (ORvR Zone) and The Garden Of Qu'aph (Arena)
This battle will only take place once per week. At Career Rank 40 a new resource tracker will become available on your screen, hovering over the tracker will let you know how much time is left before the next expedition takes place.
The Necropolis of Zandri is only available when there's an ongoing expedition. 15 minutes before an expedition starts players can sign up at the Expedition Quartermaster, located just next to the flight master in either main city.
Spots in the expedition are limited, and the players that have collected the most Expedition Resources from RvR during the week will have priority. Expedition Resources are bound to account + realm.
If you leave land of the dead or crash, you will keep a reservation for 5 minutes, if you don't get back in that time someone else in queue will get your spot.
Currently editing this section
L
O
T
D
