Crypts and Tunnels
| Crypts and Tunnels | |
|---|---|
 Sigmar Crypts loading graphic | |
| Location | Altdorf |
| Race(s) | Empire |
| Instance info | |
| Type | Dungeon |
| Advised level | 40 |
| Player limit | 6 |
Crypts and Tunnels (Dungeon)
Crypts and Tunnels (often abbreviated 'CnT') is a pair of level 40 PvE Dungeons located in Altdorf.
Normally run together in succession, these dungeons are officially named the Sigmar Crypts and the Warpblade Tunnels.
These dungeons drop Sentinel Gear, which grants the Vanquisher Ward, and requires the Conqueror Ward to equip.
Why run CnT?
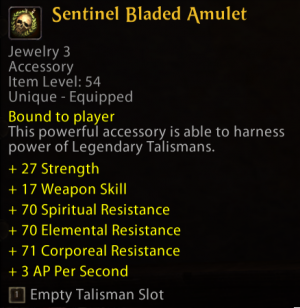
The most sought-after reward from Crypts and Tunnels is the Sentinel Ring, a jewelry piece granted as the final Influence Reward for clearing bosses within the dungeon.
This ring is special as it can hold the best-in-slot 7-day Talismans given by Stalwart Soulstone. (You could also just grind 9999 War Crests for the Triumphant Ring instead, but this is considerably more effort.)
If you're saving up War Crests for your Warlord or Sovereign Sets, you can also use the Sentinel Set as a free way to grant the Vanquisher Ward without having to buy Vanquisher armor.
Finally, many players will end up combining two pieces of Sentinel alongside other sets as a way to maximize the set bonus gains while also keeping the special bonuses from the Ring Talismans.
Difficulty level
Crypts and Tunnels is significantly more difficult than Mount Gunbad, and many parties will use tricks to avoid certain boss mechanics.
Experienced groups can still clear this easily, but if your party has fresh 40's or if it's your first time in the dungeon, it's highly advised to read up on boss mechanics in the guide below!
Full Dungeon Guide
Below you can find a full guide for Crypts and Tunnels, both in video and written format.
Video Guide
For a video guide, please click here to see the boss fights in action.
Sigmar Crypts Guide
The Sigmar Crypts is the first of the two dungeons, and many groups will begin here.
Begin by entering the Dungeon underneath the Temple of Sigmar in the West of Altdorf. As you enter, take the gate on your right and clear your way through the mobs. (These first mobs hit hard - take it slow if you're new.)
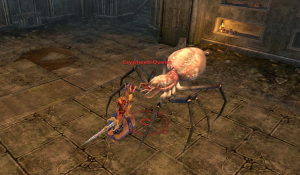
Boss 1: Cryptweb Queen
The first fight is a relatively simple warm-up:
- Cleave: As usual, Tanks should keep this boss faced away from their allies.
- Adds: Extra Spiders will spawn during this fight. Have your tank or off-tank pull them and you can easily burn them down.
- Terror: This boss causes Terror, so you can’t rez any fallen allies during the fight.
The difficulty will spike significantly once you hit the Necromancer soon, so get ready!
Boss 2: The Reaper (Optional)
The Reaper is an optional boss, and is skipped by almost all groups, so this guide won’t cover most of his attacks. Simply hug the walls as you go around his room to avoid him.
At the time of writing this guide, CnT is both a considerably harder and considerably longer dungeon set than the Destruction equivalent, BB/BE, so it’s highly recommended to save time wherever you can.
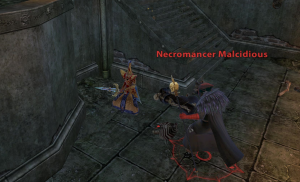
Boss 3: Necromancer Malcidious
This is where the difficulty jumps very high, especially for those undergeared or unprepared.
- Tanks: This boss punts you backward, so hold him near the corner where you first enter the room. (See image.)
- Spirit: Every 30 seconds, this boss will spawn a Spirit with the name of one of your party members. Your group needs to DPS it down as quickly as possible.
- Healers and RDPS: You can stand behind and a little away from the boss to avoid getting hit by his AOE damage attacks. Most groups place these players in the middle of the room, near the damaged floor.
- Add Groups: At 80%, 60%, 40%, and 20% Health, the boss will spawn large groups of adds. These can quickly overwhelm or kill your party if left unattended, so the tanks need to pick up aggro on them and the DPS needs to kill them quickly, before going back to the boss.
- AOE Knockdowns or stuns can be hugely helpful in this section, to buy your team time to manage the adds.
- Damage Spikes: This boss hits hard, and your tank / Melee DPS will sometimes take rapid and huge amounts of damage when both boss and adds are up. Have your tanks use their Morale 3 Bellows, your healers their Melee Absorb Morale 3, and any other damage reductions if you’re having issues surviving.
This boss drops the Sentinel Gloves and Belt.
With Malcidious defeated, you’ve cleared one of the harder fights in the run! Now it’s relatively smooth sailing for a few fights.
Make your way all the way back to the start of the dungeon, where you’ll find that the left gate is now open. Make your way through it to continue the dungeon.
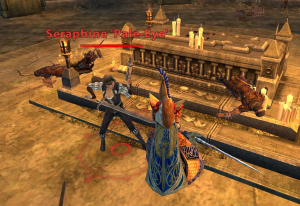
Boss Four: Seraphine ‘Pale-Eye’
The dungeon will soon branch out in three different directions – left, right, and straight. Begin on the left to fight Seraphine Pale-Eye. Some groups fight her in the room she spawns in, and others will pull her up the stairs to try and avoid her mechanic. Whichever your group prefers is fine. Key Mechanics:
- Add Spawn :Every 25 seconds, Seraphine Spanws Level 41 Champion Tomb Robber adds as the fight continues. Have your DPS kill them then focus the boss.
- Chest Mechanic: Seraphine will spawn Chests in the room as she takes damage. Have your DPS swap to these and burn them quickly if you’re doing the fight in the room. Strong groups or groups fighting her outside the room can ignore these entirely.
At 20%, Seraphine Pale-Eye will stop and agree to help you pick a lock, in exchange for letting her live. She’ll become friendly and the fight is over.
Boss Five: Sister Eudocia
This boss is a Wraith who really likes bats.
- Tank: Most tanks will pull her into the narrow corridor at the foot of the stairs leading to her room. (See image.) This boss punts your team backwards, so using this room corridor you can reduce the distance they get punted and keep them in fight.
- Add Spawn: As the fight progresses, this boss will spawn groups of Bats. Have your DPS kill them and your tank pick them up to avoid them hitting your squishier teammates.
This boss drops a Sentinel Belt.
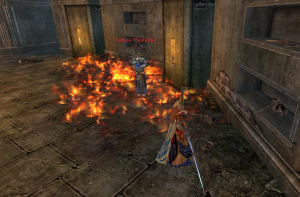
Boss Six: Tobias the Fallen
Buckle up because it's time for another fight with actual mechanics and if these are missed, your healers will hate you.
Unlike other fights nearby, you will also fight this boss in his intended room – do not pull him up the stairs!
- NOTE:This boss has a STUN mechanic that will temporarily prevent players from moving or using abilities. If he times this stun with other attacks, it may result in a full wipe on your party.
- Tank: Your tank should move this boss around the outside of the room.
- Field of Screams: This boss will drop Fire AOE on the floor. Your tank and MDPS should very quickly move out of the fire, as this will kill you rapidly. (Sometimes you will be stunned as this happens, which makes it difficult.) On the combat log, this will appear as “Field of Screams”.
- Interrupt: When Tobias holds his Warhammer with both hands and begins to raise it into the air, your tank should Taunt or a DPS should use an interrupt to stop his attack. If this is failed, the boss can do significant AOE damage to your group and will knock everyone back.
For a specific look at when to interrupt, check out the image on the right.
Once you have the pattern down, this fight isn’t too bad, but your first attempt may be rough if you miss mechanics or get unlucky with the stagger. Don’t let it dishearten you and keep at it until you finally defeat him!
This boss drops the Sentinel Boots and Sentinel Belt.
With all three of these bosses defeated, Seraphine will open the Gate to the East and allow you to fight the final boss of the Sigmar Crypts: The Arch Lector Twins.
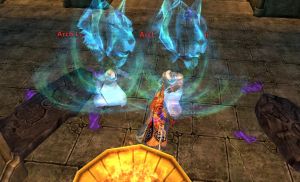
Boss Seven: The Arch Lector Twins
The final boss of the Sigmar Crypts brings its own challenges, and most of the pressure here will fall upon your Tanks and Healers. Range DPS are also king here, due to the mechanic of these twin bosses.
- Ability Block: If you’re within 30 feet of these bosses and they’re near each other, all of your abilities will show as prevented. However, it’s still possible to spam some instant cast abilities. (Like a Tank’s Challenge or Taunt) and have them go off.
- Tank(s): If you have a solo Tank, you can either hold the bosses in between the two slabs of Chaos Stone near where they spawn, or run back and forth (not towards your healers in the middle of the room).
- Dual Tank: If you have two tanks, each Tank should pick up and hold one of the bosses, keeping them split on their own sides of the room.
- DPS: The Boss HP must remain within 10% of each other, or they will both heal rapidly and cost your party a ton of time. Make sure to watch your damage and keep their HP as close as possible to avoid this.
- MDPS: If you're a melee DPS, and both bosses near each other, it's possible to stand exactly at 30 meters away to damage the bosses without losing your abilities. It may take some wiggling to get this perfect.
- Bonus Damage: The bosses will trade a bonus that increases the damage they take. This can be useful to catch up damage on a boss whose HP is far from the other, but also note that if your DPS isn’t paying attention, you will very easily reset the boss HP because of this. Make sure the DPS both have and use their brains here, or this fight will be difficult.
- Heals / RDPS: Stand in front of the open coffin in the middle of the room, which should put you out of range of most of the ability silences that these bosses can cause. Be ready for intense spikes of damage if you have a Solo Tank or if you have melee players who are not well-geared. If you’re a Range DPS, carry the team like an absolute chad, because this is your time to shine.
This boss drops the Sentinel Chestpiece.
With the Lector Twins down, you're through the hardest part of the run - good job!
Next, it's time to kill some Skaven in the Warpblade Tunnels located underneath Altdorf.
Warpblade Tunnels
There are multiple entrances to the Warpblade Tunnels, which connect beneath the four Taverns in Altdorf in pairs.
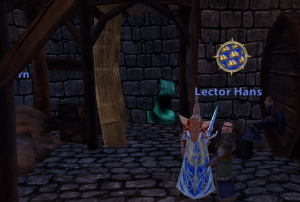
Most groups start at the Reikland Arms Tavern, located just across the road from the Bank in Lord’s Row.
Head downstairs and right click the Bookshelf to reveal a hidden entrance, and walk into this to enter the dungeon.
If you’re on the Lord’s Row entrance, begin by taking a right turn and then a left just before the wooden stairs. Here, you can either kill the Skaven in your path or have your tanks skip these by running past until they reset.
Take another left when you enter the cave area, and follow this until you can take one last left to go South into a large room. This is the first boss, Master Moulder Skrot.
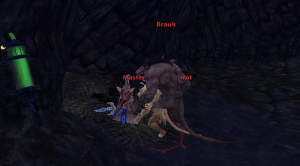
Boss One: Master Moulder Skrot and Brauk
This fight is a dual boss fight, but the only target you need to be hitting is Master Moulder Skrot. Be sure not to kill Brauk, or else Skrot will enrage and wipe your group. Many groups will also throw an axe at Skrot from the above bridge and run backwards in order to get just one of the two bosses to engage.
- Snare Break: IMPORTANT: This boss will apply a 10-minute snare that also stacks heavy debuffs on your group. Bring a snare break, and for classes that don’t have one, bring the Morale 2 “Focused Mind” to counter this.
- Tanks: Hold these bosses near the straw pile below so that the punt won’t send you flying. Maintain your Challenge to ensure you keep both held and that your DPS doesn’t accidentally pull Brauk.
- DPS: Use your Detaunts to reduce AOE damage from Brauk, and focus down Master Moulder Skrot. Use your Focused Mind when needed. (Watch your buffs/debuffs to see this.)
This boss drops the Sentinel Belt.
Boss Two: Grey Seer Quol’Tik
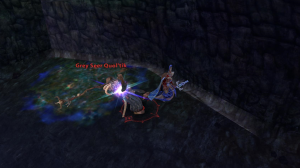
- Tank: Most groups will ask you to pull this outside of the room it spawns in to avoid the Tangled Vines mechanic. (These vines will attack your party with both range and melee attacks.) Once taunted, run quickly back through the tunnel and then pull it up to the Southernmost top-section of the room you’re in. (Shown in picture.)
- AOE Puddle: This boss drops a puddle mechanic which looks like the Archmage puddle on one of your players at random. (Shown in picture.) Move out of this when it spawns and try to stack these close to each other, as you have only limited room to move if outside the boss room. Moving too far left or right will trigger his enrage.
- Knockback: This boss will constantly knock back players. Try to position yourselves accordingly to reduce the distance you get flung.
- Healers: You can stand with your back to the rock near the bridge to position properly for much of this fight. Watch for puddles as these can still drop on your position, and will last for some time before expiring.
If you choose to fight this boss inside his original room, it’s highly recommended to have either strong DPS to handle the vines or a second tank to manage these. The difficulty is significantly higher if you fight the boss inside this room.
This boss drops the Sentinel Helmet.
With the first two bosses of Warpblade down, most groups will now use their Book of Binding or die to the mobs to respawn at the entrance. Make your way to the Mastif’s End (just left of the Auction House) for the next, much longer run to the final bosses.
Section Two: Mastif’s End Tunnel Entrance
Once back inside, this time you’ll go straight forward and take a left past the Skaven Assassins waiting for you.
This path is considerably longer with many more mobs, which you can either kill or skip. Eventually, it will fork north and south on your Mini-map, and you want to take the South path into the open room. Below is the next boss: Skiv Redwarp.
Boss Three: Skiv Redwarp
- Tank: This boss does constant knockbacks, so tank him near the magical barrier behind him and against the walls. This will reduce the distance you or other teammates get flung.
- Stealth + Aggro Reset: This boss will cast stealth and reset his aggro during the fight. Make sure your Tank immediately taunts it or Challenges to get it back and away from your more vulnerable teammates.
- Cleanse: This boss has a debuff that will increase your skill cooldowns. Most healers can cleanse this.
Beyond these key mechanics, the fight is relatively straightforward.
Skiv drops the Sentinel Belt.
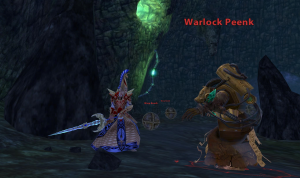
Final Boss: Warlock Peenk
The Final Boss of Warpblade Tunnels (and usually the entire run) can hit hard – if you’re solo tanking, make sure your unguarded players have their detaunts ready. You'll fight this boss within his intended room.
- Warp Bombs: This boss spawns Warp Bombs around the room. Hitting one of these while electrically charged will cause it to explode, dealing damage to you and sending you flying around the room. It’s possible to accidentally get flung from one into another, and so on – resulting in a funny, if not also frustrating, death.
- Tank: Hold this boss with your back to one of the large rocks, as shown in the image, to prevent being knocked back into a Warp Bomb.
- Detaunt: This boss will spike your group with huge damage following the orange bubble / puddle attack appearing near your tank. Many groups will ***detaunt*** here and slow/stop DPS to avoid anyone getting one-shot with a critical hit.
Some groups will spread out on this fight to avoid any players accidentally triggering a Warp Bomb and impacting multiple groupmates together.
Range DPS and Healers have the most flexibility here, as they can press their backs to various rocks in the room without losing range.
Keep burning until Peenk finally falls, and he’ll drop the Sentinel Shoulders for your party.
---
With Peenk down, you’ve done it!
Congratulations on finishing the Warpblade Tunnels, and ideally your full CnT run!
For many players, completing this dungeon as it’s intended is one of, if not the hardest PvE experience within Return of Reckoning, so take some pride in your group’s accomplishment and enjoy a well-deserved break. You’ve earned it!
