Bilerot Burrows: Difference between revisions
(Created page with "{{Warning |heading=In progress... |This page is still under development, if you would like to contribute please login.}}") |
No edit summary |
||
| (29 intermediate revisions by 2 users not shown) | |||
| Line 1: | Line 1: | ||
{{ | {{Infobox instance | ||
|name=Bilerot Burrow | |||
|aka=BB | |||
|ss=LS-196-BilerotBurrow.jpg | |||
|caption=Bilerot Burrow loading graphic | |||
|loc=[[The Inevitable City]] | |||
|race=[[Chaos]] | |||
|boss= | |||
|type=Dungeon | |||
|level=40 | |||
|players=6 | |||
|key= | |||
}} | |||
==Bilerot Burrow== | |||
The Bilerot Burrow is a level 40 City Dungeon that awards players the [[Sentinel Set|Sentinel Armor]] set and unique weapons. | |||
In this Dungeon, Nurgle's sickly power has begun to creep into The Inevitable City, and forces loyal to Tzeentch aim to purge the dungeon of the spreading disease. | |||
This Dungeon was updated and re-launched in May of 2024, and now contains six bosses with new mechanics. | |||
Players often refer to this dungeon as "BB" for short and in LFG channels. | |||
== Why run Bilerot Burrow? == | |||
[[File:Sent_chaos.png|thumb|Besides [[Sentinel Set|Sentinel Armor]], the Jewelry piece for 4 complete runs comes with a very special Talisman slot, and is almost Best-in-Slot for most classes. (Stats vary by class.)]] | |||
Useful rewards from Bilerot Burrow include special Unique Weapons and the Sentinel Ring, a jewelry piece granted as the final Influence Reward for clearing bosses within the dungeon. | |||
This ring is special as it can hold the best-in-slot 7-day Talismans given by [[Stalwart Soulstone]]. (You ''could'' also just grind 9999 [[War Crests]] for the Triumphant Ring instead, but this is considerably more effort.) | |||
If you're saving up [[War Crests]] for your [[Warlord Set|Warlord]] or [[Sovereign Set|Sovereign Sets]], you can also use the Sentinel Set as a free way to grant the [[Vanquisher Ward]] without having to buy Vanquisher armor. | |||
Finally, many players will end up combining two pieces of Sentinel alongside other sets as a way to maximize the set bonus gains while also keeping the special bonuses from the Ring Talismans. | |||
== Difficulty level == | |||
Bilerot Burrow is more difficult than [[Mount Gunbad]], and was rebuilt in May 2024 with updated mechanics and two new bosses. | |||
As part of this re-launch, the previously attached dungeon, Bloodwraught Enclave, is no longer part of the run, streamlining this into a single dungeon experience. | |||
Experienced groups can still clear this easily, but if your party has fresh 40's or if it's your first time in the dungeon, it's highly advised to read up on boss mechanics in the guide below! | |||
== Full Dungeon Guide == | |||
Below you can find a full guide for Bilerot Burrow's updated mechanics in written format. | |||
(A video guide will also be added in the future!) | |||
== Bilerot Burrows Guide == | |||
Bilerot Burrows is the Destruction City Dungeon for level 40 players, and contains six bosses. | |||
[[File:Maggotfiend.png|thumb|Move the Maggotfiend away from the debuffing Maggot he spawns, or kill it, and keep this boss faced away from the group.]] | |||
Begin by entering the Dungeon near the Sewer grate located just north of The Monolith in the Inevitable City. | |||
You'll find a small ramp near 22k / 35k that will descend towards the Dungeon entrance. | |||
First, be sure to accept all the repeatable quests here so you can get guaranteed armor pieces even if you don't have any luck with the boss drops. | |||
Once your group is ready, head inside and fight your way through the first few packs of mobs, until you arrive in an open room with three walled off sections. | |||
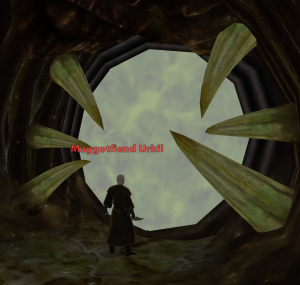
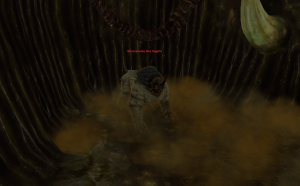
===Boss 1: Maggotfiend Urhil=== | |||
The first fight is a relatively simple warm-up: | |||
*Cleave: As usual, Tanks should keep this boss faced away from their allies. | |||
*True Damage: This boss can deal 50% HP of his current target, and this attack cannot be blocked or avoided. | |||
*Debuffing Add: This boss will spawn a Maggot every ~30 seconds, which pulses a powerful debuff that reduces Strength, Ballistic Skill, and Intelligence on anyone in range. | |||
*Terror: This boss causes Terror, so you can’t rez any fallen allies during the fight. | |||
For this fight, simply keep the boss facing away from the group and either move the boss every 30 seconds to avoid the debuff, or stack the boss on top of the add and AOE it down if you have enough damage to do so. | |||
His 50% HP loss on the tank can be a little dangerous if your tank is undergeared or solo tanking, so just keep eyes on their HP and your healers should have no problem. | |||
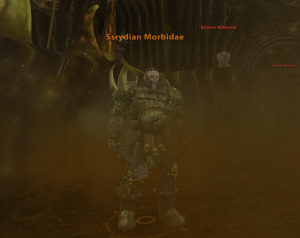
===Boss 2: Ssrydian Morbidae=== | |||
[[File:Ssrydian.png|thumb|Cleanse debuffs and look for shatters to reduce the reflect damage when fighting Ssrydian.]] | |||
The next fight in the run is against a Chosen named Ssyridian Morbidae. | |||
*Slicing Cleave: As usual, Tanks should keep this boss faced away from their allies. | |||
*Auras: This boss has 3 Auras like a regular Chosen. These debuff incoming healing by 25%, increase cast times, and pulse constant damage for healers. | |||
*Damage Reflect: This boss can buff himself with Bane Shield and reflect damage back while the buff is up. Tanks / healers should look for a shatter to remove this, or just heal through it. | |||
*Stacking Heal Debuff: This boss places stacks of debuffs on party members, which reduce incoming healing. This will stack with his base 25% debuff. | |||
*Terror: This boss causes Terror, so you can’t rez any fallen allies during the fight. | |||
This fight is a bit of a DPS race, especially with the stacking heal debuffs. Healers can cleanse these, and the Cauldrons are intended to cleanse some of these, but may or may not function properly. | |||
When you see him cast Bane Shield on himself, try to shatter or strip this to reduce reflect damage on your team. | |||
If your casters or healers are having trouble, remember that your teammates can also back up to get out of the Auras if these are causing an issue. | |||
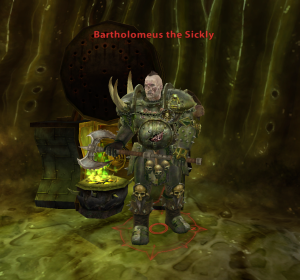
===Boss 3: Bartholomeus The Sickly=== | |||
[[File:Bartholomeus.png|thumb|Watch for the Spin and interrupt it quickly to avoid massive damage to the party when fighting Bartholomeus.]] | |||
Next, backtrack and head into the newly opened tunnel from the room where you killed Maggotfiend Urhil. | |||
As you arrive at the next split, you can either head left to fight Bartholomeus, or right to fight The Pox-Bloated Child. We'll cover Bartholomeus first since most groups do him next. | |||
*Interrupt: Like a White Lion Spin or the Morale 2 Raze, this boss will spin around in a circle and deal massive damage to your party. A tank can Taunt him to interrupt, or any other non-CC interrupt your party has will also work. | |||
*Nurgling: This boss spawns a pet Nurgling throughout the fight. You can AOE this down relatively easily. | |||
*Curses: This boss will debuff the tank - healers can cleanse this. | |||
*Positioning: It can be good to have one healer standing outside the spin damage range (which is quite large), just in case your tank misses an interrupt. | |||
*Terror: This boss causes Terror, so you can’t rez any fallen allies during the fight. | |||
This boss can wipe some groups as you figure out the interrupt timing, but his spin ability is *always* longer than the cooldown on Taunt, so once you get into the rotation, you should be good. | |||
With Bartholomeus defeated, it's time for one of the new bosses added in RoR! | |||
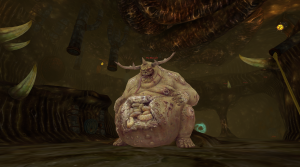
===Boss 4: The Pox-Bloated Child=== | |||
[[File:Pox.png|thumb|Cleanse constantly when fighting the Pox Child, and send DPS to destroy the objects which empower him in nearby tunnels.]] | |||
The Pox-Bloated Child is a new boss added to Return of Reckoning. | |||
This fight is heavily focused on cleanses, so groups running one healer will find this to be much more stressful than groups with two. | |||
*Cleanses: This boss has a huge amount of debuffs it can apply to players. It's highly advised to cleanse as many as you can, and use AOE Cleanse tactics if you have them. | |||
*Furthest Player Dot: This boss will spawn a dot debuff on the furthest player from the group that deals notable damage. You can heal through it or simply cleanse it. | |||
*Buffs: At 60%, 40%, and 20%, this boss will spawn Game Objects in the tunnels nearby his boss room. These will each give him powerful bonuses, like stacking damage or 90% reduced damage. | |||
*Destroyable Objects: DPS players should quickly find and destroy the Game Objects as they spawn, but watch out for the furthest player damage dot that the boss will still cast. Center-screen messages will announce when destroyable objects appear. | |||
*Game Objects: We're listing this one again because it's super important: You have to respect the mechanics here and destroy the game objects. If you don't, his stacking enrage will reach 700%+ bonus damage, and you will die. | |||
*Terror: This boss causes Terror, so you can’t rez any fallen allies during the fight. | |||
Groups with two healers and AOE cleanses should have no problem getting through this boss' debuffs, but you may want to send one healer to watch over your DPS as they navigate the tunnels to find the game objects. | |||
These objects are a rock with a Nurgle symbol on it, a corrupted bowl of porridge, and a much larger rock with an even bigger Nurgle symbol on it. | |||
With the Pox-Bloated Child down, it's time to move to the second new fight within the Dungeon! | |||
===Boss 5: Ekscremite the Septic=== | |||
[[File:Ekscremite.png|thumb|Avoid Ekscremite's fire AOE, and be ready to quickly cleanse the Infected Blood debuff if it triggers on you!]] | |||
Ekscremite the Septic is another new boss added to Return of Reckoning. | |||
Whereas the previous fight was heavily reliant on healers, this fight puts heavy pressure on your tank and requires every party member to pay attention for a key mechanic that can one-shot them. | |||
*Tiny Room: This fight is cramped, and intentionally so, which adds to the difficulty of the below mechanics: | |||
*Fire AOE: This boss drops a fire puddle on his current main target (should be your tank) which lasts for a while. Place this near the edges so you don't run out of space quickly, and remember, you can move up the ramp. | |||
*True Damage: This boss will deal true damage to the tank periodically, which cannot be mitigated or avoided. | |||
*Infected Blood: At 75% HP, this boss will Infect the blood of a random player within your party. This player has 12 seconds to find the nearby Crystal of Change and right click this, which will allow Tzeentch to change the debuff and prevent your blood from coagulating. While infected, player will have a large Red Beam around them, which looks the same as picking up a supply box. | |||
*Crystals of Change: There are three Crystals of Change which spawn throughout this fight. You can use any of these three Crystals to cleanse the Infected Blood debuff; there are three so that if your tank drops a fire puddle on one, your party always has another option. | |||
*Infected Blood 2: At 50% HP, the boss will pick two random players in the party to infect. Both these players should see the red light beam and also a center-screen message (ensure these are turned on in the Interface tab!). These players can use the same Crystals or different ones. | |||
*Infected Blood 3: At 30% HP, the boss will pick three random players in the party to infect. Same as the before - use any Crystals you like, and just move quickly so you don't die instantly. | |||
*Terror: This boss causes Terror, so you can’t rez any fallen allies during the fight. | |||
This fight has a lot to take in at first, but once you understand the Infected Blood mechanic and the Crystal spawn locations, it's very doable and not too difficult. Just pay close attention and your party should have no problem getting through it. | |||
===Boss 6: The Bile Lord=== | |||
[[File:Bile.png|thumb|Watch for the puddles dropped by the Bile Lord, handle his adds, and be ready to eviscerate his innards when he tries to vore you (ew) at 20% HP.]] | |||
The Bile Lord is the final fight of the Dungeon, and is a Great Unclean One in the service of Nurgle. | |||
Given that Tzeentch is in power within The Inevitable City, this champion of a rival god cannot be allowed to live. So let's kill it! | |||
*Puddles: This boss spawns Archmage Puddles on the Tank / closest target to him. These damage anyone standing in them, so just move away from them. (They should always display no matter your graphics settings.) | |||
*Furthest Puddles: The Furthest player from the boss also gets Puddles dropped on their location. These last for the majority of the fight, so consider where to place them so you don't run out of room later. | |||
*Add Phases: This boss will call forth packs of adds as the fight continues. Tanks should challenge these and DPS should swap to quickly burn them down. Some can be deadly if allowed to aggro to the healers. | |||
*Om Nom Phase: At 20%, the boss will stun and consume the entire party. Next, you'll need to DPS his innards to get him to change his mind on digesting you and instead to vomit you back up onto the ground. | |||
*Terror: This boss causes Terror, so you can't resurrect any fallen allies during the fight. | |||
This fight is a little harder than it used to be with extra Puddles added, but overall very doable if you just watch your feet and if the tanks and DPS pay attention to the adds. | |||
Once you burn down the boss under 20%, the main mechanics are mostly done, so just finish him off, and with that, Bilerot Burrow is complete! | |||
Congrats on clearing the new refresh of the Dungeon - and on your progress towards Sentinel Gear and your Ring! | |||
Latest revision as of 14:13, 10 June 2024
| Bilerot Burrow | |
|---|---|
 Bilerot Burrow loading graphic | |
| Location | The Inevitable City |
| Race(s) | Chaos |
| Instance info | |
| Type | Dungeon |
| Advised level | 40 |
| Player limit | 6 |
Bilerot Burrow
The Bilerot Burrow is a level 40 City Dungeon that awards players the Sentinel Armor set and unique weapons.
In this Dungeon, Nurgle's sickly power has begun to creep into The Inevitable City, and forces loyal to Tzeentch aim to purge the dungeon of the spreading disease.
This Dungeon was updated and re-launched in May of 2024, and now contains six bosses with new mechanics.
Players often refer to this dungeon as "BB" for short and in LFG channels.
Why run Bilerot Burrow?
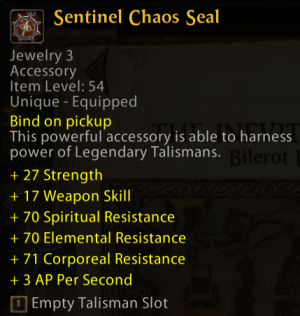
Useful rewards from Bilerot Burrow include special Unique Weapons and the Sentinel Ring, a jewelry piece granted as the final Influence Reward for clearing bosses within the dungeon.
This ring is special as it can hold the best-in-slot 7-day Talismans given by Stalwart Soulstone. (You could also just grind 9999 War Crests for the Triumphant Ring instead, but this is considerably more effort.)
If you're saving up War Crests for your Warlord or Sovereign Sets, you can also use the Sentinel Set as a free way to grant the Vanquisher Ward without having to buy Vanquisher armor.
Finally, many players will end up combining two pieces of Sentinel alongside other sets as a way to maximize the set bonus gains while also keeping the special bonuses from the Ring Talismans.
Difficulty level
Bilerot Burrow is more difficult than Mount Gunbad, and was rebuilt in May 2024 with updated mechanics and two new bosses.
As part of this re-launch, the previously attached dungeon, Bloodwraught Enclave, is no longer part of the run, streamlining this into a single dungeon experience.
Experienced groups can still clear this easily, but if your party has fresh 40's or if it's your first time in the dungeon, it's highly advised to read up on boss mechanics in the guide below!
Full Dungeon Guide
Below you can find a full guide for Bilerot Burrow's updated mechanics in written format.
(A video guide will also be added in the future!)
Bilerot Burrows Guide
Bilerot Burrows is the Destruction City Dungeon for level 40 players, and contains six bosses.
Begin by entering the Dungeon near the Sewer grate located just north of The Monolith in the Inevitable City.
You'll find a small ramp near 22k / 35k that will descend towards the Dungeon entrance.
First, be sure to accept all the repeatable quests here so you can get guaranteed armor pieces even if you don't have any luck with the boss drops.
Once your group is ready, head inside and fight your way through the first few packs of mobs, until you arrive in an open room with three walled off sections.
Boss 1: Maggotfiend Urhil
The first fight is a relatively simple warm-up:
- Cleave: As usual, Tanks should keep this boss faced away from their allies.
- True Damage: This boss can deal 50% HP of his current target, and this attack cannot be blocked or avoided.
- Debuffing Add: This boss will spawn a Maggot every ~30 seconds, which pulses a powerful debuff that reduces Strength, Ballistic Skill, and Intelligence on anyone in range.
- Terror: This boss causes Terror, so you can’t rez any fallen allies during the fight.
For this fight, simply keep the boss facing away from the group and either move the boss every 30 seconds to avoid the debuff, or stack the boss on top of the add and AOE it down if you have enough damage to do so.
His 50% HP loss on the tank can be a little dangerous if your tank is undergeared or solo tanking, so just keep eyes on their HP and your healers should have no problem.
Boss 2: Ssrydian Morbidae
The next fight in the run is against a Chosen named Ssyridian Morbidae.
- Slicing Cleave: As usual, Tanks should keep this boss faced away from their allies.
- Auras: This boss has 3 Auras like a regular Chosen. These debuff incoming healing by 25%, increase cast times, and pulse constant damage for healers.
- Damage Reflect: This boss can buff himself with Bane Shield and reflect damage back while the buff is up. Tanks / healers should look for a shatter to remove this, or just heal through it.
- Stacking Heal Debuff: This boss places stacks of debuffs on party members, which reduce incoming healing. This will stack with his base 25% debuff.
- Terror: This boss causes Terror, so you can’t rez any fallen allies during the fight.
This fight is a bit of a DPS race, especially with the stacking heal debuffs. Healers can cleanse these, and the Cauldrons are intended to cleanse some of these, but may or may not function properly.
When you see him cast Bane Shield on himself, try to shatter or strip this to reduce reflect damage on your team.
If your casters or healers are having trouble, remember that your teammates can also back up to get out of the Auras if these are causing an issue.
Boss 3: Bartholomeus The Sickly
Next, backtrack and head into the newly opened tunnel from the room where you killed Maggotfiend Urhil.
As you arrive at the next split, you can either head left to fight Bartholomeus, or right to fight The Pox-Bloated Child. We'll cover Bartholomeus first since most groups do him next.
- Interrupt: Like a White Lion Spin or the Morale 2 Raze, this boss will spin around in a circle and deal massive damage to your party. A tank can Taunt him to interrupt, or any other non-CC interrupt your party has will also work.
- Nurgling: This boss spawns a pet Nurgling throughout the fight. You can AOE this down relatively easily.
- Curses: This boss will debuff the tank - healers can cleanse this.
- Positioning: It can be good to have one healer standing outside the spin damage range (which is quite large), just in case your tank misses an interrupt.
- Terror: This boss causes Terror, so you can’t rez any fallen allies during the fight.
This boss can wipe some groups as you figure out the interrupt timing, but his spin ability is *always* longer than the cooldown on Taunt, so once you get into the rotation, you should be good.
With Bartholomeus defeated, it's time for one of the new bosses added in RoR!
Boss 4: The Pox-Bloated Child
The Pox-Bloated Child is a new boss added to Return of Reckoning.
This fight is heavily focused on cleanses, so groups running one healer will find this to be much more stressful than groups with two.
- Cleanses: This boss has a huge amount of debuffs it can apply to players. It's highly advised to cleanse as many as you can, and use AOE Cleanse tactics if you have them.
- Furthest Player Dot: This boss will spawn a dot debuff on the furthest player from the group that deals notable damage. You can heal through it or simply cleanse it.
- Buffs: At 60%, 40%, and 20%, this boss will spawn Game Objects in the tunnels nearby his boss room. These will each give him powerful bonuses, like stacking damage or 90% reduced damage.
- Destroyable Objects: DPS players should quickly find and destroy the Game Objects as they spawn, but watch out for the furthest player damage dot that the boss will still cast. Center-screen messages will announce when destroyable objects appear.
- Game Objects: We're listing this one again because it's super important: You have to respect the mechanics here and destroy the game objects. If you don't, his stacking enrage will reach 700%+ bonus damage, and you will die.
- Terror: This boss causes Terror, so you can’t rez any fallen allies during the fight.
Groups with two healers and AOE cleanses should have no problem getting through this boss' debuffs, but you may want to send one healer to watch over your DPS as they navigate the tunnels to find the game objects.
These objects are a rock with a Nurgle symbol on it, a corrupted bowl of porridge, and a much larger rock with an even bigger Nurgle symbol on it.
With the Pox-Bloated Child down, it's time to move to the second new fight within the Dungeon!
Boss 5: Ekscremite the Septic
Ekscremite the Septic is another new boss added to Return of Reckoning.
Whereas the previous fight was heavily reliant on healers, this fight puts heavy pressure on your tank and requires every party member to pay attention for a key mechanic that can one-shot them.
- Tiny Room: This fight is cramped, and intentionally so, which adds to the difficulty of the below mechanics:
- Fire AOE: This boss drops a fire puddle on his current main target (should be your tank) which lasts for a while. Place this near the edges so you don't run out of space quickly, and remember, you can move up the ramp.
- True Damage: This boss will deal true damage to the tank periodically, which cannot be mitigated or avoided.
- Infected Blood: At 75% HP, this boss will Infect the blood of a random player within your party. This player has 12 seconds to find the nearby Crystal of Change and right click this, which will allow Tzeentch to change the debuff and prevent your blood from coagulating. While infected, player will have a large Red Beam around them, which looks the same as picking up a supply box.
- Crystals of Change: There are three Crystals of Change which spawn throughout this fight. You can use any of these three Crystals to cleanse the Infected Blood debuff; there are three so that if your tank drops a fire puddle on one, your party always has another option.
- Infected Blood 2: At 50% HP, the boss will pick two random players in the party to infect. Both these players should see the red light beam and also a center-screen message (ensure these are turned on in the Interface tab!). These players can use the same Crystals or different ones.
- Infected Blood 3: At 30% HP, the boss will pick three random players in the party to infect. Same as the before - use any Crystals you like, and just move quickly so you don't die instantly.
- Terror: This boss causes Terror, so you can’t rez any fallen allies during the fight.
This fight has a lot to take in at first, but once you understand the Infected Blood mechanic and the Crystal spawn locations, it's very doable and not too difficult. Just pay close attention and your party should have no problem getting through it.
Boss 6: The Bile Lord
The Bile Lord is the final fight of the Dungeon, and is a Great Unclean One in the service of Nurgle.
Given that Tzeentch is in power within The Inevitable City, this champion of a rival god cannot be allowed to live. So let's kill it!
- Puddles: This boss spawns Archmage Puddles on the Tank / closest target to him. These damage anyone standing in them, so just move away from them. (They should always display no matter your graphics settings.)
- Furthest Puddles: The Furthest player from the boss also gets Puddles dropped on their location. These last for the majority of the fight, so consider where to place them so you don't run out of room later.
- Add Phases: This boss will call forth packs of adds as the fight continues. Tanks should challenge these and DPS should swap to quickly burn them down. Some can be deadly if allowed to aggro to the healers.
- Om Nom Phase: At 20%, the boss will stun and consume the entire party. Next, you'll need to DPS his innards to get him to change his mind on digesting you and instead to vomit you back up onto the ground.
- Terror: This boss causes Terror, so you can't resurrect any fallen allies during the fight.
This fight is a little harder than it used to be with extra Puddles added, but overall very doable if you just watch your feet and if the tanks and DPS pay attention to the adds.
Once you burn down the boss under 20%, the main mechanics are mostly done, so just finish him off, and with that, Bilerot Burrow is complete!
Congrats on clearing the new refresh of the Dungeon - and on your progress towards Sentinel Gear and your Ring!
