Sigmar's Crypts: Difference between revisions
No edit summary |
No edit summary |
||
| Line 40: | Line 40: | ||
Below you can find a full guide for Sigmar's Crypts in written form. | Below you can find a full guide for Sigmar's Crypts in written form. | ||
== Party Composition == | == Party Composition == | ||
| Line 54: | Line 48: | ||
For top-tier players and those who enjoy ''going fast'', it's also possible to complete in a 1-4-1, but good gear and mastery of your class is strongly recommended if trying this. | For top-tier players and those who enjoy ''going fast'', it's also possible to complete in a 1-4-1, but good gear and mastery of your class is strongly recommended if trying this. | ||
== Sigmar Crypts Guide == | |||
Begin by entering the Dungeon underneath the Temple of Sigmar in the West of Altdorf. | |||
As you enter, take the gate on your right and clear your way through the mobs. (These first mobs hit hard - take it slow if you're new!) | |||
===Boss 1: Cryptweb Queen=== | ===Boss 1: Cryptweb Queen=== | ||
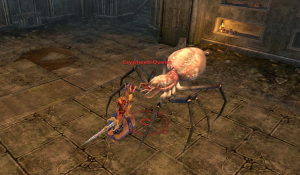
[[File:Crypt Queen.png|thumb|Face the Queen away from your allies, and | [[File:Crypt Queen.png|thumb|Face the Queen away from your allies, move the boss away from the Spiderling, and be ready for the Heartstopper 50% HP loss.]] | ||
The first fight is a relatively simple warm-up: | The first fight is a relatively simple warm-up: | ||
| Line 72: | Line 73: | ||
===Boss 2: The Reaper | ===Boss 2: The Reaper === | ||
Previously an optional boss, The Reaper is now a required fight rebuilt from the ground up, with brand new mechanics. | |||
At the | *Forward Cleave: This boss has a cleave that will hit any players standing near the tank. | ||
*Puddles: This boss will drop purple mist puddles on a random player in your group. These puddles stay for a long time, so try to place them near the outer edges of the room to avoid running out of space to fight. | |||
*Reaper's Curse: At 75% HP, the Reaper will curse one of your players at random, and a red light will appear around them. A Fire Brazier will also appear in the center of the room. The cursed player must run to and right click the Brazier within 12 seconds, or they will die. | |||
**At 50% HP, the Reaper will curse two players at random, both of whom must then run to the center of the room and interact with the brazier. | |||
**At 30% HP, the Reaper will curse three players at random, whom must repeat the same mechanic to avoid death. | |||
The key mechanics introduced here are the Puddles (which will make a return later) and the Curse, which requires paying attention and interacting with a game object. | |||
As long as your group doesn't place a puddle in the middle of the room, you should have no problems cleansing the curse as long as players are paying attention. | |||
Make sure that you have all "Center Screen messages" enabled in the Interface tab of your settings, as this will also display in large text the players who get cursed by the Reaper. | |||
| Line 83: | Line 94: | ||
This is where the difficulty jumps very high, especially for those undergeared or unprepared. | This is where the difficulty jumps very high, especially for those undergeared or unprepared. | ||
*Tanks: This boss | *Tanks: This boss has an AOE punt. Many groups will tank him near a corner to avoid having to reposition constantly. (See image.) | ||
*Spirit: Every 30 seconds, this boss will spawn a Spirit with the name of one of your party members. Your group needs to DPS it down as quickly as possible. | *Spirit: Every 30 seconds, this boss will spawn a Spirit with the name of one of your party members. Your group needs to DPS it down as quickly as possible. | ||
*Healers and RDPS: You can stand behind and a little away from the boss to avoid getting hit by his AOE damage attacks. Most groups place these players in the middle of the room, near the damaged floor. | *Healers and RDPS: You can stand behind and a little away from the boss to avoid getting hit by his AOE damage attacks. Most groups place these players in the middle of the room, near the damaged floor. | ||
*Add Groups: At 80%, 60%, 40%, and 20% Health, the boss will spawn large groups of adds. These can quickly overwhelm or kill your party if left unattended, so the tanks need to | *Add Groups: At 80%, 60%, 40%, and 20% Health, the boss will spawn large groups of adds. These can quickly overwhelm or kill your party if left unattended, so the tanks need to challenge them and the DPS needs to kill them quickly, before going back to the boss. | ||
** AOE Knockdowns or stuns can be hugely helpful in this section, to buy your team time to manage the adds. | ** AOE Knockdowns or stuns can be hugely helpful in this section, to buy your team time to manage the adds. | ||
** If you're running a two-tank composition, the Off-tank should focus on pulling and holding these. | |||
*Damage Spikes: This boss hits hard, and your tank / Melee DPS will sometimes take rapid and huge amounts of damage when both boss and adds are up. Have your tanks use their Morale 3 Bellows, your healers their Melee Absorb Morale 3, and any other damage reductions if you’re having issues surviving. | *Damage Spikes: This boss hits hard, and your tank / Melee DPS will sometimes take rapid and huge amounts of damage when both boss and adds are up. Have your tanks use their Morale 3 Bellows, your healers their Melee Absorb Morale 3, and any other damage reductions if you’re having issues surviving. | ||
This boss drops the [[Sentinel Set|Sentinel Gloves and Belt]]. | This boss drops the [[Sentinel Set|Sentinel Gloves and Belt]]. | ||
With Malcidious defeated, | With Malcidious defeated, make your way all the way back to the start of the dungeon, where you’ll find that the left gate is now open. | ||
Continue forward towards the left wing, where the hallway will open into three corridors. | |||
Two of these corridors will have Heros standing in them, so take the left Corridor first. | |||
===Boss Four: Seraphine ‘Pale-Eye’=== | ===Boss Four: Seraphine ‘Pale-Eye’=== | ||
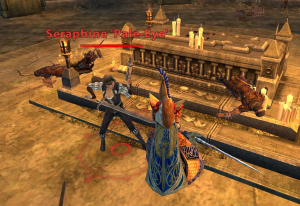
[[File:Crypt Seraphine.png|thumb| | [[File:Crypt Seraphine.png|thumb|Destroy the chests spawned by Seraphine and clear the adds that spawn, then focus the boss.]] | ||
Previously, some groups would pull this boss out of her room to avoid the chest mechanic. Doing that now will result in a stacking enrage buff, so it's recommended to fight her properly. | |||
Key Mechanics: | Key Mechanics: | ||
*Add Spawn :Every 25 seconds, Seraphine Spanws Level 41 Champion Tomb Robber adds as the fight continues. Have your DPS kill them then focus the boss. | *Add Spawn :Every 25 seconds, Seraphine Spanws Level 41 Champion Tomb Robber adds as the fight continues. Have your DPS kill them then focus the boss. | ||
*Chest Mechanic: Seraphine will spawn Chests in the room as she takes damage. Have your DPS swap to these and burn them quickly | *Chest Mechanic: Seraphine will spawn Chests in the room as she takes damage. Have your DPS swap to these and burn them quickly. | ||
*Armor Debuff: This boss has an armor debuff that she will apply to your tank. | |||
At 20%, Seraphine Pale-Eye will stop and agree to help you pick a lock, in exchange for letting her live. She’ll become friendly and the fight is over. | At 20%, Seraphine Pale-Eye will stop and agree to help you pick a lock, in exchange for letting her live. She’ll become friendly and the fight is over. | ||
| Line 111: | Line 126: | ||
===Boss Five: Sister Eudocia=== | ===Boss Five: Sister Eudocia=== | ||
The next boss is a Wraith, and you'll find her in a room surrounded by bats. | |||
Previously, many groups would pull this boss into the corridor near the room, but with her new mechanics, this is not advised. Her new mechanics are: | |||
*Pit of Shades: This boss will spawn a floor AOE that uses the Pit of Shades graphic from the Sorcerer class. Quickly move out of this to avoid taking heavy damage. | |||
*AOE Knockback: This boss will punt your team, so consider your positioning to avoid being punted into one of the damaging shade pits. | |||
*Add Spawn: This boss will spawn a Bat add periodically in the fight. Cleave it down with AOE or ignore it completely if your tank is fine. | |||
*Stun: This boss has a 4 second CC stun that it will throw periodically on your tank. | |||
*Eudocia's Memories: At 30% HP, the antechamber behind the boss room will spawn a glowing skull game object called Eudocia's Memories. While this is active, the boss takes 90% less damage. | |||
**DPS must quickly burn this down (there are Champion adds in this room too, so send your off-tank to help if you have one.) | |||
*Winds of Insanity: At 50% and 15% HP, the boss will become surrounded by swirling winds, which knock all players back. This can be taunted by your tank to interrupt it. If not interrupted, the boss will begin moving after a short period, and will continue punting your party while on the move. | |||
This fight has a lot of new mechanics and is much more complex than its old tank and spank version. All of these mechanics are fairly simple to understand and have counterplay, so as long as your party is paying attention, you should be able to clear it. | |||
This boss drops a [[Sentinel Set|Sentinel Belt]]. | This boss drops a [[Sentinel Set|Sentinel Belt]]. | ||
Revision as of 03:28, 18 June 2024
| Crypts and Tunnels | |
|---|---|
| CnT | |
 Sigmar Crypts loading graphic | |
| Location | Altdorf |
| Race(s) | Empire |
| Instance info | |
| Type | Dungeon |
| Advised level | 40 |
| Player limit | 6 |
Sigmar's Crypts (Dungeon)
Sigmar's Crypts is a level 40 PvE Dungeon located in Altdorf.
This dungeons drops Sentinel Gear, which grants the Vanquisher Ward, and requires the Conqueror Ward to equip.
The Dungeon contains six bosses, and was updated and re-launched in May 2024 to create a more streamlined and better balanced experience for players.
Why run Crypts?
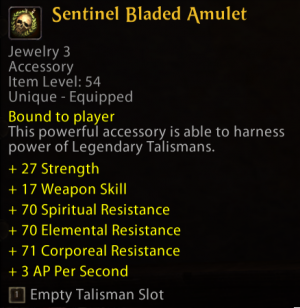
The most sought-after reward from Crypts and Tunnels is the Sentinel Ring, a jewelry piece granted as the final Influence Reward for clearing bosses within the dungeon.
This ring is special as it can hold the best-in-slot 7-day Talismans given by Stalwart Soulstone. (You could also just grind 9999 War Crests for the Triumphant Ring instead, but this is considerably more effort.)
If you're saving up War Crests for your Warlord or Sovereign Sets, you can also use the Sentinel Set as a free way to grant the Vanquisher Ward without having to buy Vanquisher armor.
Finally, many players will end up combining two pieces of Sentinel alongside other sets as a way to maximize the set bonus gains while also keeping the special bonuses from the Ring Talismans.
Difficulty level
Sigmar's Crypts is slightly more difficult than Mount Gunbad, but as part of the re-balance, many deaths can be avoided by understanding the mechanics of each boss fight.
If you're a new player or group having difficulty clearing a boss, you can check the guides below for more info on the new mechanics!
Full Dungeon Guide
Below you can find a full guide for Sigmar's Crypts in written form.
Party Composition
This Dungeon is easiest with a standard 2-2-2 composition. (Two tanks, two DPS, two Healers.) In this setup, your off-tank can run a 2H and play more offensively.
For veteran players, this Dungeon can also be run in a 1-3-2 (One tank, three DPS, two healers), but note that the final boss difficulty will increase moderately, so ensure your tank is well-geared.
For top-tier players and those who enjoy going fast, it's also possible to complete in a 1-4-1, but good gear and mastery of your class is strongly recommended if trying this.
Sigmar Crypts Guide
Begin by entering the Dungeon underneath the Temple of Sigmar in the West of Altdorf.
As you enter, take the gate on your right and clear your way through the mobs. (These first mobs hit hard - take it slow if you're new!)
Boss 1: Cryptweb Queen
The first fight is a relatively simple warm-up:
- Heartstopper: The Queen bites your tank with a potent venom that reduces 50% of their total HP.
- Cleave: As usual, Tanks should keep this boss faced away from their allies.
- Debuffing Spiderling: Every 30 seconds, this boss will spawn a Spiderling that spits Silken Strands at anyone nearby, debuffing Strength, Ballistic Skill, and Intelligence. This mob will not move.
- Terror: This boss causes Terror, so you can’t rez any fallen allies during the fight.
There are two key mechanics here:
1. Ensure your tank and heals can survive the 50% HP loss + normal damage coming in, (with enough Block and Parry, you should be fine) 2, Decide whether to move the boss away from the spiderling to avoid the debuff, or to cleave it down with AOE dps near the Queen.
For most groups, especially newer geared players, it's recommended to simply have your tank move around the room so your DPS don't get hit by the Silken Strands debuff from the Spiderling.
Boss 2: The Reaper
Previously an optional boss, The Reaper is now a required fight rebuilt from the ground up, with brand new mechanics.
- Forward Cleave: This boss has a cleave that will hit any players standing near the tank.
- Puddles: This boss will drop purple mist puddles on a random player in your group. These puddles stay for a long time, so try to place them near the outer edges of the room to avoid running out of space to fight.
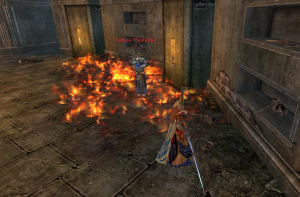
- Reaper's Curse: At 75% HP, the Reaper will curse one of your players at random, and a red light will appear around them. A Fire Brazier will also appear in the center of the room. The cursed player must run to and right click the Brazier within 12 seconds, or they will die.
- At 50% HP, the Reaper will curse two players at random, both of whom must then run to the center of the room and interact with the brazier.
- At 30% HP, the Reaper will curse three players at random, whom must repeat the same mechanic to avoid death.
The key mechanics introduced here are the Puddles (which will make a return later) and the Curse, which requires paying attention and interacting with a game object.
As long as your group doesn't place a puddle in the middle of the room, you should have no problems cleansing the curse as long as players are paying attention.
Make sure that you have all "Center Screen messages" enabled in the Interface tab of your settings, as this will also display in large text the players who get cursed by the Reaper.
Boss 3: Necromancer Malcidious
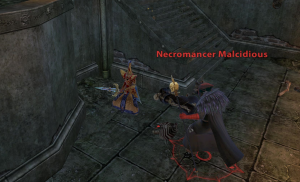
This is where the difficulty jumps very high, especially for those undergeared or unprepared.
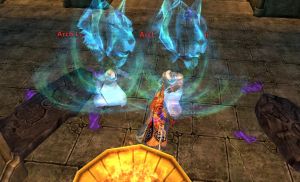
- Tanks: This boss has an AOE punt. Many groups will tank him near a corner to avoid having to reposition constantly. (See image.)
- Spirit: Every 30 seconds, this boss will spawn a Spirit with the name of one of your party members. Your group needs to DPS it down as quickly as possible.
- Healers and RDPS: You can stand behind and a little away from the boss to avoid getting hit by his AOE damage attacks. Most groups place these players in the middle of the room, near the damaged floor.
- Add Groups: At 80%, 60%, 40%, and 20% Health, the boss will spawn large groups of adds. These can quickly overwhelm or kill your party if left unattended, so the tanks need to challenge them and the DPS needs to kill them quickly, before going back to the boss.
- AOE Knockdowns or stuns can be hugely helpful in this section, to buy your team time to manage the adds.
- If you're running a two-tank composition, the Off-tank should focus on pulling and holding these.
- Damage Spikes: This boss hits hard, and your tank / Melee DPS will sometimes take rapid and huge amounts of damage when both boss and adds are up. Have your tanks use their Morale 3 Bellows, your healers their Melee Absorb Morale 3, and any other damage reductions if you’re having issues surviving.
This boss drops the Sentinel Gloves and Belt.
With Malcidious defeated, make your way all the way back to the start of the dungeon, where you’ll find that the left gate is now open.
Continue forward towards the left wing, where the hallway will open into three corridors.
Two of these corridors will have Heros standing in them, so take the left Corridor first.
Boss Four: Seraphine ‘Pale-Eye’
Previously, some groups would pull this boss out of her room to avoid the chest mechanic. Doing that now will result in a stacking enrage buff, so it's recommended to fight her properly. Key Mechanics:
- Add Spawn :Every 25 seconds, Seraphine Spanws Level 41 Champion Tomb Robber adds as the fight continues. Have your DPS kill them then focus the boss.
- Chest Mechanic: Seraphine will spawn Chests in the room as she takes damage. Have your DPS swap to these and burn them quickly.
- Armor Debuff: This boss has an armor debuff that she will apply to your tank.
At 20%, Seraphine Pale-Eye will stop and agree to help you pick a lock, in exchange for letting her live. She’ll become friendly and the fight is over.
Boss Five: Sister Eudocia
The next boss is a Wraith, and you'll find her in a room surrounded by bats.
Previously, many groups would pull this boss into the corridor near the room, but with her new mechanics, this is not advised. Her new mechanics are:
- Pit of Shades: This boss will spawn a floor AOE that uses the Pit of Shades graphic from the Sorcerer class. Quickly move out of this to avoid taking heavy damage.
- AOE Knockback: This boss will punt your team, so consider your positioning to avoid being punted into one of the damaging shade pits.
- Add Spawn: This boss will spawn a Bat add periodically in the fight. Cleave it down with AOE or ignore it completely if your tank is fine.
- Stun: This boss has a 4 second CC stun that it will throw periodically on your tank.
- Eudocia's Memories: At 30% HP, the antechamber behind the boss room will spawn a glowing skull game object called Eudocia's Memories. While this is active, the boss takes 90% less damage.
- DPS must quickly burn this down (there are Champion adds in this room too, so send your off-tank to help if you have one.)
- Winds of Insanity: At 50% and 15% HP, the boss will become surrounded by swirling winds, which knock all players back. This can be taunted by your tank to interrupt it. If not interrupted, the boss will begin moving after a short period, and will continue punting your party while on the move.
This fight has a lot of new mechanics and is much more complex than its old tank and spank version. All of these mechanics are fairly simple to understand and have counterplay, so as long as your party is paying attention, you should be able to clear it.
This boss drops a Sentinel Belt.
Boss Six: Tobias the Fallen
Buckle up because it's time for another fight with actual mechanics and if these are missed, your healers will hate you.
Unlike other fights nearby, you will also fight this boss in his intended room – do not pull him up the stairs!
- NOTE:This boss has a STUN mechanic that will temporarily prevent players from moving or using abilities. If he times this stun with other attacks, it may result in a full wipe on your party.
- Tank: Your tank should move this boss around the outside of the room.
- Field of Screams: This boss will drop Fire AOE on the floor. Your tank and MDPS should very quickly move out of the fire, as this will kill you rapidly. (Sometimes you will be stunned as this happens, which makes it difficult.) On the combat log, this will appear as “Field of Screams”.
- Interrupt: When Tobias holds his Warhammer with both hands and begins to raise it into the air, your tank should Taunt or a DPS should use an interrupt to stop his attack. If this is failed, the boss can do significant AOE damage to your group and will knock everyone back.
For a specific look at when to interrupt, check out the image on the right.
Once you have the pattern down, this fight isn’t too bad, but your first attempt may be rough if you miss mechanics or get unlucky with the stagger. Don’t let it dishearten you and keep at it until you finally defeat him!
This boss drops the Sentinel Boots and Sentinel Belt.
With all three of these bosses defeated, Seraphine will open the Gate to the East and allow you to fight the final boss of the Sigmar Crypts: The Arch Lector Twins.
Boss Seven: The Arch Lector Twins
The final boss of the Sigmar Crypts brings its own challenges, and most of the pressure here will fall upon your Tanks and Healers. Range DPS are also king here, due to the mechanic of these twin bosses.
- Ability Block: If you’re within 30 feet of these bosses and they’re near each other, all of your abilities will show as prevented. However, it’s still possible to spam some instant cast abilities. (Like a Tank’s Challenge or Taunt) and have them go off.
- Tank(s): If you have a solo Tank, you can either hold the bosses in between the two slabs of Chaos Stone near where they spawn, or run back and forth (not towards your healers in the middle of the room).
- Dual Tank: If you have two tanks, each Tank should pick up and hold one of the bosses, keeping them split on their own sides of the room.
- DPS: The Boss HP must remain within 10% of each other, or they will both heal rapidly and cost your party a ton of time. Make sure to watch your damage and keep their HP as close as possible to avoid this.
- MDPS: If you're a melee DPS, and both bosses near each other, it's possible to stand exactly at 30 meters away to damage the bosses without losing your abilities. It may take some wiggling to get this perfect.
- Bonus Damage: The bosses will trade a bonus that increases the damage they take. This can be useful to catch up damage on a boss whose HP is far from the other, but also note that if your DPS isn’t paying attention, you will very easily reset the boss HP because of this. Make sure the DPS both have and use their brains here, or this fight will be difficult.
- Heals / RDPS: Stand in front of the open coffin in the middle of the room, which should put you out of range of most of the ability silences that these bosses can cause. Be ready for intense spikes of damage if you have a Solo Tank or if you have melee players who are not well-geared. If you’re a Range DPS, carry the team like an absolute chad, because this is your time to shine.
This boss drops the Sentinel Chestpiece.
With the Lector Twins down, you're through the hardest part of the run - good job!
Next, it's time to kill some Skaven in the Warpblade Tunnels located underneath Altdorf.
