Bilerot Burrows
| Bilerot Burrow | |
|---|---|
| BB | |
 Bilerot Burrow loading graphic | |
| Location | The Inevitable City |
| Race(s) | Chaos |
| Instance info | |
| Type | Dungeon |
| Advised level | 40 |
| Minimum level | 10 |
| Player limit | 6 |
In progress... This page is still under development, if you would like to contribute please login. |
Why run Bilerot Burrows?

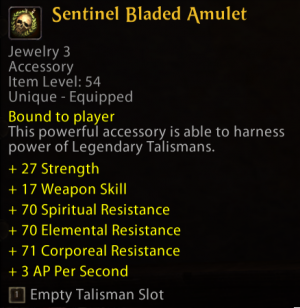
The most sought-after reward from Bilerot Burrows is the Sentinel Ring, a jewelry piece granted as the final Influence Reward for clearing bosses within the dungeon.
This ring is special as it can hold the best-in-slot 7-day Talismans given by Stalwart Soulstone. (You could also just grind 9999 War Crests for the Triumphant Ring instead, but this is considerably more effort.)
If you're saving up War Crests for your Warlord or Sovereign Sets, you can also use the Sentinel Set as a free way to grant the Vanquisher Ward without having to buy Vanquisher armor.
Finally, many players will end up combining two pieces of Sentinel alongside other sets as a way to maximize the set bonus gains while also keeping the special bonuses from the Ring Talismans.
Difficulty level
Bilerot Burrows is more difficult than Mount Gunbad, and was rebuilt in May 2024 with updated mechanics and two new bosses. As part of this re-launch, the previously attached dungeon, Bloodwraught Enclave, is no longer part of the run.
Experienced groups can still clear this easily, but if your party has fresh 40's or if it's your first time in the dungeon, it's highly advised to read up on boss mechanics in the guide below!
Full Dungeon Guide
Below you can find a full guide for Bilerot Burrow's updated mechanics in written format.
Bilerot Burrows Guide
Bilerot Burrows is the Destruction City Dungeon for level 40 players, and contains six bosses.
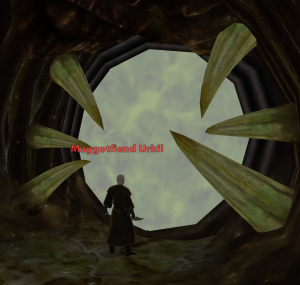
Begin by entering the Dungeon near the Sewer grate located just north of The Monolith in the Inevitable Center.
Boss 1: Maggotfiend Urhil
The first fight is a relatively simple warm-up:
- Cleave: As usual, Tanks should keep this boss faced away from their allies.
- True Damage: This boss can deal 50% HP of his current target, and this attack cannot be blocked or avoided.
- Debuffing Add: This boss will spawn a Maggot every ~30 seconds, which pulses a powerful debuff that reduces Strength, Ballistic Skill, and Intelligence on anyone in range.
- Terror: This boss causes Terror, so you can’t rez any fallen allies during the fight.
For this fight, simply keep the boss facing away from the group and either move the boss every 30 seconds to avoid the debuff, or stack the boss on top of the add and AOE it down if you have enough damage to do so.
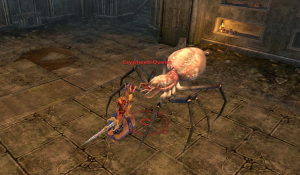
Boss 2: Ssyridian Morbidae
The next fight in the run is against a Chosen named Ssyridian Morbidae.
- Cleave: As usual, Tanks should keep this boss faced away from their allies.
- Auras: This boss has 3 Auras like a regular Chosen. These debuff incoming healing by 25%, increase cast times, and pulse constant damage for healers.
- Damage Reflect: This boss can buff himself and reflect damage back while the buff is up. Tanks / healers should look for a shatter to remove this, or just heal through it.
- Stacking Heal Debuff: This boss places stacks of debuffs on party members, which reduce incoming healing. This will stack with his base 25% debuff.
- Terror: This boss causes Terror, so you can’t rez any fallen allies during the fight.
This fight is a bit of a DPS race, especially with the stacking heal debuffs. Healers can cleanse these, and the Cauldrons are intended to cleanse some of these, but may or may not function properly.
Remember that your teammates can also back up to get out of the Auras if these are causing too much of an issue.

