Vainglorious Guide (Destro)
Vainglorious Set: Destruction Guide 
This guide is for the Epic Quest Vanity Is Its Own Reward, and will help you acquire the Vainglorious Set within Return of Reckoning.
Besides gear, this quest line also grants players access to a number of previously unavailable armor designs that match sets you'll unlock via RvR and PvE. These are listed in the guide with "Matching Visual Set" notes.
Before you get started
You can take the Vainglorious Quest at any level, but before starting, some important tips:
- This Epic Quest line may take you a number of hours to complete, (on average, 2-4 hours) so bring along friends, guildmates, or find others in LFG to make the experience more enjoyable.
- When grouping, a maximum of 6 people (one party) is recommended as only one party can gain kill credit at a time for the quest.
- Try to have at least 32 open spaces of Inventory if you want to keep all the gear, and plan to complete this Quest in one session.
Because there is no level requirement for these quests, it is possible for strong players to carry lower level friends or others through these quests and earn them this gear early, even at level 1.
Step 1
You can begin this Epic Quest in either Norsca in Chaos Chapter 1, or in the The Inevitable City's Southwest section in the Slananesh Quarters.
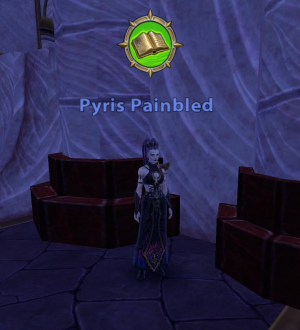
Speak to Pyris Painbled to accept the first part of the quest.
Step 2
Once you accept the quest, fly to Norsca and head to the Ruinous Powers PQ in the North. (If you started the quest in Chaos Chapter 1, just head South to the PQ!)
- Note that if you're above Rank 16, you'll be Debolstered, so higher-level mounts, most tactics, and a number of skills may not work.
- If you lost your starter mount, you can purchase another for 5 silver from the Quartermaster in the starting camp.
Clear the PQ and get credit for killing the final boss. Head northwest across the bridge towards Chaos Chapter 1, and turn in the quest.
You'll receive the Thorshafn Belt (Matching Visual set: Decimator), and your choice between four different Norscan Farmer dyes.
Step 3
Accept the next part of the quest and head Southwest to the Holmsteinn Revisited Public Quest.
Here, kill Boswald Griev, the final boss of the PQ, and then head back to Chaos Chapter 2.
You'll receive the Holmsteinn Belt (Matching Visual Set: Carnage), and another choice between four Norscan Farmer dyes.
Step 4
Accept the next part of the quest and head a few steps over to the Destruction of the Weak Public Quest.
Kill 'em all, and then head Southwest to turn in the quest and receive the Norscan Grimbraces (Matching Visual set: Decimator) and another choice between the same dyes.
Step 5
Accept the next quest and head to the Suderholm Public Quest, just southwest of your current location.
As you arrive at the PQ, find yourself inexplicably attacked by every Raven in a 2 mile radius as you burn the town, then kill the boss.
Head back to Chaos Chapter 2 and turn in the quest to earn the Suderholm Belt (Matching Visual Set: Tracker) and another choice of dyes.
Step 6
Use the Flight Master in your current camp to fly to Nordland, then head east to Pillage and Plunder Public Quest.
As the title suggests, do some pillaging and plundering, and once you defeat the boss, return to Chaos Chapter 3.
Turn in the quest to receive the Plunderer's Gloves (Matching Visual Set: Carnage), and your choice of four different dyes.
Step 7
Accept the next part of the quest and head just across the road to the Macabre Fervor Public Quest.
Kill the PQ Boss and return to earn the Macabre Shoulders (Matching Visual Set: Decimator) and a new choice between five different dyes, Including Chaos Black, Chaos Sky Blue, and Chaos Navy Purple.
Step 8
It's time for the Hard PQ. Accept the next quest and head East to the Wilds of War Public Quest.
Once cleared, you can use your War Report to Nordland to save time running back to the quest giver.
Turn in this quest to receive the Wilds of War Shoulders (Matching Visual Set: Tracker), and another choice of the same Dyes.
Step 9
Next, you'll be heading further Southeast to the Sacred Ground PQ to kill a White Wolf.
Once complete, head to Chaos Chapter 4 to turn in the quest and acquire the White Wolf Shoulders (Matching Visual set: Carnage). Like before, you'll get another choice between special Chaos dyes.
Step 10
You've been on this quest for a while now, so let out a little frustration by accepting the next quest and razing an entire town to the ground in the Fields of Woe Public Quest.
Once complete, you'll be heading South to turn in the Quest and receive your final quest for Tier 1!
Some classes will receive the Beeckerhoven Udda Helm (Matching Visual Set: Decimator), and all players get a choice of bonus Dyes.
Step 11
Accept the final Tier 1 PQ Quest and head through the nearby tunnel to arrive within the town.
Make a mockery of the Empire's guards while screaming: "BLOOD FOR THE BLOOD GOD" through the streets to impress the local roleplayers, then casually kill the PQs final bosses.
It's a long run back to Chaos Chapter 4, so you can use your War Report to Nordland here to save a little bit of time.
Once back, turn in the quest. Some classes will receive an additional Salzenmund Helm (Matching Visual Set: Tracker) here, and all players get to pick another set of Chaos Dyes as your reward.
Step 12
Take the next part of the quest and use the Flight Master in Chapter 4 to fly to Ostland.
If you were debolstered, take a moment to reset your tactics so they function again, and then hug your 50-60% Movement speed mount - you never realized just how much you loved them until they were gone.
Head towards the Bells of War Hard PQ in the West, and kill the boss to complete the quest.
Once done, run South to Chapter 5 to turn the quest in, and take a close look at the Ferlengan Belt (Matching Visual Set: Havoc/Obliterator) you pick up: it's one of a number that now include Talisman slots.
Step 13
Accept the next quest, and once you have it, use the camp's Flight Master to fly to --> Troll Country, and then immediately fly back to --> Ostland.
This little trick will put you much closer to the Wayshrine of Sigmar PQ, which is the next stop on your ever-growing trail of murder.
Once the PQ boss is dead, make your way Northwest to Chaos Chapter 6, which is located not far and just barely into Troll Country.
Turn in the quest to receive the Felde Shoulders (Matching Visual Set: Obliterator)
Step 14
To get to the next PQ, first fly to Ostland from the flight master in Chapter 6, then fly back to Troll country. This will place you much closer to your destination - now head east to the Griffon Outpost and complete the PQ.
Once this PQ is complete, see if there's a War Report active for High Population in Ostland - if so, take it! Otherwise, you can either fly or run south back to Chaos Chapter 7 in Ostland to turn in this quest.
Turn in the quest to get the Frontier Helm (Matching Visual Set: Obliterator) and another choice of Dyes. (You can never have enough Dyes.)
Step 15
Next, fly back to Troll Country and make your way Northeast to the Plaguewood Thicket Public Quest.
- In this PQ, you can skip a number of enemies by simply clicking the flags after the first phase.
Once this PQ is done and the quest completed, turn it in nearby at Chaos Chapter 8 to get the Plaguewood Belt (Matching Visual Set: Keeper) and even more Dyes.
Step 16
Accept the next quest, where you'll learn that Papa Nurgle has been up to no good, and it's time to go show him a thing or two about playing nice with his diseases.
Head Northwest to Tearing the Portal, wipe out his forces and the PQ Boss, and then Southeast to Chapter 9 to turn it in.
This quest reward will grant you the Soulblight Shoulders (Matching Visual Set: Havoc).
- Note: The Havoc shoulders have a unique visual appearance, and at the time of publishing this article, this quest is the only way in the game to earn them!
Step 17
Take a moment to appreciate that you've just grinded through a considerable number of PQs. Take a moment to stand up and grab a drink.
All done with that? Then let's keep going!
Step 18
It's time to leave Troll Country behind. Accept the next quest, run East to Talabecland, and complete the Mud Flats PQ not far from where you spawn in.
Once done, turn that back in at Chaos Chapter 10 to receive a very special reward:
This time you'll get Humble Origins, the first piece of your Vainglorious Set, and another choice of dyes!
Step 19
Accept the head next quest and head north to the Serpent's Fang Bandits PQ.
As you clear this PQ, ponder the curious placement of wenches and Slaaneshi demons, including the Slaaneshi harem at the end, and smile and nod as you understand why this game did not receive an E for Everyone Rating.
With the Slaaneshi harem defeated and with the crippling realization that you will likely never be cool enough to get one of your own, perk yourself up by heading Northeast to Chaos Chapter 11 with the knowledge that another reward is waiting for you.
Upon turning in the quest, you'll receive the Serpent's Fang Belt (Matching Visual Set: Stalker) and another choice of dyes.
Step 20
Now that you have multiple fancy belts with Talisman slots, reconsider that whole 'not cool enough' thing as you accept the next part of the Quest and make your way East to the Bitterspring PQ.
The fastest way there is through the RvR Lake, as long as it's not active and crawling with those nasty Witch Hunters.
Once you clear the Bitterspring PQ, turn it in nearby at Volgen, Chaos Chapter 12.
This reward will grant you the Bitterspring Belt (Matching Visual set: Devastator/Mayhem). This belt, as with many others in this quest line, also comes with a Talisman slot.
Step 21
Accept the next Quest, and fly to High Pass.
Follow the main road Southeast and then the smaller road North over the ice bridge to arrive at the PQ.
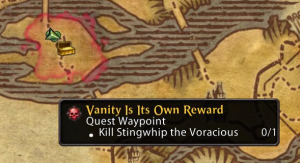
- IMPORTANT: It is possible to complete this PQ without killing the boss which you need for the quest. Make sure to kill the boss before blowing the super-cool, ridiculously-sized Horn in the final stage.
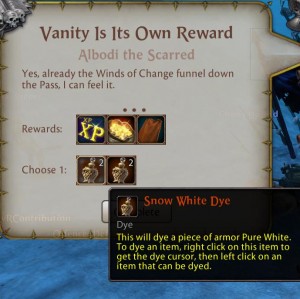
Once done, head back to Chapter 13 and turn in the quest to receive the Helm of the Tempest Horn. (Matching Visual Set: Stalker) and two very special dyes:
Here, you'll also get to choose between two Snow White Dye or two Arctic Blue Dye, both of which are very bright and very rare, so decide which you'd like!
*PSA: The Snow White Dye is tradeable, but the Arctic Blue Dye is bound-to-player. Keep this in mind when choosing!
Step 22
Accept the next quest, head Northeast and take the Cave at the next chapter to quickly move towards the next PQ. (Don't take the main road!)
This PQ is filled with High Elves, so make the world a better place by removing them from it. Once completed, the fastest trip back to Chapter 14 is to die to the remaining Champions on the hill, or to run back through the cave.
Upon turning in the quest, it's time to receive Death Deceived, a shiny cape and the second part of your Vainglorious Set!
Like the last quest, you'll also get one more chance to choose between two Snow White Dye or two Arctic Blue Dye upon turning this quest in.
Step 23
Take a moment to realize that you're nearing the end of the Epic Quest, and only two PQ's remain.
Accept the next quest, and use the Flight Master in the chapter camp to fly to The Chaos Wastes.
Once here, head North along the road to Public Quest "The Storm is Coming", and trounce some Beastmen and Dragon-ogres.
Head even further North to turn in the quest at Chaos Chapter 15, where you'll receive the Stormbreaker Belt (Matching Visual Set: Annihilator / Ruin), as well as new dyes to select: Raven Host Black, Raven Host Blue, Raven Host Sea Blue, and Raven Host Tan.
Step 24
Only one Public Quest remains.
Head all the way South in Chaos Wastes to the Fall of Grimclan PQ. Look for a Cave entrance just west of the main road to find most of the dwarves you'll need.
Purge the dwarves so hard that even their Roleplay guilds cry out in anguish, and then, once the dust settles... you've done it!
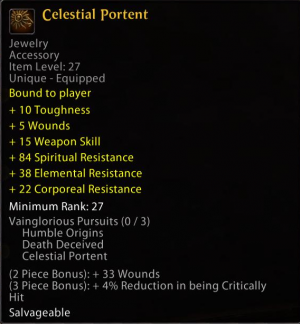
Head back North to Chaos Chapter 16 and turn in the quest to receive the Celestial Portent, the third and final piece of the Vainglorious Set, as well as more Raven Host dyes.
There's just one last thing to do: Head back to Pyris and tell her that your world tour of death, destruction, and slaughter was wonderful, and that you're ready to stop doing PQ's now.
Step 25
Arriving back at the Slaaneshi Chambers, talk to Pyris who will grant you a bonus reward -- even more dyes to choose from, including Slaanesh Black, Slaanesh Pink, Slaanesh Light Violet Blue, Slaanesh Violet White, and Slaanesh Gold dye.
She'll let you know how she feels about your results, and then, all's well that ends well, right?
... right?
Just kidding.
It's not over yet.
Step 26
Surprise! There's one more little favor Pyris would like you to do for her.
This time, you'll need to head into Mount Gunbad and take on The Big Oaf, the first boss located in the Middle Wing.
- IMPORTANT: If you are on a Gunbad Lockout timer, you cannot earn credit for this quest.
Gather your allies and head to Gunbad, defeat The Big Oaf to get some of his Toe Fungus (yes, really) and return to Pyris to get the Red-Eye Belt (Matching Visual Set: Red-Eye) and one final choice at her selection of fancy Slaanesh dyes.
Step 27
This time, it's truly over. Get up, get a drink, use the restroom, and leave your computer for a bit. You did it. You finally did it.
Congratulations on completing the Vainglorious Epic Quest!
Special Thanks to <Shrek Is Life> and <Fog of Waaaaagh> for their help making these guides possible!


