Chapter 22 Guide
Chapter 22 Guide
Chapter 22 is a series of 24-man Public Quests that are built as a raid for 24 Players.
These Public Quests were updated and re-launched in September 2024 with new mechanics.
At the time of writing this page, Chapter 22 now features the most mechanic-heavy fights in Return of Reckoning.
For a guide on the basic mechanics of each Chapter 22 PQ, please see below.
Public Quest Stages
Each Chapter 22 Public Quest features either four or five stages.
The first stages of each Chapter 22 PQ are generally straightforward, with the final bosses featuring unique mechanics and enrage timers that require efficient teamwork to complete.
It may be possible to bypass or ignore some mechanics, but most are specifically designed in ways that give each member of the warband (and each class) very clear roles.
Chapter 22 Rewards
After successfully completing any Chapter 22 PQ, your warband will roll on bags that grant top-tier rewards, like Onslaught Gear and boxes of random best-in-slot Talismans.
- Chapter 22 is the only place to acquire Onslaught Gear, a special PvE set that grants the Vanquisher Ward. (As part of the 2024 Re-work, Onslaught Gear was upgraded to Vanquisher Ward, given new pieces and set bonuses, and had its Renown requirement removed.)
Additionally, new Cosmetic Capes were added to Onslaught, each with unique looks that may be a draw for many Fashionhammer aficionados.
- The Chest, Helmet, and Shoulders Onslaught pieces drop exclusively from Gold Bags.
It is possible for players who do not need these to Opt Out of the PQ Gold Bags specifically to help players who need these get their gear. Make sure to remind your warband as you enter the final stage to do this, just to be safe.
- 2025 Update: To combat solo players leeching bags from the organizing warbands, now only members of the largest Warband participating in the PQ will get the top rolls. Players not in the Warband will roll at the bottom of the list.
These players can still take white bags if a player in the main Warband opts out of "All" Bags, but opting out of simply Gold should guarantee that a player in the main warband gets at least a White Bag.
Chapter 22 New Mechanics Guide
Below you can find a full guide for the key mechanics that exist in each Chapter 22 PQ.
These PQs are generally mirrored by Race. (This means that High Elf mechanics are similar for the Dark Elf PQ; Dwarf mechanics are similar for the Greenskin PQ, etc.)
There are a few rules for Mechanics that are followed by all six Chapter 22 PQs.
General Mechanic Rules:
- A red light on a player means that an AOE will soon drop on their location
- A red light on a boss means that the boss is empowered, and dealing bonus damage (it is always possible to remove this)
- A white light on a Game Object means that the Game Object is important, and can be destroyed
- A white light on a player means that a special mechanic has activated on them (see the Dwarf and Greenskin guide for examples)
- Every final boss has a 12 Minute Enrage Timer, which you can see on them as a buff. If the boss is not defeated before this time, they deal massive damage and wipe the raid.
Before you Begin: General Advice
- The final Lord of every PQ is specially built to deal significant damage. It is highly advised for Main Tanks and Off-Tanks to run maximum avoidance (block/parry) and builds that boost their survival.
- Many 2H / DPS-leaning Tank Builds may be strong in other PvE content, but might melt considerably faster against these bosses.
- The amount of adds (extra enemies that spawn) is high in some of these raids. In many cases, a designated group to handle these is advised.
- Besides healing the raw damage, Healers should keep eyes out for cleanses and debuffs to remove from their party. All of these debuffs are special, and can be cleansed by any healer class.
- Many bosses have active channels or skills that can be interrupted by DPS or by a tank's Taunt ability. Players should watch for and interrupt these as often as possible.
- Many bosses have buffs that can be stripped or removed by players. Keep an eye out for these and strip constantly if you see a chance to do so.
Order PQ 1: The Ebon Keep (Chaos)
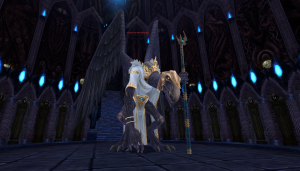
This PQ Lord is a Lord of Change, a greater Daemon of Tzeentch.
Key Mechanics (All Phases):
- Tank Swap:
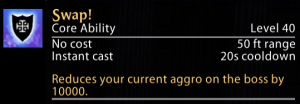
 This boss puts a stacking debuff (icon shown on left) on whoever is tanking it. Once this debuff reaches 9 stacks, the sacred number of Tzeentch, the player dies instantly.
- The boss will also apply this attack at range, so ensure that you have a second tank building aggro to properly manage this.
- Tanks near the Boss will gain the 'Swap!' ability, which is a granted ability that can be used to lower their aggro on the boss by 10,000. This has a 20 second cooldown.
- True Damage Spikes: The boss will hit your Main Tank for a large chunk of their HP, regardless of their block or parry rates.
- Forward Cleave: The boss will cleave players in front of him. Tanks should face him away from the group at all times.
- Interrupt: This boss has an interruptable AOE attack called Surging Flames that will damage all those nearby him. This appears as Blue and Purple flames.
- Shatter: This boss will buff himself to increase his power. This can be shattered or stripped.
- Deadly Adds: Every time the boss loses 10% HP, a group of adds will appear at a random Chaos Portal upstairs. The portals cannot be destroyed.
Phase Mechanics:
- Phase 1: (Game Objects) Every 5% HP, the boss will summon the power of a new arcane artifact. These appear up the stairs on the rampart, and a white light will appear with them to draw attention to them.
- Phase 2: A Portal Opens up the small ramp behind the boss' spawn location. Within this portal, players must destroy the "Core of the Ebon Keep" object to stop the Lord of Change from gaining a stacking power increase. A Hero mob is also waiting nearby to protect this object.
- Phase 3: At 40% HP, two additional Daemons, similar to the Seneschal of the Ebon Keep the raid fought in Stage III, will appear at each of the large stairs leading up to the ramparts. These can and should be killed quickly. These also apply the same stacking 9 stack debuff to their target. If the main Tank has 5 stacks from the boss and 4 stacks from one of these mobs, they will still die from hitting a total of 9 stacks, so be sure to split these onto unique tanks.
- Phase 4: At 20%, the boss will enter a DPS race phase. If not killed within the time limit, it will enrage and wipe the raid.
This boss drops Onslaught Shoulders and Gloves.
Order PQ 2: Tor Sethai (Dark Elf)
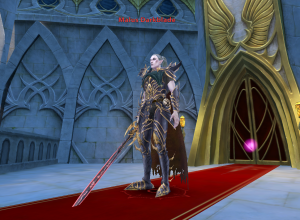
This PQ Lord is Malus Darkblade, a Dark Elf partially possessed by a Greater Daemon named Tz'arkan.
Key Mechanics (All Phases):
- Furthest Player Puddle: The furthest person from the raid will have a red light appear on them, and a puddle will drop on their location a second or two later.
- True Damage Spikes: The boss will hit your Main Tank for 60% of their HP, regardless of their block or parry rates.
- AOE Damage: The boss will deal AOE damage to all players near him.
- Forward Cleave: The boss will cleave players in front of him. Tanks should face him away from the group at all times.
- Deadly Adds: Every time the boss loses 5% HP, a group of adds will appear at the stairs leading to the upper platform.
- Add Bonus: If the Captain adds are allowed to get near Malus, both Malus and the Captain will gain a damage bonus.
- Spite: Malus' Cold One, spite, will join the battle at 70%. If Spite is killed, Malus will enrage.
Phase Mechanics:
- Phase 1: (75% HP): The boss will select twelve players at random, who will have red beams shine upon them. After seven seconds, these players will drop slightly weaker versions of the Daemonic Puddle at their locations.
- Phase 2: (70% HP): Spite, Malus' Cold One mount, will appear to aid his master. An off tank should pick this up and keep Spite away from the main boss, or each will deal bonus damage. Spite also shreds armor over time, so for weaker tanks, consider tank swapping to mitigate this.
- Phase 3: (65% HP): A Statue of Khaine spawns above on the ramparts above the stairs that the warband ascended to fight Malus. Use the glowing orbs at the towers to climb up and destroy the statue to stop Malus from gaining bonus damage.
- Phase 4: (50% HP): A large amount of reinforcement will arrive to support Malus.
- Phase 5: (25% HP): The boss will again select twelve players at random, who will have red beams shine upon them. After seven seconds, these players will drop slightly weaker versions of the Daemonic Puddle at their locations.
- Phase 6: 20% HP: A banner will spawn on top of the building behind Malus which reduces his incoming damage. Use the purple Orb behind him to teleport up top and destroy this banner.
This boss drops the Onslaught Helmet and Boots.
Order PQ 3:Dammaz Skar (Greenskin)
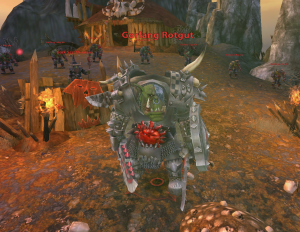
This PQ Lord is Gorfang Rotgut, a powerful Warboss who rules over Black Crag. He is assisted by powerful Big Un' Orcs and Night Goblin shamans.
Key Mechanics (All Phases):
- Gork Sez: The key mechanic is called "Gork Sez", and is similar to "Simon Says": If Gork Sez to do an emote, you must target Gorfang and then do the required emote. This triggers every 10% HP lost by the boss.
- As an example, If "Gork Sez Bow!", you must target Gorfang and then use the /bow emote.
- Important: The Shaman will try to trick you! If he doesn't say "Gork Sez", don't do an emote!
- You can see the commands both in your center screen messages and also in your chat logs. Be sure to filter them so you ensure you have visibility on this mechanic.
- Gork's Gift: Players will randomly be given "Gork's Gift", which is a buff + debuff that increases their damage for a short time. After the timer ends, their increased damage goes even higher. If this debuff is not cleansed before it reaches the third stage, it will kill the player at the end.
- Stand in Da Green: The Shaman will periodically target a random player, who will have their name announced in chat and center screen messages. After a few seconds, this player will drop a Green Puddle that damages any players who stand in it.
- Black Orc Boss: A Black Orc Boss will appear at 65% HP. If he is killed, Gorfang will enrage.
Phase Mechanics:
- Phase 1 (90% HP): The "Gork Sez" mechanic will first trigger. In this phase, until the Black Orc boss spawns later, it is possible to resurrect players who fail this mechanic. Down the hill, Big Uns spawn to begin the fight circle.
- Phase 2 (65% HP): The Black Orc Boss will join the fight. If allowed to get near Gorfang, each will gain a damage bonus, and the Black Orc will Guard Gorfang, reducing the incoming damage on the main boss. Down the hill, the Big Uns get closer, reducing the amount of space to move.
- Phase 3: (40% HP): The Big Uns down the hill get even closer, and the circle to fight in shrinks further.
This boss drops Onslaught Chest and Belt.
Destro PQ 1: All the King's Men (Empire)
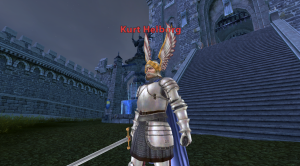
This PQ Lord is Kurt Helborg, one of the greatest warriors of the Empire. He is supported by the Reiksguard and a Celestial Wizard.
Key Mechanics (All Phases):
- Tank Swap:
 This boss puts a stacking debuff on whoever is tanking him. (Icon shown on left.) Once this debuff reaches ten stacks, Kurt will strike a killing blow, instantly defeating his target.
- Tanks near the Boss will gain the 'Swap!' ability, which is a granted ability that can be used to lower their aggro on the boss by 10,000. This has a 20 second cooldown.
- True Damage Spikes: Kurt will hit your Main Tank for a large chunk of their HP, regardless of their block or parry rates.
- Forward Cleave: The boss will cleave players in front of him. Tanks should face him away from the group at all times.
- Interrupt: This boss has an interruptable AOE attack that will damage all those nearby him. (This attack is a spin and looks like the Raze Morale 2)
- Shatter: This boss will buff himself to increase his power. This can be shattered or stripped.
- Deadly Adds: Every time the boss loses 10% HP, a group of Reiksguard Reinforcements will appear from a random direction to join the fight.
Phase Mechanics:
- Phase 1: (Game Objects) Every 5% HP, the Reiksguard will raise banners or summon objects to empower Kurt. These appear first over near the Tents outside the PQ's tower, and each will have a white light glowing on it to make it visible. One appears at the bottom floor of the Tower, and another will appear around the side of the Tower. Destroy these quickly to remove the buffs from Kurt.
- Phase 2: At 50% HP, the Game Objects stop spawning. A Portal Opens up the stairs behind the boss' spawn location. Within this portal, players must defeat the Celestial Wizard and then destroy the Game Object sitting atop the tower he resides in. Once defeated, use the Exit Portal to rejoin the fight.
- Phase 3: At 40% HP, two Reikscaptains will appear on either side of Kurt. These can and should be killed quickly. These also apply the same stacking 10 stack debuff to their target. If the main Tank has 5 stacks from the boss and 5 stacks from one of these mobs, they will still die from hitting a total of 10 stacks, so be sure to split these onto unique tanks.
- Phase 4: At 20%, the boss will enter a DPS race phase. If not killed within the time limit, it will enrage and wipe the raid.
This boss drops the Onslaught Shoulders and Gloves.
Destro PQ 2: The Glittering Citadel (High Elf)
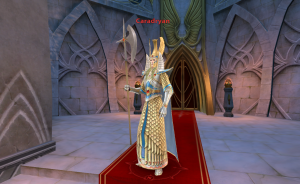
This PQ Lord is Caradryan, captain of the Phoenix Guard of Ulthuan and a dangerous warrior in his own right. He rides the Frostheart Phoenix Ashtari in battle.
Key Mechanics (All Phases):
- Furthest Player Puddle: The furthest person from the raid will have a red light appear on them, and a puddle will drop an Archmage Puddle on their location a second or two later.
- True Damage Spikes: The boss will hit your Main Tank for 60% of their HP, regardless of their block or parry rates.
- AOE Damage: The boss will deal AOE damage to all players near him.
- Forward Cleave: The boss will cleave players in front of him. Tanks should face him away from the group at all times.
- Shatter: This boss will cast an absorb on himself that soaks up incoming damage. You can shatter this to immediately remove it.
- Deadly Adds: Every time the boss loses 5% HP, a group of adds will appear from a random location near the boss. (Be careful that your player dropping puddles does not run into them!)
- Add Bonus: If specific adds are allowed to get near Caradryan, both the boss and the add will gain a damage bonus.
- Ashtari: The Frostheart Phoenix Ashtari will join the fight at 70%. If Ashtari is killed, Caradryan will enrage.
Phase Mechanics:
- Phase 1: (75% HP): The boss will select twelve players at random, who will have red beams shine upon them. After seven seconds, these players will drop slightly weaker versions of the Archmage Puddle at their locations.
- Phase 2: (70% HP): Ashtari, Caradryan's Frostheart Phoenix, will appear to aid his master. An off tank should pick this up and keep Ashtari away from the main boss, or each will deal bonus damage.
- Phase 3: (65% HP): The first of two Game Objects will appear high up on the Elven building behind Caradryan's spawn location. Send a group or a couple DPS up here by using the red light orbs located on either side of the fight, near the walls. If this Game Object is not destroyed, Caradryan will steadily increase damage of all of his abilities.
- Phase 4: (50% HP): A large amount of High Elf reinforcements will appear to support Caradryan.
- Phase 5: (25% HP): The boss will again select twelve players at random, who will have red beams shine upon them. After seven seconds, these players will drop slightly weaker versions of the Archmage Puddle at their locations.
- Phase 6: (20% HP): The second game object, a banner of the High Elves, will appear on the building behind Caradryan. This Banner reduces all of his incoming damage significantly, and can be removed by sending a team to destroy it via the red light orbs on either side of the walls.
This boss drops the Onslaught Helmet and Boots.
Destro PQ 3: The Slayer Keep (Dwarf)
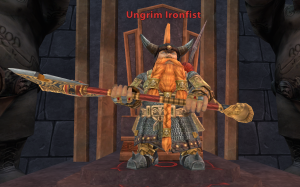
This PQ Lord is Ungrim Ironfist, the Slayer King and one of the deadliest fighters and commanders of the Dwarfs. He is joined by a Herald of Grimnir named Rungrar, who cannot be killed and will constantly cast damaging spells on your raid.
Key Mechanics (All Phases):
- Grimnir Commands: The key mechanic is called "Grimnir Commands", and is similar to "Simon Says": If Grimnir Commands you to do an emote, you must target Ungrim Ironfist and then do the required emote.
- As an example, If "Grimnir Commands... cry!", you must target Ungrim Ironfist and then use the /cry emote.
- If you fail to use the correct emote and Grimnir Commanded it, you'll die once the timer expires.
- Important: The Grimnir's Herald, Rungrar, will try to trick you! If he doesn't say "Grimnir Commands", don't do an emote, or you'll die!
- You can see the commands both in your center screen messages and also in your chat logs. Be sure to filter them so you ensure you have visibility on this mechanic.
- Napalm: The Herald of Grimnir will periodically target a random player, who will have their name announced in chat and center screen messages. After a few seconds, this player will drop a Napalm fire AOE at their location, damaging anyone who steps into it.
- Shield of the King: An Ironbreaker named Corund will appear at 65% Boss HP. If he is killed, Ungrim will enrage.
Phase Mechanics:
- Phase 1 (90% HP): The "Grimnir Commands" mechanic will first trigger. In this phase, until the Ironbreaker boss spawns later, it is possible to resurrect players who fail this mechanic.
- Phase 2 (65% HP): The Ironbreaker Corund will join the fight. If allowed to get near Ungrim Ironfist, each will gain a damage bonus, and the Ironbreaker will Guard Ungrim, reducing the incoming damage on the main boss.
This boss drops the Onslaught Chest and Belt.
Notable Changes and Updates
(January 2025) A number of Quality-of-life updates and balance changes were added, including:
- New Tank 'Swap!' ability added for Order's Ebon Keep and Destruction's All the King's Men. This is a granted ability that lasts for two minutes, and is given only to Tank classes.
- Order's Ebon Keep Boss adds had their HP and damage toned down as they were notably stronger than the Destruction equivalent.
- Order's Ebon Keep Boss ability: "Surging Flames" is now always visible for players, so they can clearly see when to taunt / interrupt it.
- Destruction's All the King's Men boss adds had their HP slightly reduced, and the Game Object health slightly increased, to better mirror Order's PQ.
- All White Bags now grant two +24 or equivalent Talismans, instead of just one.
(2024)The Re-launch of the Dungeon adjusted how Contribution works for Stage 1, preventing any Contribution from being granted until Stage 2. This was to prevent solo players showing up and killing some mobs to leech bags from the actual warbands later.
