Highpass Cemetery: Difference between revisions
From RoR Wiki
No edit summary |
No edit summary |
||
| Line 4: | Line 4: | ||
|ss=Highpass_Cemetery.png | |ss=Highpass_Cemetery.png | ||
|type=Deathmatch | |type=Deathmatch | ||
}} | }} | ||
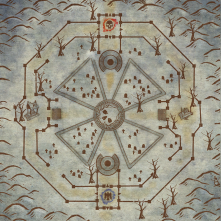
Highpass Cemetery features simple dual capture mechanics. Capture both the Stag and the Crypt to earn points for your Realm and be granted a powerful boon to destroy your enemies! | |||
Effectively, your Realm should look forward to capture one point as soon as possible, while a few other prevent the capture of the other point, by the opposing Realm. The Cemetery is a location filled with obstacles that could be used for LoS (''Line of Sight'') in order to counter casters and isolate enemies from their healers. | |||
== Score Calculation == | |||
Every scenario has a different way to calculate the score for each Realm. In this SC: | |||
== | * Kill = 5 points | ||
* Capture both objectives = 80 points | |||
* Hold both objectives for 15 seconds = gain a damage buff | |||
== | == Optimal Strategy == | ||
* This scenario is best played with a coordinated group. Consider teaming up with other players before queueing. | |||
* Aim at capturing one objective as fast as possible, then head towards the second one with your team. | |||
* | * Consider sending a few players to the opposite side of the main team, in order to delay any capture attempts by the enemy realm. | ||
* | * Slaughtering your enemies in this scenario is a must, however you need to profit from any team fight win to instantly capture the objectives. | ||
* | * Hold the conquered objectives for 15 seconds in order to gain the team-wide damage buff. | ||
* | |||
* | |||
Revision as of 19:21, 22 February 2021
| High Pass Cemetery | |
|---|---|
| Scenario Map | |
 | |
| Instance info | |
| Type | Deathmatch |
Highpass Cemetery features simple dual capture mechanics. Capture both the Stag and the Crypt to earn points for your Realm and be granted a powerful boon to destroy your enemies! Effectively, your Realm should look forward to capture one point as soon as possible, while a few other prevent the capture of the other point, by the opposing Realm. The Cemetery is a location filled with obstacles that could be used for LoS (Line of Sight) in order to counter casters and isolate enemies from their healers.
Score Calculation
Every scenario has a different way to calculate the score for each Realm. In this SC:
- Kill = 5 points
- Capture both objectives = 80 points
- Hold both objectives for 15 seconds = gain a damage buff
Optimal Strategy
- This scenario is best played with a coordinated group. Consider teaming up with other players before queueing.
- Aim at capturing one objective as fast as possible, then head towards the second one with your team.
- Consider sending a few players to the opposite side of the main team, in order to delay any capture attempts by the enemy realm.
- Slaughtering your enemies in this scenario is a must, however you need to profit from any team fight win to instantly capture the objectives.
- Hold the conquered objectives for 15 seconds in order to gain the team-wide damage buff.