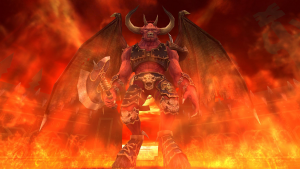
Bastion Stair: Difference between revisions
No edit summary |
(Added notes for accessing the first Secret Boss) |
||
| (98 intermediate revisions by 4 users not shown) | |||
| Line 1: | Line 1: | ||
{{Infobox instance | {{Infobox instance | ||
|name=Bastion Stair | |name=Bastion Stair | ||
|aka=BS | |aka=BS | ||
|ss= | |ss=Bastion Stair Art.png | ||
|caption=Bastion Stair | |caption=The Bastion Stair | ||
|loc=[[Chaos Wastes]] | |loc=[[Chaos Wastes]] | ||
|race=[[Chaos]] | |race=[[Chaos]] | ||
| Line 14: | Line 14: | ||
}} | }} | ||
== The Bastion Stair == | == The Bastion Stair == | ||
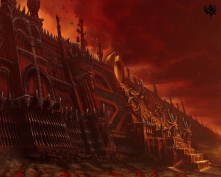
Bastion Stair is a dungeon located deep in the [[Chaos Wastes]]. Inhabited by demon and mortal alike, the fiends who inhabit this bloody fortress seek the blessings of their dark god Khorne through spilled blood and claimed skulls. | |||
Bastion Stair is an upper mid-tier Dungeon in terms of difficulty, and awards players the [[Bloodlord Set]], which includes DPS-focused Weapons and Armor. | |||
This | This Dungeon is intended for level 40 players wearing Vanquisher-gear or equivalent. | ||
== Entering the Dungeon == | == Entering the Dungeon == | ||
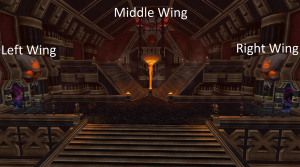
[[File:Bastion Entrance.png|thumb|Bastion Stair has three Wings to clear. Killing the final boss of each will reward Influence.]] | |||
If your guild is level 32 or higher, you can purchase an instant Teleport Scroll from either Sigmar's Hammer or The Viper Pit. | If your guild is level 32 or higher, you can purchase an instant Teleport Scroll from either [[Sigmar's Hammer]] or [[The Viper Pit]]. | ||
If you're too cool for scrolls and prefer to walk, follow these instructions: | If you're too cool for scrolls and prefer to walk, follow these instructions: | ||
| Line 42: | Line 43: | ||
== Bastion Stair Quests == | == Bastion Stair Quests == | ||
[[File:Bloodlord Armor Repeatable.png|thumb|Grab repeatable quests at the start of Bastion Stair to earn guaranteed [[Bloodlord Set|Bloodlord Armor]] pieces.]] | |||
Be sure to take the '''Blue Repeatable Quests''' in the first room of the Fortress, as these will give you free [[Bloodlord Set|Bloodlord Armor]] pieces after completing 4 runs of the dungeon. | |||
One of these quests will also grant the [[Stalwart Soulstone]], which is used to purchase 7-day duration Best-in-slot Talismans that can be slotted into Sentinel or Triumphant rings. | |||
== Lore == | |||
''"I saw a Stair, surrounded by pinnacles and columns and arches of blood and carven bone, circled by Daemons bound within black iron, brazen steps and hideous shrieking mouths.'' | |||
''All that could speak or gibber vomited forth the praises of Khorne and shrieked out songs of blood and death."'' | |||
In ''Return of Reckoning'', the Bastion Stair is a dungeon and Fortress of the Blood God Khorne that the forces of Order and Destruction both seek to conquer for their own purposes. | |||
Within, the Knights of the Blazing Sun search for the fabled Spear of Myrmidia, but rumor has it their initial attempt has already fallen to ruin, and even now their Grandmaster is missing... | |||
The forces of Chaos vie amongst themselves for control of the citadel, and the followers of Tzeentch now seek to weaken Khorne's hold and ever-growing power, as Tchar'zanek commands. | |||
== Exceptional Seeds == | |||
This Dungeon has a very rare chance of dropping six different [[Exceptional Seeds]]. | |||
These are Purple-rarity seeds used for [[Cultivating]] which can be regrown 250 times, and grant the exclusive Liniments found only in the Bastion Stair. | |||
The drop rate of these seeds is less than 1%, so they are quite rare - if you see one appear, good luck! | |||
== Teleports == | |||
[[File:Bastion portals.png|thumb|If you get disconnected during a run, you can use the Skulls at the Dungeon's entrance to teleport to an already defeated boss.]] | |||
Quality-of-life Teleports were added in the October 2024 Patch. | |||
You can now teleport to defeated bosses by using the Skull objects at the entrance of the Dungeon. | |||
These are particularly helpful if you disconnect during the Dungeon, or teleporting to a final boss bugs and sends you to your book of binding. | |||
To teleport, simply right click one of the skulls that spawn at the entrance, then catch up to your group! | |||
Aligning with the Sacred Number of Khorne, there are a total of 8 Boss Teleports that can be activated. | |||
== Wing Guides == | == Wing Guides == | ||
For a list of Bastion Stair Guides, please | For a list of Bastion Stair Guides, please see the sections below. | ||
As part of the 2025 Re-work, almost all fights in Bastion Stair now offer new Double-Edged mechanics that will make your party take more damage, but also increase your damage in exchange. | |||
Almost all of these mechanics are optional, so stronger groups are recommended to use these to their benefit to make the run faster. | |||
== Left Wing == | == Left Wing == | ||
=== First Boss: Borzhar Rageborn === | |||
[[File:Borzhar.png|thumb|Fight Borzhar inside the room he spawns in to avoid his enrage. If your group is strong, leave the Banner of Blood active for bonus damage!]] | |||
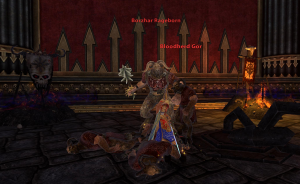
Head down the stairs to find the first required boss of the left wing, '''Borzhar Rageborn.''' | |||
Key Mechanics: | |||
*Tanks: Fight this boss inside his room as he will enrage if pulled outside of it. (In the old days, moving him out of the room was standard - now there's a good reason not to.) | |||
*There are two banners in the room with this boss: The Banner of the Herd and the Banner of Blood. | |||
**The Banner of the Herd spawns adds every 15-20 seconds. These can be killed and will grant a 1% movement speed bonus (if not already maxed) per kill, up to 20%. | |||
**The Banner of Blood is a new double-edged buff added in the 2025 re-work. This banner increases the damage that all players and creatures - including the boss - take by 20%. | |||
***If you can survive the damage increase, leave this up to burn the boss even faster! | |||
*This boss will do some AOE damage, so healers should be ready to heal through it, especially if you're leaving the Banner of Blood up. | |||
Borzhar Rageborn drops [[Blood Gems]], used for Iron-Blood rings, and the Bloodlord Amulet, which is a decent DPS jewelry piece but is not part of the [[Bloodlord Set]]. | |||
With Borzhar defeated, you can now proceed through the hall at the bottom of the stairs. | |||
As you move forward, you'll spot an NPC named The Collector who will give you a choice of 3 randomized [[Dungeon Group Buffs]]. You can pay gold to purchase one for your party. | |||
=== Second Boss: Gahlvoth Darkrage === | |||
[[File:Gahlroth_Darkrage.png|thumb|Avoid Gahlvoth's AOE's on the floor, and kill his pet to make him take more damage and deal more damage.]] | |||
'''Gahlvoth Darkage''' is a towering Dragon Ogre with a pet bloodhound named Beastrip. | |||
Key Mechanics: | |||
*If Beastrip is killed, the boss will apply the ability "Daisy Chained" to himself, making him deal 30% more damage, but also take 30% more damage while enraged. | |||
*This boss will call down lightning strikes on anyone near him. Once these finish, you will see an electric AOE on the floor - '''move away from this!''' | |||
*Curse of Lightning: The boss will periodically announce that a player has the Curse of Lightning. This will apply a green lightning strike on a player, which deals 10-15% of their HP per tick. | |||
**Any healer can cleanse this, so have healers watching and ready to use it. | |||
*After 4-5 AOE's are on the floor, the first to be summoned will begin to disappear. Your tank can follow a circular pattern here and repeat it. | |||
This boss drops the [[Bloodlord Set|Bloodlord Boots]]. | |||
=== Third Boss: Azuk'Thul === | |||
Enter the fiery arena ahead of you to confront '''Azuk'Thul''', the next boss. | |||
Azuk'Thul has a very unique mechanic which your healers need to pay special attention to. | |||
[[File:Azukthul.png|thumb|Heals will cause damage back to you while fighting Azuk'Thul, so be mindful!]] | |||
Key Mechanics: | |||
*All: Watch out for the Curse of Khorne on this fight, which deals damage back to anyone who casts heal. Almost all heals will trigger this, so be especially careful of hots and small heals. Even non-healers can trigger this. | |||
*Tank: Tank the boss near the platform he starts on, and as usual, keep him faced away from the group. This boss will cleave anyone in melee near him. | |||
*Healers: Group heals work fine on this boss, but watch out for hots (health-over-time) as these will deal much more damage back to you and may kill you. | |||
*At 80% HP, two Orbs of death spawn on either side of the boss arena. | |||
**The player who picks up an orb temporarily increases all damage dealt by 50%, but also reduces all incoming healing by 50% for 60 seconds. This risk-reward mechanic is optional, but very powerful. | |||
This boss drops the [[Bloodlord Set|Bloodlord Gloves]]. | |||
One more boss awaits in the left wing! | |||
=== Fourth Boss: Thar'Ignan === | |||
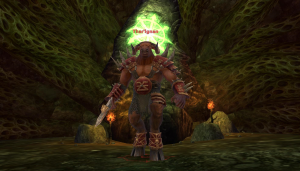
The final boss of the Left Wing is the Doombull '''Thar'Ignan.''' | |||
[[File:Tharignan.png|thumb|When Thar'Ignan punts your teammates, move quickly to support and save them!]] | |||
Key Mechanics: | |||
*Tank: [https://wiki.returnofreckoning.com/images/b/bf/Tharignan_tanking.png {{#tip-img: https://wiki.returnofreckoning.com/images/c/cd/Tharignen_tiny.png|Hold this boss near the middle of the room}}] where the crumbling floor and dirt meet. (This is important for the next mechanic.) | |||
*For every 10% of HP the boss loses, he will send one of your party members flying to a location in the room and root them in place. Two champion hounds will then spawn and try to kill the rooted player, so your party needs to quickly head to assist them, with the exception of whoever is tanking the boss. | |||
*If your ally who is punted lands near the boss, move the boss away from that teammate (more on this with the healing mechanic below). | |||
**Each time someone is punted in this way, they lose all aggro - so this can be a problem if your tank(s) are consistently unlucky and get punted repeatedly in this way. | |||
**There is no cooldown on this punt and it's purely random, so the same person might get punted 5-6 times in a row. | |||
*This boss will periodically hit his target for 50% of their HP in True Damage, which cannot be defended against. This will happen throughout the fight, so keep the tank near full HP as much as possible. | |||
*If anything dies near this boss - be it an enemy add or an allied player - he will heal for a significant amount of health. Thankfully, he won't reset his punts if this happens. | |||
If you have two tanks, make sure to keep both tanks near the top of the aggro charts (use the helpful [https://tools.idrinth.de/addons/aggrometer/| aggrometer add-on] to see this) just in case one or both end up getting punted and lose their aggro. | |||
*If you have a Solo Tank, you can use the Stones of Aggression, which spawn near the entrance as the fight begins, to rapidly build aggro. Each of these will generate roughly 40,000 hate, so save them in case your solo tank has bad luck! | |||
*Double-Edged Buff - Pulsing Herdstone: There is a Pulsing Herdstone fragment just behind where the boss first stands. The fist player to interact with this will activate a special buff on themselves and any players next to the stone, granting 30% more damage in exchange for 30% more damage taken. | |||
**In addition to the damage bonuses, a player marked with the Pulsing Herdstone buff will also attract two additional dogs if they are selected for the throw mechanic. Provided you have decent AOE dps, this increase should be manageable for most groups. | |||
As with many other fights in Bastion Stair, this fight is a marathon, not a race, and shouldn't give you much trouble if you take it steady. | |||
Once the boss is defeated, loot him to claim the two [[Bloodlord Set|Bloodlord Shoulders]] that he drops! | |||
With the boss dead, head back out the entrance and take a left to find a portal back to the main dungeon hub. | |||
== Right Wing == | == Right Wing == | ||
=== First boss: Urlf Daemonblessed === | |||
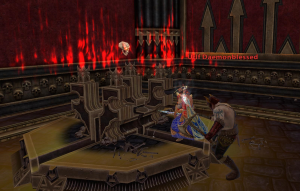
[[File:Urlf.png|thumb|Destroy his skulls, then focus down Urlf. Be ready for his stun and aggro reset.]] | |||
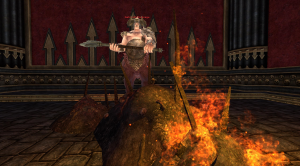
Head up the stairs to find the first boss, '''Urlf Daemonblessed''', a Marauder of Chaos. Urlf's boss room has two skulls which will spawn on altars to either side of him once the fight begins. | |||
Key Mechanics: | |||
*Attack these skulls one at a time to quickly destroy them, then burn him down. The skulls will respawn after a period of time. | |||
*The beginning of this fight is the hardest part, so have your healers ready to focus your group hard until the first skull is destroyed, and the pressure drops. | |||
**If your group is having difficulty surviving the initial phase, one player may pick up the Skull's Blessing at the back of the room. This will grant a 30,000 absorb shield to the player, but then makes them take 50% more damage and deal 50% less healing and damage after it runs out. (It's a very good crutch to help survive the start, but you'll have to pay for it a little after.) | |||
*Stun: This boss will use “Throat Punch” to stun your top aggro member for 10 seconds at a time, which will reset their aggro fully. | |||
**He will constantly make his way down the top aggro list, so be ready for him to hit the DPS while your tanks rebuild threat. | |||
*Orb of Blood: The boss will spawn an Orb of Blood once he goes under 50% HP. Have a DPS pick this up to speed up the latter half of the fight. This will increase their damage by 50%, but also make them take 50% more damage. | |||
The fight is relatively easy, and drops the DPS-focused Bloodlord Jewelry piece, which is not part of the [[Bloodlord Set]]. | |||
=== Second Boss: Garithex the Mountain === | |||
As you move forward you'll arrive at a giant symbol of Chaos bathed in crimson light. Here, head straight and then look to your left to find the next boss: '''Garithex the Mountain.''' | |||
Garithex has three armor pieces that heavily reduce the damage he takes: The Helmet, Pauldron, and Gauntlet of Slaughter, which are located in a triangle formation around the room. | |||
*The intended strategy is to split your DPS on each of the pieces and then destroy two or all three at once, allowing you to burst the boss for high damage immediately afterwards. | |||
*However, each time you destroy an armor piece, Garithex will reduce the armor of his current target by the same amount he is reduced. This means that if you pop all three pieces, your main tank will take significantly higher damage. | |||
**High avoidance (Block/Parry) can help significantly reduce the incoming damage in this phase, as Garithex has very few true damage attacks. | |||
*The pieces of armor will heal if they get out of combat, so be sure to keep either your off-tank or minor dots rolling on the lowest piece while your DPS burn down the others. | |||
*Aggro Spikes: This boss will sometimes spike huge amounts of aggro to a teammate (usually a healer) -- tanks can save their taunt and use it when the aggro spikes if this is an issue for your team. | |||
Rinse and repeat this process as the armor of Slaughter will eventually respawn itself, and you should have the boss down. | |||
Garithex drops the [[Bloodlord Set|Bloodlord Boots]]. | |||
=== Third Boss: Chorek the Unstoppable === | |||
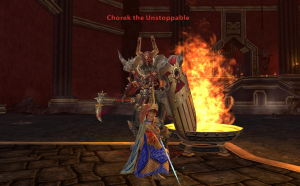
[[File:Chorekboss.png|thumb|You can either kill Chorek's Juggernaut, or leave it alive to make the fight go faster.]] | |||
With Garithex down, head back the way you came and take a left turn at the crossroads (on your mini-map, you should be heading West). You’ll find a door that leads into a large open room. | |||
Head to the left and drop off the side, then clear all the adds nearby. Open the large grey door to begin the next boss fight with '''Chorek the Unstoppable.''' | |||
This is a dual-boss fight, so if you have two tanks, you can split these two bosses away from each other. | |||
Key Mechanics: | |||
*The Ragebeast, named Juggernaut, is the first choice your group should make. You can kill Juggernaut to remove his CC/extra damage, or: | |||
**If you leave Juggernaut alive, he will apply a stacking debuff to all nearby creatures (both players AND chorek) that increases their incoming damage by 2% per stack. | |||
**If your group is strong enough, you can use these built up stacks to make burning Chorek much faster. | |||
*Armor Shred: Your main tank should start by holding Chorek, but mind his armor shred mechanic, which stacks and will eventually neutralize almost all armor your main tank has. | |||
**If your main tank is dying to this, have your off-tank pick up aggro so that the main tank can wait for the debuff to fall off. | |||
*Tanks: Hold Chorek near the fiery lit brazier nearby. This is done primarily to position you well for the next mechanic: | |||
*Add Spawns + Jail: At 80%, 60%, 40%, and 20%, the boss will spawn Fireborn Sprite adds and randomly select a Non-tank player to place them in the nearby jail. | |||
**Tanks should generally challenge these, and DPS should quickly AOE the sprites down. Once the sprites are all killed, the jailed player will immediately be released. (They will eventually break out of jail even if sprites are still up.) | |||
**If you're taking a lot of damage, use your tank Bellows morale 3 to drop the boss and the sprite damage down to 50% during these sections. | |||
This fight drops the [[Bloodlord Set|Bloodlord Gloves]]. | |||
=== Fourth Boss: Lord Slaurith === | |||
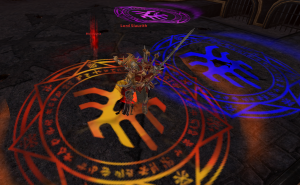
[[File:Slaurith2.png|thumb|Stand in the circles of Khorne on the floor to increase your damage, but mind the incoming damage increase you'll also get!]] | |||
One boss remains in the right wing: '''Lord Slaurith'''. | |||
Key Mechanics: | |||
*Three colored circles will appear and move around on the floor throughout the fight. Standing in each grants unique stacking effects that help and hurt you: | |||
**The Orange Circle increases your melee damage, but will increase incoming damage. | |||
**The Purple Circle increases your Range and Magic damage, AND grants a 5 second temporary silence immunity, but will increase incoming damage. | |||
**The Blue Circle increases your chance to Block, but will increase incoming damage that does hit you. | |||
The damage increase from these circles is generally not too bad and easily healed, but there is one section of the fight later, called the Warrior's Gamble, where the boss will test your healers. | |||
*At 75%, and at 50%, Icons on the ledges on either side of the room (up the stairs) will pulse red, and the giant Chaos Symbol on the floor will also pulse red to indicate that the mechanic has begun. | |||
**While active, the boss gain will a stacking damage increase, which will eventually wipe the group if not removed. | |||
**To remove his damage increase, these two icons must be pushed within a few seconds of each other. If this works, the red symbol on the floor will immediately vanish. | |||
**Important: Once you purge the icons once, you will gain a warning debuff that says doing so again will weaken you. If the same player does this mechanic twice in a row, they will take 500% more incoming damage for the rest of the fight. | |||
**To get around this, it's recommended to pick two pairs of players and alternate, having one group get the 75% icons, and another get the 50%. | |||
*Bloodpulse: This boss will randomly spawn a Bloodpulse effect on one of your party members. Whoever stands on the "Bloodpulse" will continue to gain huge amounts of aggro, and will become the new tank if they stand in it too long. | |||
*Warrior's Gamble: At 25%, the boss will Champion's Challenge the entire room and begin a 10-second channel called Warrior's Gamble. This hits every second, and may hit hard if you have lots of increased damage stacks. | |||
**To counter this, use your Tank's M3 Bellows or M4 Immaculate defense (if available) to heavily reduce the damage of this ability. | |||
**Healers can also continue healing in this phase, as the boss will no longer cast his AOE silence under 30% HP. | |||
*Select a Champion!: At 20%, a Greatsword will appear near the entrance of the room. The first player to interact with this will become the Duelist for the final phase of the boss fight, which starts at 10%. | |||
**If your party does not select a Champion, the boss will enrage, furious at your cowardice, and wipe the group. | |||
*At 10% HP, the Champion player grows in size and gains additional wounds and a 100% damage increase. The other party members are teleported up to the ledges and gain a new "Cheer for your Champion" ability. | |||
**If you are a spectator, target your Champion while up top and hit the Cheer ability to heal them for 300 HP. This healing stacks from all party members, so cheer hard to keep your Champion going! | |||
As your Champion finally conquers Lord Slaurith (thanks to your wonderful cheers, of course) the right wing is complete! | |||
You'll gain the [[Bloodlord Set|Bloodlord Belt]] from this boss. | |||
== Middle Wing == | == Middle Wing == | ||
| Line 60: | Line 286: | ||
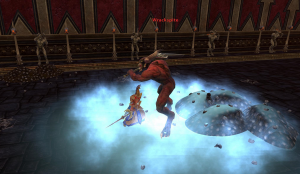
===First boss: Wrackspite ''(Optional)'' === | ===First boss: Wrackspite ''(Optional)'' === | ||
[[File:Wrackspite2.png|thumb|Tank Wrackspite in the middle of the room, and be ready for the statues to come to life.]] | |||
''Note: To skip this boss, simply hug the right wall and run through the room.'' | |||
'''Wrackspite''' is an optional boss that most groups skip. He has a 100% drop rate of [[Blood-Iron]]. | |||
Key Mechanics: | |||
* | *Start with the boss in the middle of the room. | ||
**If near the walls, he | **If near the walls, he may enrage and hit your tank for upwards of 10,000+. | ||
*DPS: focus down the statue adds as they come to life, and don't let them reach the boss. | *DPS: focus down the statue adds as they come to life, and don't let them reach the boss. | ||
*Tanks: Face the boss away from the group to protect from his cleave. | *Tanks: Face the boss away from the group to protect from his cleave. As adds spawn, move the boss away from their location. | ||
*Aggro Reset: This boss will periodically reset his aggro on the tank. It's highly-recommended to use two tanks for this fight to avoid him bouncing to your DPS. | |||
*Terror: This boss causes Terror, so healers won't be able to rez dead allies during this fight. | *Terror: This boss causes Terror, so healers won't be able to rez dead allies during this fight. | ||
Wrackspite drops [[Bloodlord Set|Bloodlord Boots]]. | Wrackspite drops [[Bloodlord Set|Bloodlord Boots]]. | ||
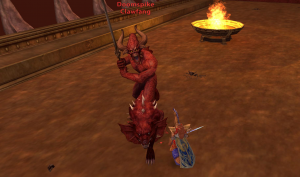
===Second Boss: Doomspike=== | ===Second Boss: Doomspike=== | ||
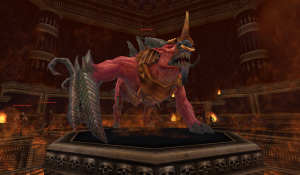
'''Doomspike''' is the first required boss of the Middle Wing, and is either a dual-tank fight or can be handled by a geared solo tank. | |||
As with all the named Bloodletters in the middle wing, Doomspike also has a 100% drop chance for [[Blood-Iron]]. | |||
[[File:Doomspike.png|thumb|Keep the health of Doomspike and Clawfang close as you DPS them down.]] | |||
Key Mechanics: | |||
*This boss fight will spawn an additional sub-boss, '''Clawfang''', a Fleshhound of Khorne and a ''very good boy''. | *This boss fight will spawn an additional sub-boss, '''Clawfang''', a Fleshhound of Khorne and a ''very good boy''. | ||
*The two bosses must be kept within 10% Health of each other and burned down together. | *The two bosses must be kept within 10% Health of each other and burned down together. | ||
*Tank the bosses near each other to avoid taking increased damage. | *Tank the bosses near each other to avoid taking increased damage. | ||
*Terror: This boss causes Terror, so healers won't be able to rez dead allies during this fight. | |||
This boss drops the Bloodlord Jewelry piece, which can be useful for some characters but is not part of the [[Bloodlord Set]]. | This boss drops the Bloodlord Jewelry piece, which can be useful for some characters but is not part of the [[Bloodlord Set]]. | ||
| Line 81: | Line 320: | ||
This pair of bosses must be defeated in order to progress further in the Wing. | This pair of bosses must be defeated in order to progress further in the Wing. | ||
===Third Boss: Zekaraz the Bloodcaller=== | |||
===Third Boss: Zekaraz the Bloodcaller ''(Optional)'' === | |||
'''Zekaraz the Bloodcaller''' is an optional boss that stands in your way as you ascend towards the summit of the Bastion Stair. He has a 100% drop-rate of [[Blood-Iron]]. | |||
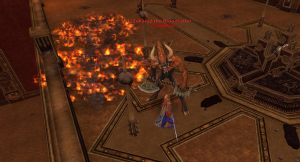
[[File:Zekaraz.png|thumb|Move out of the fire AOE while fighting Zekaraz!]] | |||
''Note: At the time of writing, this boss can be skipped by sacrificing one team member while others pass the door. Simply rez your teammate afterward.'' | |||
*This boss has a "Bloodrage" buff that will steadily increase his damage the longer the fight continues, up to a maximum of 400%. | *This boss has a "Bloodrage" buff that will steadily increase his damage the longer the fight continues, up to a maximum of 400%. | ||
*Move out of the Fire AOE he drops on the ground. (This attack is called "Field of Screams" in your combat log.) | *Move out of the Fire AOE he drops on the ground. (This attack is called "Field of Screams" in your combat log.) | ||
*In indents | *In indents along the wall of the arena you can find skulls, which can be picked up and taken to the altar in the middle of the room. Doing this will reset Zekaraz' stacking damage buff. | ||
*As | **Skulls should only be taken to the altar shortly before the damage on your tank is too significant to heal through. | ||
**Be careful, as only three skulls can be placed, despite there being four of them. If you use your skulls up too quickly, you won't have enough time to kill the boss before he kills your tank. | |||
**When a Skull is used at the altar, your team will also gain a debuff reducing your outgoing damage, which is a stacking 20% reduction per skull. (As the fight goes on, you'll do less and less damage.) | |||
*Terror: This boss causes Terror, so healers won't be able to rez dead allies during this fight. | |||
This boss drops the [[Bloodlord Set|Bloordlord Gloves]]. | This boss drops the [[Bloodlord Set|Bloordlord Gloves]]. | ||
=== Fourth Boss: Kaarn the Vanquisher === | |||
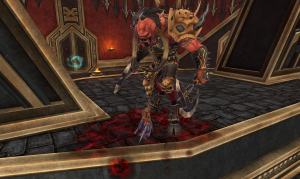
'''Kaarn the Vanquisher''' is the final boss of the Middle Wing, and as such will grant Influence once defeated. | |||
''Note: Some groups choose to save this boss for last, and fight Skull Lord Var'ithrok first, as there's a rare bug that may send you back to your capital city when exiting his arena.'' | |||
[[File:Kaarn.png|thumb|Avoid Kaarn's Blood puddles and send one DPS to destroy his totems.]] | |||
Key Mechanics: | |||
*Tank: Hold this boss on the platform you find him on. If he leaves this platform, his skin will turn to iron and he will take no damage. | |||
*All: Make sure to avoid standing in the red Blood puddles this boss will periodically spawn if a specific totem is up. The tank can move the boss out of these. | |||
*Healers: You can stand further back from the boss to avoid getting hit by his AOE cleaves. Melee DPS will take damage from these. | |||
*Totems: this boss will spawn skull Totems which buff him. There are 3, which appear randomly on the platform above him - to get to these, use the ramps leading up on the far left and right sides of the room. Each totem causes a different bonus for the boss. | |||
You can either DPS him down and ignore the totems if your party is strong, or send one DPS (ideally a range DPS) to destroy them. | |||
*Range DPS can still attack Kaarn from the stairs if he's pulled to a nearby corner. | |||
This boss drops the [[Bloodlord Set|Bloordlord Chestpiece]]. | |||
This boss is considered the Final Boss of the Middle Wing, but not of the Dungeon, so note there's still one more boss to go afterward! | |||
The | === Final Boss: Skull Lord Var'ithrok === | ||
[[File:Skull Lord Varithrok.png|thumb|The final boss, Skull Lord Vari'throk, awaits!]] | |||
'''Skull Lord Var'ithrok''' is the Final Boss of the Bastion Stair, and behind him looms the Rift of Madness. | |||
*Party Positioning: | |||
Your party positioning is very important on this fight, so start by splitting up your DPS and Tanks into pairs. One tank and DPS stand in front of him, one tank and DPS (or just two DPS if solo tanking) stand behind him. Your healers both stand alone on the remaining two empty sides, parallel from each other. | |||
You can see a visual example by [https://wiki.returnofreckoning.com/images/c/c7/Skull_Lord_example.png {{#tip-img: https://wiki.returnofreckoning.com/images/c/c7/Skull_Lord_example.png| hovering over or clicking this text.}}] | |||
[[File:Funnel power v2.png|thumb|If you deal damage while you have Infectious Rage, you're going to die. Quickly.]] | |||
Key Mechanics: | |||
*Stay within the Ring of Fire once the fight begins. If your party stays far from the boss for too long, he will reset. | |||
*This boss will give one player an "Infectious Rage" buff which looks like the Bright Wizard's "Funnel Power" skill. '''DO NOT ATTACK if you have this buff, or you'll kill yourself and everyone around you!''' | |||
**When a player is given Infectious Rage, this will also appear in the chat window in yellow text and will put a visual Skull Icon over the player's head. (Added January 2025 patch) | |||
*This boss will also periodically place a strong damaging dot on a player which cannot be cleansed. This is called Khorne's Affliction, and the text messages will read: "(player name) is taking extra damage!" (Added January 2025 patch) | |||
**Have a healer focus heals onto the announced player to counteract the incoming damage. | |||
*This boss will periodically punt those in front of him and then aggro anyone else left in the circle. Those punted should simply run back into the fire circle and keep attacking. If you have a second tank, they begin tanking once the other tank goes flying. | |||
*The boss will spawn hounds that should be pulled off the healers and can be AOE'd down by your DPS. Keep these killed to avoid them piling up as the fight continues. | |||
*Solo tanking: If you're solo tanking, have the DPS standing opposite the tank prepare an avoidance Morale 1 skill (like 100% parry) to mitigate damage while the Tank runs back from being punted. | |||
This fight is actually quite simple beyond the Infectious Rage buff, so as long as you take it slow, you should have no problem. | |||
This boss drops the [[Bloodlord Set|Bloordlord Helmet]]. | |||
Once defeated, the Skull Lord is pulled back into the Rift, perhaps to be tormented by the Chaos gods for his failure, or perhaps to return even stronger to fight another day... ''or perhaps both?'' | |||
'''Congratulations on clearing the Bastion Stair Dungeon!''' | |||
== Secret Bosses == | |||
There are two Secret Bosses that can be challenged within the Bastion Stair. | |||
These are optional bosses, and each has a chance to drop both Purple Seeds for [[Cultivating]] liniments and also the Rare Mount. They also both grant additional Dungeon Influence. | |||
To challenge the Secret Bosses, the party must kill three optional creatures, one per wing. Those creatures are: | |||
*'''Bulrok Headsmasher:''' | |||
**After defeating Borzhar in the left wing, continue straight instead of turning right at the split. At the end of this path, you will find Bulrok and Squonk, who drop the Skulls of Carnage. | |||
*'''Hargan the Furious: ''' | |||
**In the right wing, after defeating Urlf and as you arrive at the four-way split with the red Chaos Symbol on the floor, take the left turn to arrive at the feast hall. Hargan is located here, and drops the Skulls of Fury. | |||
*'''Lockjaw: ''' | |||
**Just before arriving at Zekaraz in the Middle Wing, look to your left as you ascend the stairs to find a non-hostile enemy named Lockjaw. Defeat them to gain the Skulls of Ruin. | |||
Once your party has all 3 Offerings of skulls, you may enter the portal that has appeared near the Dungeon's entrance. | |||
The player with the Offering item should interact with the skull pile to add the skulls to it, and grant access to the next. These skull piles are also positioned to the left, right, and middle, hinting at the wing in which the paired offering may be found. | |||
Once all 3 offerings are given, your party may enter The Depths, where the first secret boss, Murr Deyng, awaits. | |||
===Murr Deyng=== | |||
== Achievements == | |||
The 2025 re-work introduced a number of [[Bastion_Stair_(Achievements) | Bastion Stair Achievements]]. These include [[achievements]] for: | |||
*Defeating Hard Mode Boss fights one, five, and ten times | |||
*Multiple new Bestiary unlocks | |||
*Defeating the Secret Boss | |||
== Additional Tips == | |||
*There's a rare chance that you may get ported back to your capital city while exiting the Kaarn the Vanquisher fight. Some groups choose to defeat Vari'throk first, and then double back to Kaarn to avoid this. | |||
*Bastion Stair is usually abbreviated as "BS" in the LFG channels when forming a group. | |||
Latest revision as of 01:33, 17 February 2026
| Bastion Stair | |
|---|---|
 The Bastion Stair | |
| Location | Chaos Wastes |
| Race(s) | Chaos |
| Instance info | |
| Type | Dungeon |
| Advised level | 40 |
| Player limit | 6 |
The Bastion Stair
Bastion Stair is a dungeon located deep in the Chaos Wastes. Inhabited by demon and mortal alike, the fiends who inhabit this bloody fortress seek the blessings of their dark god Khorne through spilled blood and claimed skulls.
Bastion Stair is an upper mid-tier Dungeon in terms of difficulty, and awards players the Bloodlord Set, which includes DPS-focused Weapons and Armor.
This Dungeon is intended for level 40 players wearing Vanquisher-gear or equivalent.
Entering the Dungeon
If your guild is level 32 or higher, you can purchase an instant Teleport Scroll from either Sigmar's Hammer or The Viper Pit.
If you're too cool for scrolls and prefer to walk, follow these instructions:
- Order: Fly to Chaos Wastes, and follow the PvE road South. Then, go east to reach 64,000 / 60,000 and the Dungeon's entrance.
- Destro: Fly to Praag, and follow the PvE road North. Head to the Tomb of Deathsword PQ in the Northeast, and follow that small road further North to the Dungeon's entrance.
Dungeon Basics
- Similar to Gunbad, Bastion Stair has three distinct wings, each filled with unique bosses to fight and defeat.
- Influence in Bastion Stair, which grants Bloodlord items, is earned only upon killing the final boss of a wing. (It is no longer given out for boss kills along each wing.)
- This means that skipping optional bosses is highly recommended for those looking to optimize their run - just don't ask for The Blood God's opinion.
- Bloodlord Weapons can only be earned via Influence. Bloodlord Armor can be found from boss kills and earned via repeatable quests.
- Thanks to a 2022 Patch that heavily reduced Influence required, you can now earn your first Bloodlord Weapon after only two full runs of the Dungeon.
Bastion Stair Quests
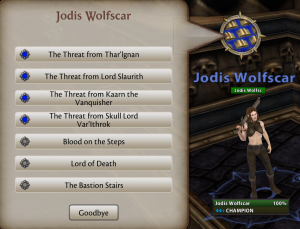
Be sure to take the Blue Repeatable Quests in the first room of the Fortress, as these will give you free Bloodlord Armor pieces after completing 4 runs of the dungeon.
One of these quests will also grant the Stalwart Soulstone, which is used to purchase 7-day duration Best-in-slot Talismans that can be slotted into Sentinel or Triumphant rings.
Lore
"I saw a Stair, surrounded by pinnacles and columns and arches of blood and carven bone, circled by Daemons bound within black iron, brazen steps and hideous shrieking mouths.
All that could speak or gibber vomited forth the praises of Khorne and shrieked out songs of blood and death."
In Return of Reckoning, the Bastion Stair is a dungeon and Fortress of the Blood God Khorne that the forces of Order and Destruction both seek to conquer for their own purposes.
Within, the Knights of the Blazing Sun search for the fabled Spear of Myrmidia, but rumor has it their initial attempt has already fallen to ruin, and even now their Grandmaster is missing...
The forces of Chaos vie amongst themselves for control of the citadel, and the followers of Tzeentch now seek to weaken Khorne's hold and ever-growing power, as Tchar'zanek commands.
Exceptional Seeds
This Dungeon has a very rare chance of dropping six different Exceptional Seeds.
These are Purple-rarity seeds used for Cultivating which can be regrown 250 times, and grant the exclusive Liniments found only in the Bastion Stair.
The drop rate of these seeds is less than 1%, so they are quite rare - if you see one appear, good luck!
Teleports
Quality-of-life Teleports were added in the October 2024 Patch.
You can now teleport to defeated bosses by using the Skull objects at the entrance of the Dungeon.
These are particularly helpful if you disconnect during the Dungeon, or teleporting to a final boss bugs and sends you to your book of binding.
To teleport, simply right click one of the skulls that spawn at the entrance, then catch up to your group!
Aligning with the Sacred Number of Khorne, there are a total of 8 Boss Teleports that can be activated.
Wing Guides
For a list of Bastion Stair Guides, please see the sections below.
As part of the 2025 Re-work, almost all fights in Bastion Stair now offer new Double-Edged mechanics that will make your party take more damage, but also increase your damage in exchange.
Almost all of these mechanics are optional, so stronger groups are recommended to use these to their benefit to make the run faster.
Left Wing
First Boss: Borzhar Rageborn
Head down the stairs to find the first required boss of the left wing, Borzhar Rageborn.
Key Mechanics:
- Tanks: Fight this boss inside his room as he will enrage if pulled outside of it. (In the old days, moving him out of the room was standard - now there's a good reason not to.)
- There are two banners in the room with this boss: The Banner of the Herd and the Banner of Blood.
- The Banner of the Herd spawns adds every 15-20 seconds. These can be killed and will grant a 1% movement speed bonus (if not already maxed) per kill, up to 20%.
- The Banner of Blood is a new double-edged buff added in the 2025 re-work. This banner increases the damage that all players and creatures - including the boss - take by 20%.
- If you can survive the damage increase, leave this up to burn the boss even faster!
- This boss will do some AOE damage, so healers should be ready to heal through it, especially if you're leaving the Banner of Blood up.
Borzhar Rageborn drops Blood Gems, used for Iron-Blood rings, and the Bloodlord Amulet, which is a decent DPS jewelry piece but is not part of the Bloodlord Set.
With Borzhar defeated, you can now proceed through the hall at the bottom of the stairs.
As you move forward, you'll spot an NPC named The Collector who will give you a choice of 3 randomized Dungeon Group Buffs. You can pay gold to purchase one for your party.
Second Boss: Gahlvoth Darkrage
Gahlvoth Darkage is a towering Dragon Ogre with a pet bloodhound named Beastrip.
Key Mechanics:
- If Beastrip is killed, the boss will apply the ability "Daisy Chained" to himself, making him deal 30% more damage, but also take 30% more damage while enraged.
- This boss will call down lightning strikes on anyone near him. Once these finish, you will see an electric AOE on the floor - move away from this!
- Curse of Lightning: The boss will periodically announce that a player has the Curse of Lightning. This will apply a green lightning strike on a player, which deals 10-15% of their HP per tick.
- Any healer can cleanse this, so have healers watching and ready to use it.
- After 4-5 AOE's are on the floor, the first to be summoned will begin to disappear. Your tank can follow a circular pattern here and repeat it.
This boss drops the Bloodlord Boots.
Third Boss: Azuk'Thul
Enter the fiery arena ahead of you to confront Azuk'Thul, the next boss.
Azuk'Thul has a very unique mechanic which your healers need to pay special attention to.
Key Mechanics:
- All: Watch out for the Curse of Khorne on this fight, which deals damage back to anyone who casts heal. Almost all heals will trigger this, so be especially careful of hots and small heals. Even non-healers can trigger this.
- Tank: Tank the boss near the platform he starts on, and as usual, keep him faced away from the group. This boss will cleave anyone in melee near him.
- Healers: Group heals work fine on this boss, but watch out for hots (health-over-time) as these will deal much more damage back to you and may kill you.
- At 80% HP, two Orbs of death spawn on either side of the boss arena.
- The player who picks up an orb temporarily increases all damage dealt by 50%, but also reduces all incoming healing by 50% for 60 seconds. This risk-reward mechanic is optional, but very powerful.
This boss drops the Bloodlord Gloves.
One more boss awaits in the left wing!
Fourth Boss: Thar'Ignan
The final boss of the Left Wing is the Doombull Thar'Ignan.
Key Mechanics:
- Tank: Hold this boss near the middle of the room where the crumbling floor and dirt meet. (This is important for the next mechanic.)
- For every 10% of HP the boss loses, he will send one of your party members flying to a location in the room and root them in place. Two champion hounds will then spawn and try to kill the rooted player, so your party needs to quickly head to assist them, with the exception of whoever is tanking the boss.
- If your ally who is punted lands near the boss, move the boss away from that teammate (more on this with the healing mechanic below).
- Each time someone is punted in this way, they lose all aggro - so this can be a problem if your tank(s) are consistently unlucky and get punted repeatedly in this way.
- There is no cooldown on this punt and it's purely random, so the same person might get punted 5-6 times in a row.
- This boss will periodically hit his target for 50% of their HP in True Damage, which cannot be defended against. This will happen throughout the fight, so keep the tank near full HP as much as possible.
- If anything dies near this boss - be it an enemy add or an allied player - he will heal for a significant amount of health. Thankfully, he won't reset his punts if this happens.
If you have two tanks, make sure to keep both tanks near the top of the aggro charts (use the helpful aggrometer add-on to see this) just in case one or both end up getting punted and lose their aggro.
- If you have a Solo Tank, you can use the Stones of Aggression, which spawn near the entrance as the fight begins, to rapidly build aggro. Each of these will generate roughly 40,000 hate, so save them in case your solo tank has bad luck!
- Double-Edged Buff - Pulsing Herdstone: There is a Pulsing Herdstone fragment just behind where the boss first stands. The fist player to interact with this will activate a special buff on themselves and any players next to the stone, granting 30% more damage in exchange for 30% more damage taken.
- In addition to the damage bonuses, a player marked with the Pulsing Herdstone buff will also attract two additional dogs if they are selected for the throw mechanic. Provided you have decent AOE dps, this increase should be manageable for most groups.
As with many other fights in Bastion Stair, this fight is a marathon, not a race, and shouldn't give you much trouble if you take it steady.
Once the boss is defeated, loot him to claim the two Bloodlord Shoulders that he drops!
With the boss dead, head back out the entrance and take a left to find a portal back to the main dungeon hub.
Right Wing
First boss: Urlf Daemonblessed
Head up the stairs to find the first boss, Urlf Daemonblessed, a Marauder of Chaos. Urlf's boss room has two skulls which will spawn on altars to either side of him once the fight begins.
Key Mechanics:
- Attack these skulls one at a time to quickly destroy them, then burn him down. The skulls will respawn after a period of time.
- The beginning of this fight is the hardest part, so have your healers ready to focus your group hard until the first skull is destroyed, and the pressure drops.
- If your group is having difficulty surviving the initial phase, one player may pick up the Skull's Blessing at the back of the room. This will grant a 30,000 absorb shield to the player, but then makes them take 50% more damage and deal 50% less healing and damage after it runs out. (It's a very good crutch to help survive the start, but you'll have to pay for it a little after.)
- Stun: This boss will use “Throat Punch” to stun your top aggro member for 10 seconds at a time, which will reset their aggro fully.
- He will constantly make his way down the top aggro list, so be ready for him to hit the DPS while your tanks rebuild threat.
- Orb of Blood: The boss will spawn an Orb of Blood once he goes under 50% HP. Have a DPS pick this up to speed up the latter half of the fight. This will increase their damage by 50%, but also make them take 50% more damage.
The fight is relatively easy, and drops the DPS-focused Bloodlord Jewelry piece, which is not part of the Bloodlord Set.
Second Boss: Garithex the Mountain
As you move forward you'll arrive at a giant symbol of Chaos bathed in crimson light. Here, head straight and then look to your left to find the next boss: Garithex the Mountain.
Garithex has three armor pieces that heavily reduce the damage he takes: The Helmet, Pauldron, and Gauntlet of Slaughter, which are located in a triangle formation around the room.
- The intended strategy is to split your DPS on each of the pieces and then destroy two or all three at once, allowing you to burst the boss for high damage immediately afterwards.
- However, each time you destroy an armor piece, Garithex will reduce the armor of his current target by the same amount he is reduced. This means that if you pop all three pieces, your main tank will take significantly higher damage.
- High avoidance (Block/Parry) can help significantly reduce the incoming damage in this phase, as Garithex has very few true damage attacks.
- The pieces of armor will heal if they get out of combat, so be sure to keep either your off-tank or minor dots rolling on the lowest piece while your DPS burn down the others.
- Aggro Spikes: This boss will sometimes spike huge amounts of aggro to a teammate (usually a healer) -- tanks can save their taunt and use it when the aggro spikes if this is an issue for your team.
Rinse and repeat this process as the armor of Slaughter will eventually respawn itself, and you should have the boss down.
Garithex drops the Bloodlord Boots.
Third Boss: Chorek the Unstoppable
With Garithex down, head back the way you came and take a left turn at the crossroads (on your mini-map, you should be heading West). You’ll find a door that leads into a large open room.
Head to the left and drop off the side, then clear all the adds nearby. Open the large grey door to begin the next boss fight with Chorek the Unstoppable.
This is a dual-boss fight, so if you have two tanks, you can split these two bosses away from each other.
Key Mechanics:
- The Ragebeast, named Juggernaut, is the first choice your group should make. You can kill Juggernaut to remove his CC/extra damage, or:
- If you leave Juggernaut alive, he will apply a stacking debuff to all nearby creatures (both players AND chorek) that increases their incoming damage by 2% per stack.
- If your group is strong enough, you can use these built up stacks to make burning Chorek much faster.
- Armor Shred: Your main tank should start by holding Chorek, but mind his armor shred mechanic, which stacks and will eventually neutralize almost all armor your main tank has.
- If your main tank is dying to this, have your off-tank pick up aggro so that the main tank can wait for the debuff to fall off.
- Tanks: Hold Chorek near the fiery lit brazier nearby. This is done primarily to position you well for the next mechanic:
- Add Spawns + Jail: At 80%, 60%, 40%, and 20%, the boss will spawn Fireborn Sprite adds and randomly select a Non-tank player to place them in the nearby jail.
- Tanks should generally challenge these, and DPS should quickly AOE the sprites down. Once the sprites are all killed, the jailed player will immediately be released. (They will eventually break out of jail even if sprites are still up.)
- If you're taking a lot of damage, use your tank Bellows morale 3 to drop the boss and the sprite damage down to 50% during these sections.
This fight drops the Bloodlord Gloves.
Fourth Boss: Lord Slaurith
One boss remains in the right wing: Lord Slaurith.
Key Mechanics:
- Three colored circles will appear and move around on the floor throughout the fight. Standing in each grants unique stacking effects that help and hurt you:
- The Orange Circle increases your melee damage, but will increase incoming damage.
- The Purple Circle increases your Range and Magic damage, AND grants a 5 second temporary silence immunity, but will increase incoming damage.
- The Blue Circle increases your chance to Block, but will increase incoming damage that does hit you.
The damage increase from these circles is generally not too bad and easily healed, but there is one section of the fight later, called the Warrior's Gamble, where the boss will test your healers.
- At 75%, and at 50%, Icons on the ledges on either side of the room (up the stairs) will pulse red, and the giant Chaos Symbol on the floor will also pulse red to indicate that the mechanic has begun.
- While active, the boss gain will a stacking damage increase, which will eventually wipe the group if not removed.
- To remove his damage increase, these two icons must be pushed within a few seconds of each other. If this works, the red symbol on the floor will immediately vanish.
- Important: Once you purge the icons once, you will gain a warning debuff that says doing so again will weaken you. If the same player does this mechanic twice in a row, they will take 500% more incoming damage for the rest of the fight.
- To get around this, it's recommended to pick two pairs of players and alternate, having one group get the 75% icons, and another get the 50%.
- Bloodpulse: This boss will randomly spawn a Bloodpulse effect on one of your party members. Whoever stands on the "Bloodpulse" will continue to gain huge amounts of aggro, and will become the new tank if they stand in it too long.
- Warrior's Gamble: At 25%, the boss will Champion's Challenge the entire room and begin a 10-second channel called Warrior's Gamble. This hits every second, and may hit hard if you have lots of increased damage stacks.
- To counter this, use your Tank's M3 Bellows or M4 Immaculate defense (if available) to heavily reduce the damage of this ability.
- Healers can also continue healing in this phase, as the boss will no longer cast his AOE silence under 30% HP.
- Select a Champion!: At 20%, a Greatsword will appear near the entrance of the room. The first player to interact with this will become the Duelist for the final phase of the boss fight, which starts at 10%.
- If your party does not select a Champion, the boss will enrage, furious at your cowardice, and wipe the group.
- At 10% HP, the Champion player grows in size and gains additional wounds and a 100% damage increase. The other party members are teleported up to the ledges and gain a new "Cheer for your Champion" ability.
- If you are a spectator, target your Champion while up top and hit the Cheer ability to heal them for 300 HP. This healing stacks from all party members, so cheer hard to keep your Champion going!
As your Champion finally conquers Lord Slaurith (thanks to your wonderful cheers, of course) the right wing is complete!
You'll gain the Bloodlord Belt from this boss.
Middle Wing
The Middle Wing is the final wing in Bastion Stair, and as you ascend the summit of the fortress, you'll encounter two bosses who both grant Influence.
This wing also contains a number of optional bosses, listed below.
First boss: Wrackspite (Optional)
Note: To skip this boss, simply hug the right wall and run through the room.
Wrackspite is an optional boss that most groups skip. He has a 100% drop rate of Blood-Iron.
Key Mechanics:
- Start with the boss in the middle of the room.
- If near the walls, he may enrage and hit your tank for upwards of 10,000+.
- DPS: focus down the statue adds as they come to life, and don't let them reach the boss.
- Tanks: Face the boss away from the group to protect from his cleave. As adds spawn, move the boss away from their location.
- Aggro Reset: This boss will periodically reset his aggro on the tank. It's highly-recommended to use two tanks for this fight to avoid him bouncing to your DPS.
- Terror: This boss causes Terror, so healers won't be able to rez dead allies during this fight.
Wrackspite drops Bloodlord Boots.
Second Boss: Doomspike
Doomspike is the first required boss of the Middle Wing, and is either a dual-tank fight or can be handled by a geared solo tank.
As with all the named Bloodletters in the middle wing, Doomspike also has a 100% drop chance for Blood-Iron.
Key Mechanics:
- This boss fight will spawn an additional sub-boss, Clawfang, a Fleshhound of Khorne and a very good boy.
- The two bosses must be kept within 10% Health of each other and burned down together.
- Tank the bosses near each other to avoid taking increased damage.
- Terror: This boss causes Terror, so healers won't be able to rez dead allies during this fight.
This boss drops the Bloodlord Jewelry piece, which can be useful for some characters but is not part of the Bloodlord Set.
This pair of bosses must be defeated in order to progress further in the Wing.
Third Boss: Zekaraz the Bloodcaller (Optional)
Zekaraz the Bloodcaller is an optional boss that stands in your way as you ascend towards the summit of the Bastion Stair. He has a 100% drop-rate of Blood-Iron.
Note: At the time of writing, this boss can be skipped by sacrificing one team member while others pass the door. Simply rez your teammate afterward.
- This boss has a "Bloodrage" buff that will steadily increase his damage the longer the fight continues, up to a maximum of 400%.
- Move out of the Fire AOE he drops on the ground. (This attack is called "Field of Screams" in your combat log.)
- In indents along the wall of the arena you can find skulls, which can be picked up and taken to the altar in the middle of the room. Doing this will reset Zekaraz' stacking damage buff.
- Skulls should only be taken to the altar shortly before the damage on your tank is too significant to heal through.
- Be careful, as only three skulls can be placed, despite there being four of them. If you use your skulls up too quickly, you won't have enough time to kill the boss before he kills your tank.
- When a Skull is used at the altar, your team will also gain a debuff reducing your outgoing damage, which is a stacking 20% reduction per skull. (As the fight goes on, you'll do less and less damage.)
- Terror: This boss causes Terror, so healers won't be able to rez dead allies during this fight.
This boss drops the Bloordlord Gloves.
Fourth Boss: Kaarn the Vanquisher
Kaarn the Vanquisher is the final boss of the Middle Wing, and as such will grant Influence once defeated.
Note: Some groups choose to save this boss for last, and fight Skull Lord Var'ithrok first, as there's a rare bug that may send you back to your capital city when exiting his arena.
Key Mechanics:
- Tank: Hold this boss on the platform you find him on. If he leaves this platform, his skin will turn to iron and he will take no damage.
- All: Make sure to avoid standing in the red Blood puddles this boss will periodically spawn if a specific totem is up. The tank can move the boss out of these.
- Healers: You can stand further back from the boss to avoid getting hit by his AOE cleaves. Melee DPS will take damage from these.
- Totems: this boss will spawn skull Totems which buff him. There are 3, which appear randomly on the platform above him - to get to these, use the ramps leading up on the far left and right sides of the room. Each totem causes a different bonus for the boss.
You can either DPS him down and ignore the totems if your party is strong, or send one DPS (ideally a range DPS) to destroy them.
- Range DPS can still attack Kaarn from the stairs if he's pulled to a nearby corner.
This boss drops the Bloordlord Chestpiece.
This boss is considered the Final Boss of the Middle Wing, but not of the Dungeon, so note there's still one more boss to go afterward!
Final Boss: Skull Lord Var'ithrok
Skull Lord Var'ithrok is the Final Boss of the Bastion Stair, and behind him looms the Rift of Madness.
- Party Positioning:
Your party positioning is very important on this fight, so start by splitting up your DPS and Tanks into pairs. One tank and DPS stand in front of him, one tank and DPS (or just two DPS if solo tanking) stand behind him. Your healers both stand alone on the remaining two empty sides, parallel from each other.
You can see a visual example by hovering over or clicking this text.
Key Mechanics:
- Stay within the Ring of Fire once the fight begins. If your party stays far from the boss for too long, he will reset.
- This boss will give one player an "Infectious Rage" buff which looks like the Bright Wizard's "Funnel Power" skill. DO NOT ATTACK if you have this buff, or you'll kill yourself and everyone around you!
- When a player is given Infectious Rage, this will also appear in the chat window in yellow text and will put a visual Skull Icon over the player's head. (Added January 2025 patch)
- This boss will also periodically place a strong damaging dot on a player which cannot be cleansed. This is called Khorne's Affliction, and the text messages will read: "(player name) is taking extra damage!" (Added January 2025 patch)
- Have a healer focus heals onto the announced player to counteract the incoming damage.
- This boss will periodically punt those in front of him and then aggro anyone else left in the circle. Those punted should simply run back into the fire circle and keep attacking. If you have a second tank, they begin tanking once the other tank goes flying.
- The boss will spawn hounds that should be pulled off the healers and can be AOE'd down by your DPS. Keep these killed to avoid them piling up as the fight continues.
- Solo tanking: If you're solo tanking, have the DPS standing opposite the tank prepare an avoidance Morale 1 skill (like 100% parry) to mitigate damage while the Tank runs back from being punted.
This fight is actually quite simple beyond the Infectious Rage buff, so as long as you take it slow, you should have no problem.
This boss drops the Bloordlord Helmet.
Once defeated, the Skull Lord is pulled back into the Rift, perhaps to be tormented by the Chaos gods for his failure, or perhaps to return even stronger to fight another day... or perhaps both?
Congratulations on clearing the Bastion Stair Dungeon!
Secret Bosses
There are two Secret Bosses that can be challenged within the Bastion Stair.
These are optional bosses, and each has a chance to drop both Purple Seeds for Cultivating liniments and also the Rare Mount. They also both grant additional Dungeon Influence.
To challenge the Secret Bosses, the party must kill three optional creatures, one per wing. Those creatures are:
- Bulrok Headsmasher:
- After defeating Borzhar in the left wing, continue straight instead of turning right at the split. At the end of this path, you will find Bulrok and Squonk, who drop the Skulls of Carnage.
- Hargan the Furious:
- In the right wing, after defeating Urlf and as you arrive at the four-way split with the red Chaos Symbol on the floor, take the left turn to arrive at the feast hall. Hargan is located here, and drops the Skulls of Fury.
- Lockjaw:
- Just before arriving at Zekaraz in the Middle Wing, look to your left as you ascend the stairs to find a non-hostile enemy named Lockjaw. Defeat them to gain the Skulls of Ruin.
Once your party has all 3 Offerings of skulls, you may enter the portal that has appeared near the Dungeon's entrance.
The player with the Offering item should interact with the skull pile to add the skulls to it, and grant access to the next. These skull piles are also positioned to the left, right, and middle, hinting at the wing in which the paired offering may be found.
Once all 3 offerings are given, your party may enter The Depths, where the first secret boss, Murr Deyng, awaits.
Murr Deyng
Achievements
The 2025 re-work introduced a number of Bastion Stair Achievements. These include achievements for:
- Defeating Hard Mode Boss fights one, five, and ten times
- Multiple new Bestiary unlocks
- Defeating the Secret Boss
Additional Tips
- There's a rare chance that you may get ported back to your capital city while exiting the Kaarn the Vanquisher fight. Some groups choose to defeat Vari'throk first, and then double back to Kaarn to avoid this.
- Bastion Stair is usually abbreviated as "BS" in the LFG channels when forming a group.
