Hunter's Vale: Difference between revisions
No edit summary |
No edit summary |
||
| (36 intermediate revisions by 3 users not shown) | |||
| Line 1: | Line 1: | ||
{{Infobox instance | {{Infobox instance | ||
|name=Hunters Vale | |name=Hunters Vale | ||
|aka= | |aka=HV | ||
|ss=LS-50-HuntersVale.jpg | |ss=LS-50-HuntersVale.jpg | ||
|caption=The Hunter's Vale | |caption=The Hunter's Vale | ||
|loc=[[ | |loc=[[Ellyrion]] | ||
|race=[[High Elf]] | |race=[[High Elf]] | ||
|type=Dungeon | |type=Dungeon | ||
|level=40 | |level=40 | ||
|players=6 | |players=6 | ||
|key= | |key= | ||
}} | }} | ||
'''Hunter's Vale''' is a | ==The Hunter's Vale== | ||
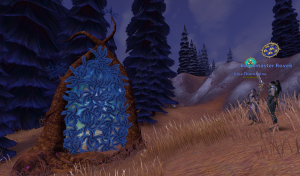
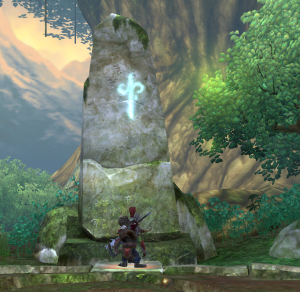
[[File:HV_entrance.png|thumb|Enter the Hunter's Vale Dungeon via special portals in Ellyrion.]] | |||
The '''Hunter's Vale''' is a level 40 Dungeon within Return of Reckoning that awards the [[Vale-Walker Set|Vale-Walker Armor Set]]. | |||
Set within the domain of Kurnous and presumably within or near Athel Loren, home of the Wood Elves, this dungeon punishes those who attack indiscriminately, and rewards those hunters who know when to be patient and strike only what they need. | |||
== Entering the Dungeon == | |||
The Dungeon's entrance can be found in Ellyrion, with specific portals for both Order and Destruction. Those are: | |||
*Order: 56.6k / 54k | |||
*Destruction: 26.7k / 33k | |||
Once discovered, a head with antlers will be shown on your map to denote the entrance area. | |||
''For new players: These number coordinates above reference the numbers shown under "Map Markers" when players open their Map in-game.'' | |||
* | ==Dungeon Basics== | ||
* | * This Dungeon is one of the shorter dungeons in the game, and includes a PQ-style Speed Run timer. Completing the Dungeon in time will grant your party additional items from these chests. | ||
* | * Wandering monsters, like Cold Ones and Treekin, will hunt your party as you progress the path in this dungeon. | ||
* | * If you attack random non-threatening mobs, like birds or deer, the forest will go into a rage and additional mobs will emerge from the woods to attack your party. | ||
* | * Many treekin mobs will split into two smaller mobs upon death. | ||
* Be sure to take the quests before you enter the dungeon! These repeatable quests are used to acquire the [[Vale-Walker Set|Vale-Walker]] gear, and can be found next to the dungeon's entrance. | |||
==Acquiring Vale-Walker Gear== | |||
[[File:HV_Quests.png|thumb|Accept the Repeatable Quests near the Dungeon Entrance to begin earning [[Vale-Walker Set|Vale-Walker gear]].]] | |||
Speak to the NPCs in front of the Dungeon entrance to accept Repeatable Quests to acquire the [[Vale-Walker Set|Vale-Walker gear]]. | |||
Vale-Walker gear requires first having equipped the [[Beastlord Set]]. | |||
Similar to the Beastlord Set requirements, this set will require you to kill both PvE Bosses and also Players. Player kills can be earned in both Open RvR and also in [[Scenario Guide|Scenarios]]. | |||
Unlike most other sets of this item level, this set does not require any [[Wards]], meaning players can wear it even without first picking up Conqueror, Vanquisher, or similar gear. The only prerequisite set is Beastlord. | |||
==Guide== | ==Influence Rewards== | ||
As of the May 2024 Re-launch of this dungeon, the Hunter's Vale now grants Influence and has unique Influence Rewards. These are: | |||
*'''Basic:''' Ellyrian Hunter's Satchel: Contains 1 Renown Potion, 5 Armor Potions, 10 HP Potions and 10 AP Potions | |||
*'''Advanced:''' Sacred Stag Hide: DPS-focused cape that also contains a Talisman Slot. | |||
*'''Elite:''' ? (Secret - will be added in the future!) | |||
This Dungeon now also grants Influence towards the [[Dungeon Weekly]], with Thanan Tree Lord and The Cadathaine Lion granting 2,000 each, and the Spirit of Kurnous awarding 4,000 Influence, for a total of 8,000 per run. | |||
==Lore== | |||
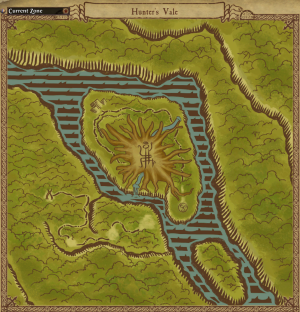
[[File:HVmap.png|thumb|A Map of the Hunter's Vale Dungeon.]] | |||
''The Elven God of the Hunt has stalked the mortal lands since time immemorial. Year in and year out, the High Elves gather to honor Kurnous with a sacred hunt, where the best of the best try to prove themselves Master Hunters in the eyes of the greatest hunter of them all. | |||
''But with the war raging on, the practice has faltered ... and the God of the Hunt is angry. No longer do skillful mortals hunt to feed their families; instead, hardened soldiers scour the woods and meadows of all available game. No longer do hunters observe the sacred rites; they kill only to test their skills, and leave their prey to rot on the battlefields...'' | |||
''The God of the Hunt can brook no more! The hunter's moon has risen! The horn of Kurnous has sounded! Let those who honor the ancient traditions pay heed—and let all who slaughter with abandon tremble!'' | |||
''It is the Age of Reckoning, and the God of the Hunt will take his toll...'' | |||
==Dungeon Guide== | |||
The Hunter's Vale Dungeon has only six major fights, each with some unique mechanics for a party to overcome. | |||
You can find a full Guide on those mechanics and recommended strategies to clear them below. Some general tips for all Dungeons: | |||
*Tanks: Be sure to slot the "Menace" Tactic to double your aggro generation, and use Taunt / Challenge constantly. | |||
*Healers: If you have trouble generating too much aggro, you can slot the Subtlety tactic to reduce this. | |||
*Healers: In fights with AOE damage, you can generally use detaunts to reduce incoming damage on yourself. | |||
*DPS: Use add-ons like Aggrometer to keep an eye on the boss aggro. (The tank can only reduce aggro for one teammate, so keep this in mind.) | |||
While the standard Dungeon setup for stable parties remains 2-2-2 (2 tanks, 2 DPS, 2 Healers), many parties in Hunter's Vale get a little more aggressive. | |||
Many groups often run 1-3-2 (3 DPS) or even 1-4-1 (4 DPS) for very confident parties. Unless you have to complete the Timed Run, remember you can still clear the dungeon with almost any composition! | |||
==First Boss: Durthu and the Tree-Kin== | |||
Begin the Dungeon and follow the path through the forest. (Try to avoid straying from this path, as the forest is filled with lots of hungry creatures that will attack you.) | |||
You'll encounter Kurnous as a Stag that transforms as you approach. He'll speak to you for a moment, and then the timer begins. | |||
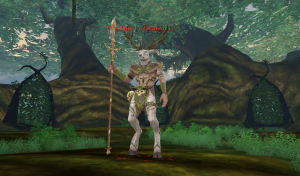
Follow the path forward until you enter a clearing with two large Treekin in it. The first fight is about to begin! | |||
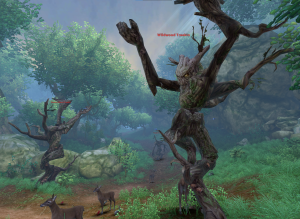
[[File:Treekin.png|thumb|Durthu and the Wildwood Tree-kin each come to life periodically as their health depletes.]] | |||
*This is a Dual-Boss Mechanic. | |||
*As you damage Durthu, he will harden his bark and the second Treekin will come to life instead. Damage the Tree-Kin and the opposite will happen, until finally both bosses are defeated. | |||
*Tank: It is recommended to tank with your back to the nearby rock wall. These bosses do large AOE Punts that will send your party flying, so the rock wall will keep you firmly in place. | |||
*Tank: Adds will join the fight as it continues. Have your DPS AOE them down, and be sure to Challenge them to maintain your aggro. | |||
This starting fight is relatively straightforward, with aggro management and tank positioning being key for a smooth start. | |||
==Second Boss: Spellbiter== | |||
Spellbiter is an angry Sprite who will summon his friends to kill your party. Killing these adds will offer a temporary respite, but he'll summon them back not long after. There are two ways to clear this boss: | |||
*Style 1: Single Target: In this strategy, your team will focus all damage on Spellbiter and kill him as quickly as possible, while ignoring the additional adds. | |||
*Style 2: AOE Unga Bunga: In this strat, your DPS go full AOE and cleave down the adds once the tank has used Challenge to hold them. | |||
*Either style can work, but the key thing to remember here is to let your tank use CHALLENGE before your DPS open on the boss or any adds. | |||
This is a relatively simple fight, and once defeated, the Spites will vanish from the latter part of the dungeon. (Attempting to skip this boss will result in lots of angry Spites later on.) | |||
==Third Boss: Thanan Tree Lord== | |||
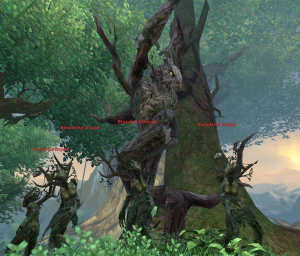
[[File:Thanantree.png|thumb|Tank Thanan with your back to the tree behind him, and AOE down the adds as they arrive!]] | |||
Thanan Tree Lord is a giant Treekin with four Dryads in front of him. Begin the fight by defeating the four Dryads, at which point Thanan will awaken. | |||
*Tank: As with all other Dryads, these will split into smaller adds once they die. Quickly pick these up with a skill like Challenge or an AOE attack. | |||
*Tank: Tank this boss with your back to the Giant tree behind him. This will prevent you from being tossed around by his CC. | |||
*DPS: There are going to be many, many adds rushing into this fight as it progresses. Use AOE to cleave these down once your tank has used Challenge to hold them. | |||
Once this fight is cleared, the giant tree behind Thanan will split and fall, creating a natural bridge for your party to pass to the center of the Dungeon. | |||
==Fourth Boss: The Three Mothers== | |||
As you cross the bridge, you'll encounter vines that block your path. Interacting with these begins the next fight: the trial of the Three Mothers. | |||
*The moment the vines are open, adds will begin to charge your group and will continue spawning. Rush past them, stopping only if they amount is too much for your tank to handle. | |||
*As you progress, you'll find the Mother Hound first. Killing this will stop the hounds from spawning. | |||
*Next, Wolves will attack as you continue the path. Find the Mother Wolf and kill her to stop the Wolves from spawning. | |||
*Finally, you'll be attacked by Lions on the last third of the path. Kill the Mother Lionness to stop these from spawning, which will allow you to open the final set of vines that leads to the Cadathaine Lion. | |||
==Fifth Boss: The Cadaithaine Lion== | |||
Make your way past the vines to begin the next encounter with the Cadaithaine Lion. | |||
This fight is mostly straightforward, with managing the extra adds as the key mechanic: | |||
*As the boss HP falls, a Lioness will spawn and randomly target different members of your party. | |||
*Do not kill the Lioness! This will enrage the Lion, who will then wipe your party. Instead, kite this around the room or use only Single Target attacks. | |||
*Additional small adds will appear. These can be killed, as long as the Lioness is not accidentally hit. (Her HP is very low, on purpose.) | |||
Once the Lion is finally defeated, the vines behind him will open, allowing access to the short puzzle that will take you to the final boss fight. | |||
==Puzzle Guide== | |||
[[File:Hv_symbol2.png|thumb|Have one player stand on the square in front of each pillar to illuminate a symbol. Next, have another player stand on the matching square!]] | |||
To summon the Eagles that will take you to the final fight, you first need to solve a puzzle. | |||
If you fail the puzzle, you all die - no pressure! | |||
IMPORTANT: One symbol that will be shown on the pillars cannot be seen on the stone circle. This symbol is hidden and covered by mud, so if you cannot find a symbol, stand on the muddy square! | |||
*Step 1: One member should stand on the empty square in front of a pillar. This will highlight a symbol on the pillar. (Shown in the picture on the right) | |||
*Step 2: Next, another member should find the shown symbol on one of the squares in the stone circle, and stand on it. (If this is done incorrectly, lightning will kill the party.) | |||
*Step 3: Next, another member should find another empty square in front of a pillar, and stand on it to illuminate a second symbol. | |||
*Step 4: Now, your fourth member finds the matching symbol on the ground, and stands on it. | |||
*Step 5: Finally, your fifth member finds the last empty square in front of the third pillar, and stands on it to illuminate the final symbol. | |||
*Step 6: Your last party member finds the matching symbol, and stands on it. | |||
*Step 7: ??? | |||
*Step 8: Profit! Eagles will now appear. Right click them to be flown to the top of the great tree where the Spirit of Kurnous awaits. | |||
==Final Boss: The Spirit of Kurnous== | |||
[[File:Spiritofkurnous.png|thumb|The Final Boss, the Spirit of Kurnous, awaits.]] | |||
The Final Boss is the Spirit of Kurnous, and this is by far the longest fight in the Dungeon. As of the May 2024 update, this fight is also more difficult than before, so stay on your toes! | |||
All Phases: | |||
*Spears: Kurnous will cast Spears into the air which will land on the floor of the arena. These spears pulse damage which will deal roughly 50% of your HP per hit, so quickly move away from them! | |||
*Healers: Kurnous will cast Shock of Nature on one of your party members. This is a dot that deals significant damage, so cleanse it quickly! Text will appear to alert you which player this is cast on. | |||
Gate Phases: | |||
As you reduce Kurnous' HP, he will run into the Gates that surround the arena. During these phases, shift your damage to the Gates, and be careful to avoid the Spears that Kurnous will throw while you attack them. | |||
Kurnous will trigger a second gate Phase at ~60% HP. During this second gate phase, he will spawn small adds in between the windows to attack the gates. AOE these down and then quickly prepare to hit the gates again. | |||
Final Phases: | |||
As you progress the boss under 50% HP, he will take on the aspect of either a Dog, a Wolf, or a Lion. | |||
As this begins, a Dog, Wolf, and Lion NPC will appear and run around the arena. Clicking one of these will grant your party an associated buff, but be careful -- selecting the wrong one may kill your entire group! | |||
This mechanic is a rock-paper-scissors style game. The pattern is: | |||
*Wolf Beats Hound | |||
*Lion Beats Wolf | |||
*Hound Beats Lion | |||
For non-English speakers, the following are what you should select: | |||
*Kurnous is taking on a Canine (Dog) Aspect: Players should pick the WOLF | |||
*Kurnous is taking on a Lupine (Wolf) Aspect: Players should pick the LION | |||
*Kurnous is taking on a Leonine (Lion) Aspect: Players should pick the HOUND | |||
In the new version of this fight, these aspects will grant every player of the party an active buff that they can trigger. These buffs can be used to support a teammate or prevent incoming damage. Read them carefully! | |||
*Each time that Kurnous assumes an animal form, he will be granted a large absorb shield. Keep damaging him while using the granted ability buff to break the shield and burn him to the next transformation. | |||
*Once you complete three transformations, Kurnous will stop taking on forms and will fight you normally until the end. | |||
Continue burning him until he falls, and... congratulations! You've cleared the Hunter's Vale Dungeon! | |||
== Hidden Achievements == | |||
*There are hidden corpses of fallen adventurers within the Dungeon. These are generally slightly off the normal path, and are randomized each time the dungeon is created. | |||
* | |||
Latest revision as of 04:05, 3 May 2024
| Hunters Vale | |
|---|---|
| HV | |
 The Hunter's Vale | |
| Location | Ellyrion |
| Race(s) | High Elf |
| Instance info | |
| Type | Dungeon |
| Advised level | 40 |
| Player limit | 6 |
The Hunter's Vale
The Hunter's Vale is a level 40 Dungeon within Return of Reckoning that awards the Vale-Walker Armor Set.
Set within the domain of Kurnous and presumably within or near Athel Loren, home of the Wood Elves, this dungeon punishes those who attack indiscriminately, and rewards those hunters who know when to be patient and strike only what they need.
Entering the Dungeon
The Dungeon's entrance can be found in Ellyrion, with specific portals for both Order and Destruction. Those are:
- Order: 56.6k / 54k
- Destruction: 26.7k / 33k
Once discovered, a head with antlers will be shown on your map to denote the entrance area.
For new players: These number coordinates above reference the numbers shown under "Map Markers" when players open their Map in-game.
Dungeon Basics
- This Dungeon is one of the shorter dungeons in the game, and includes a PQ-style Speed Run timer. Completing the Dungeon in time will grant your party additional items from these chests.
- Wandering monsters, like Cold Ones and Treekin, will hunt your party as you progress the path in this dungeon.
- If you attack random non-threatening mobs, like birds or deer, the forest will go into a rage and additional mobs will emerge from the woods to attack your party.
- Many treekin mobs will split into two smaller mobs upon death.
- Be sure to take the quests before you enter the dungeon! These repeatable quests are used to acquire the Vale-Walker gear, and can be found next to the dungeon's entrance.
Acquiring Vale-Walker Gear
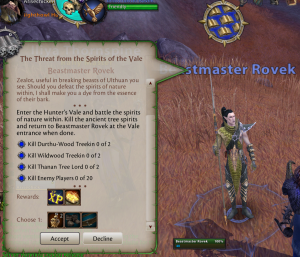
Speak to the NPCs in front of the Dungeon entrance to accept Repeatable Quests to acquire the Vale-Walker gear.
Vale-Walker gear requires first having equipped the Beastlord Set.
Similar to the Beastlord Set requirements, this set will require you to kill both PvE Bosses and also Players. Player kills can be earned in both Open RvR and also in Scenarios.
Unlike most other sets of this item level, this set does not require any Wards, meaning players can wear it even without first picking up Conqueror, Vanquisher, or similar gear. The only prerequisite set is Beastlord.
Influence Rewards
As of the May 2024 Re-launch of this dungeon, the Hunter's Vale now grants Influence and has unique Influence Rewards. These are:
- Basic: Ellyrian Hunter's Satchel: Contains 1 Renown Potion, 5 Armor Potions, 10 HP Potions and 10 AP Potions
- Advanced: Sacred Stag Hide: DPS-focused cape that also contains a Talisman Slot.
- Elite: ? (Secret - will be added in the future!)
This Dungeon now also grants Influence towards the Dungeon Weekly, with Thanan Tree Lord and The Cadathaine Lion granting 2,000 each, and the Spirit of Kurnous awarding 4,000 Influence, for a total of 8,000 per run.
Lore
The Elven God of the Hunt has stalked the mortal lands since time immemorial. Year in and year out, the High Elves gather to honor Kurnous with a sacred hunt, where the best of the best try to prove themselves Master Hunters in the eyes of the greatest hunter of them all.
But with the war raging on, the practice has faltered ... and the God of the Hunt is angry. No longer do skillful mortals hunt to feed their families; instead, hardened soldiers scour the woods and meadows of all available game. No longer do hunters observe the sacred rites; they kill only to test their skills, and leave their prey to rot on the battlefields...
The God of the Hunt can brook no more! The hunter's moon has risen! The horn of Kurnous has sounded! Let those who honor the ancient traditions pay heed—and let all who slaughter with abandon tremble!
It is the Age of Reckoning, and the God of the Hunt will take his toll...
Dungeon Guide
The Hunter's Vale Dungeon has only six major fights, each with some unique mechanics for a party to overcome.
You can find a full Guide on those mechanics and recommended strategies to clear them below. Some general tips for all Dungeons:
- Tanks: Be sure to slot the "Menace" Tactic to double your aggro generation, and use Taunt / Challenge constantly.
- Healers: If you have trouble generating too much aggro, you can slot the Subtlety tactic to reduce this.
- Healers: In fights with AOE damage, you can generally use detaunts to reduce incoming damage on yourself.
- DPS: Use add-ons like Aggrometer to keep an eye on the boss aggro. (The tank can only reduce aggro for one teammate, so keep this in mind.)
While the standard Dungeon setup for stable parties remains 2-2-2 (2 tanks, 2 DPS, 2 Healers), many parties in Hunter's Vale get a little more aggressive.
Many groups often run 1-3-2 (3 DPS) or even 1-4-1 (4 DPS) for very confident parties. Unless you have to complete the Timed Run, remember you can still clear the dungeon with almost any composition!
First Boss: Durthu and the Tree-Kin
Begin the Dungeon and follow the path through the forest. (Try to avoid straying from this path, as the forest is filled with lots of hungry creatures that will attack you.)
You'll encounter Kurnous as a Stag that transforms as you approach. He'll speak to you for a moment, and then the timer begins.
Follow the path forward until you enter a clearing with two large Treekin in it. The first fight is about to begin!
- This is a Dual-Boss Mechanic.
- As you damage Durthu, he will harden his bark and the second Treekin will come to life instead. Damage the Tree-Kin and the opposite will happen, until finally both bosses are defeated.
- Tank: It is recommended to tank with your back to the nearby rock wall. These bosses do large AOE Punts that will send your party flying, so the rock wall will keep you firmly in place.
- Tank: Adds will join the fight as it continues. Have your DPS AOE them down, and be sure to Challenge them to maintain your aggro.
This starting fight is relatively straightforward, with aggro management and tank positioning being key for a smooth start.
Second Boss: Spellbiter
Spellbiter is an angry Sprite who will summon his friends to kill your party. Killing these adds will offer a temporary respite, but he'll summon them back not long after. There are two ways to clear this boss:
- Style 1: Single Target: In this strategy, your team will focus all damage on Spellbiter and kill him as quickly as possible, while ignoring the additional adds.
- Style 2: AOE Unga Bunga: In this strat, your DPS go full AOE and cleave down the adds once the tank has used Challenge to hold them.
- Either style can work, but the key thing to remember here is to let your tank use CHALLENGE before your DPS open on the boss or any adds.
This is a relatively simple fight, and once defeated, the Spites will vanish from the latter part of the dungeon. (Attempting to skip this boss will result in lots of angry Spites later on.)
Third Boss: Thanan Tree Lord
Thanan Tree Lord is a giant Treekin with four Dryads in front of him. Begin the fight by defeating the four Dryads, at which point Thanan will awaken.
- Tank: As with all other Dryads, these will split into smaller adds once they die. Quickly pick these up with a skill like Challenge or an AOE attack.
- Tank: Tank this boss with your back to the Giant tree behind him. This will prevent you from being tossed around by his CC.
- DPS: There are going to be many, many adds rushing into this fight as it progresses. Use AOE to cleave these down once your tank has used Challenge to hold them.
Once this fight is cleared, the giant tree behind Thanan will split and fall, creating a natural bridge for your party to pass to the center of the Dungeon.
Fourth Boss: The Three Mothers
As you cross the bridge, you'll encounter vines that block your path. Interacting with these begins the next fight: the trial of the Three Mothers.
- The moment the vines are open, adds will begin to charge your group and will continue spawning. Rush past them, stopping only if they amount is too much for your tank to handle.
- As you progress, you'll find the Mother Hound first. Killing this will stop the hounds from spawning.
- Next, Wolves will attack as you continue the path. Find the Mother Wolf and kill her to stop the Wolves from spawning.
- Finally, you'll be attacked by Lions on the last third of the path. Kill the Mother Lionness to stop these from spawning, which will allow you to open the final set of vines that leads to the Cadathaine Lion.
Fifth Boss: The Cadaithaine Lion
Make your way past the vines to begin the next encounter with the Cadaithaine Lion.
This fight is mostly straightforward, with managing the extra adds as the key mechanic:
- As the boss HP falls, a Lioness will spawn and randomly target different members of your party.
- Do not kill the Lioness! This will enrage the Lion, who will then wipe your party. Instead, kite this around the room or use only Single Target attacks.
- Additional small adds will appear. These can be killed, as long as the Lioness is not accidentally hit. (Her HP is very low, on purpose.)
Once the Lion is finally defeated, the vines behind him will open, allowing access to the short puzzle that will take you to the final boss fight.
Puzzle Guide
To summon the Eagles that will take you to the final fight, you first need to solve a puzzle.
If you fail the puzzle, you all die - no pressure!
IMPORTANT: One symbol that will be shown on the pillars cannot be seen on the stone circle. This symbol is hidden and covered by mud, so if you cannot find a symbol, stand on the muddy square!
- Step 1: One member should stand on the empty square in front of a pillar. This will highlight a symbol on the pillar. (Shown in the picture on the right)
- Step 2: Next, another member should find the shown symbol on one of the squares in the stone circle, and stand on it. (If this is done incorrectly, lightning will kill the party.)
- Step 3: Next, another member should find another empty square in front of a pillar, and stand on it to illuminate a second symbol.
- Step 4: Now, your fourth member finds the matching symbol on the ground, and stands on it.
- Step 5: Finally, your fifth member finds the last empty square in front of the third pillar, and stands on it to illuminate the final symbol.
- Step 6: Your last party member finds the matching symbol, and stands on it.
- Step 7: ???
- Step 8: Profit! Eagles will now appear. Right click them to be flown to the top of the great tree where the Spirit of Kurnous awaits.
Final Boss: The Spirit of Kurnous
The Final Boss is the Spirit of Kurnous, and this is by far the longest fight in the Dungeon. As of the May 2024 update, this fight is also more difficult than before, so stay on your toes!
All Phases:
- Spears: Kurnous will cast Spears into the air which will land on the floor of the arena. These spears pulse damage which will deal roughly 50% of your HP per hit, so quickly move away from them!
- Healers: Kurnous will cast Shock of Nature on one of your party members. This is a dot that deals significant damage, so cleanse it quickly! Text will appear to alert you which player this is cast on.
Gate Phases: As you reduce Kurnous' HP, he will run into the Gates that surround the arena. During these phases, shift your damage to the Gates, and be careful to avoid the Spears that Kurnous will throw while you attack them.
Kurnous will trigger a second gate Phase at ~60% HP. During this second gate phase, he will spawn small adds in between the windows to attack the gates. AOE these down and then quickly prepare to hit the gates again.
Final Phases: As you progress the boss under 50% HP, he will take on the aspect of either a Dog, a Wolf, or a Lion. As this begins, a Dog, Wolf, and Lion NPC will appear and run around the arena. Clicking one of these will grant your party an associated buff, but be careful -- selecting the wrong one may kill your entire group!
This mechanic is a rock-paper-scissors style game. The pattern is:
- Wolf Beats Hound
- Lion Beats Wolf
- Hound Beats Lion
For non-English speakers, the following are what you should select:
- Kurnous is taking on a Canine (Dog) Aspect: Players should pick the WOLF
- Kurnous is taking on a Lupine (Wolf) Aspect: Players should pick the LION
- Kurnous is taking on a Leonine (Lion) Aspect: Players should pick the HOUND
In the new version of this fight, these aspects will grant every player of the party an active buff that they can trigger. These buffs can be used to support a teammate or prevent incoming damage. Read them carefully!
- Each time that Kurnous assumes an animal form, he will be granted a large absorb shield. Keep damaging him while using the granted ability buff to break the shield and burn him to the next transformation.
- Once you complete three transformations, Kurnous will stop taking on forms and will fight you normally until the end.
Continue burning him until he falls, and... congratulations! You've cleared the Hunter's Vale Dungeon!
Hidden Achievements
- There are hidden corpses of fallen adventurers within the Dungeon. These are generally slightly off the normal path, and are randomized each time the dungeon is created.
