Altdorf Tunnels (Old)
(This is a placeholder page for the Altdorf Tunnels Dungeon Guide. This Dungeon has been split from Sigmar's Crypts as of the May 2024 update, and may return in the future, but likely with very different mechanics. The original guide is listed below, for archival purposes.)
Warpblade Tunnels
There are multiple entrances to the Warpblade Tunnels, which connect beneath the four Taverns in Altdorf in pairs.
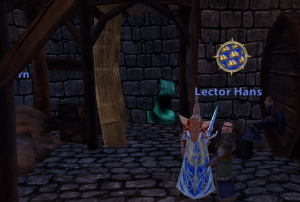
Most groups start at the Reikland Arms Tavern, located just across the road from the Bank in Lord’s Row.
Head downstairs and right click the Bookshelf to reveal a hidden entrance, and walk into this to enter the dungeon.
If you’re on the Lord’s Row entrance, begin by taking a right turn and then a left just before the wooden stairs. Here, you can either kill the Skaven in your path or have your tanks skip these by running past until they reset.
Take another left when you enter the cave area, and follow this until you can take one last left to go South into a large room. This is the first boss, Master Moulder Skrot.
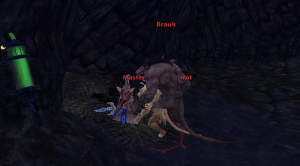
Boss One: Master Moulder Skrot and Brauk
This fight is a dual boss fight, but the only target you need to be hitting is Master Moulder Skrot. Be sure not to kill Brauk, or else Skrot will enrage and wipe your group. Many groups will also throw an axe at Skrot from the above bridge and run backwards in order to get just one of the two bosses to engage.
- Snare Break: IMPORTANT: This boss will apply a 10-minute snare that also stacks heavy debuffs on your group. Bring a snare break, and for classes that don’t have one, bring the Morale 2 “Focused Mind” to counter this.
- Tanks: Hold these bosses near the straw pile below so that the punt won’t send you flying. Maintain your Challenge to ensure you keep both held and that your DPS doesn’t accidentally pull Brauk.
- DPS: Use your Detaunts to reduce AOE damage from Brauk, and focus down Master Moulder Skrot. Use your Focused Mind when needed. (Watch your buffs/debuffs to see this.)
This boss drops the Sentinel Belt.
Boss Two: Grey Seer Quol’Tik
- Tank: Most groups will ask you to pull this outside of the room it spawns in to avoid the Tangled Vines mechanic. (These vines will attack your party with both range and melee attacks.) Once taunted, run quickly back through the tunnel and then pull it up to the Southernmost top-section of the room you’re in. (Shown in picture.)
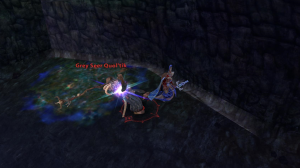
- AOE Puddle: This boss drops a puddle mechanic which looks like the Archmage puddle on one of your players at random. (Shown in picture.) Move out of this when it spawns and try to stack these close to each other, as you have only limited room to move if outside the boss room. Moving too far left or right will trigger his enrage.
- Knockback: This boss will constantly knock back players. Try to position yourselves accordingly to reduce the distance you get flung.
- Healers: You can stand with your back to the rock near the bridge to position properly for much of this fight. Watch for puddles as these can still drop on your position, and will last for some time before expiring.
If you choose to fight this boss inside his original room, it’s highly recommended to have either strong DPS to handle the vines or a second tank to manage these. The difficulty is significantly higher if you fight the boss inside this room.
This boss drops the Sentinel Helmet.
With the first two bosses of Warpblade down, most groups will now use their Book of Binding or die to the mobs to respawn at the entrance. Make your way to the Mastif’s End (just left of the Auction House) for the next, much longer run to the final bosses.
Section Two: Mastif’s End Tunnel Entrance
Once back inside, this time you’ll go straight forward and take a left past the Skaven Assassins waiting for you.
This path is considerably longer with many more mobs, which you can either kill or skip. Eventually, it will fork north and south on your Mini-map, and you want to take the South path into the open room. Below is the next boss: Skiv Redwarp.
Boss Three: Skiv Redwarp
- Tank: This boss does constant knockbacks, so tank him near the magical barrier behind him and against the walls. This will reduce the distance you or other teammates get flung.
- Stealth + Aggro Reset: This boss will cast stealth and reset his aggro during the fight. Make sure your Tank immediately taunts it or Challenges to get it back and away from your more vulnerable teammates.
- Cleanse: This boss has a debuff that will increase your skill cooldowns. Most healers can cleanse this.
Beyond these key mechanics, the fight is relatively straightforward.
Skiv drops the Sentinel Belt.
Final Boss: Warlock Peenk
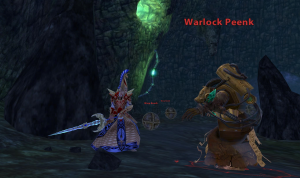
The Final Boss of Warpblade Tunnels (and usually the entire run) can hit hard – if you’re solo tanking, make sure your unguarded players have their detaunts ready. You'll fight this boss within his intended room.
- Warp Bombs: This boss spawns Warp Bombs around the room. Hitting one of these while electrically charged will cause it to explode, dealing damage to you and sending you flying around the room. It’s possible to accidentally get flung from one into another, and so on – resulting in a funny, if not also frustrating, death.
- Tank: Hold this boss with your back to one of the large rocks, as shown in the image, to prevent being knocked back into a Warp Bomb.
- Detaunt: This boss will spike your group with huge damage following the orange bubble / puddle attack appearing near your tank. Many groups will ***detaunt*** here and slow/stop DPS to avoid anyone getting one-shot with a critical hit.
Some groups will spread out on this fight to avoid any players accidentally triggering a Warp Bomb and impacting multiple groupmates together.
Range DPS and Healers have the most flexibility here, as they can press their backs to various rocks in the room without losing range.
Keep burning until Peenk finally falls, and he’ll drop the Sentinel Shoulders for your party.
---
With Peenk down, you’ve done it!
Congratulations on finishing the Warpblade Tunnels, and ideally your full CnT run!
For many players, completing this dungeon as it’s intended is one of, if not the hardest PvE experience within Return of Reckoning, so take some pride in your group’s accomplishment and enjoy a well-deserved break. You’ve earned it!


