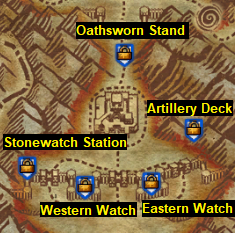
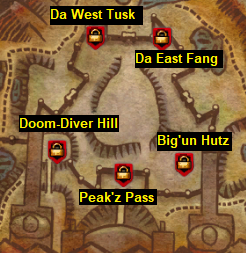
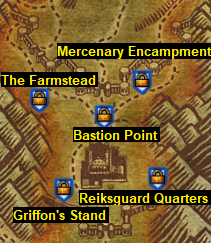
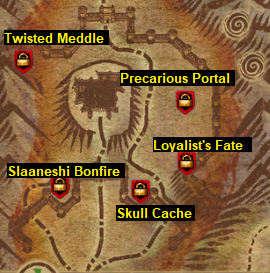
Fortresses
Each pairing has two fortresses that sit at opposing ends of the pairing. Upon arriving in Tier 4 a Realm must successfully siege and lock two zones (middle and pre-fort) to reach the fort.
Before the Fortress siege begins
Population Caps
Fortresses are capped to 168 attackers (7 full warbands) and 135 defenders (80% of the attackers, 5 full warbands, 1 half-full warband). It is very common to see more attackers and defenders in a pre-fort siege, so entry to a fortress siege is determined by contribution in the pre-fort zone. Entry is further complicated by the need for each side to have a reasonable number of each archtype, and therefore it's not as straightforward as "the top 168 attackers by contribution get in". Often underplayed heal/tank archetypes find entry into fortresses more consistent while more DPS roles do not, however this is wildly varying by time of day, realm attacking/defending, which fortress is being attacked, and other factors.
Fortress Zones
Dwarfs vs Greenskins
Stonewatch
How To Get There
Stonewatch is the Dwarfen fort at the North end of the Dwarf / Greenskin pairing. The defenders (Order) will be able to get there by going South out of the front gate of Karaz-a-Karak or taking a portal there from Reikwald or Shining Way. Both the attackers and defenders can arrive there by crossing the Northern border of Kadrin Valley. To make it easier for the attackers (Destruction) to arrive at the Northern border of Kadrin Valley, they may take a Skaven tunnel outside of their Warcamp at the coordinates (45089,55181) which takes you to (51265,9150), and from there they would run down South West into the RvR lake, and then Northwards into the Fort (this route can't be completed without flagging for RvR).
Butcher's Pass
How To Get There
Butcher's Pass is the Greenskin fort at the South end of the Dwarf / Greenskin pairing. The defenders (Destruction) will be able to get there by going North out of the front gate of Karak Eight Peaks or taking a portal there from The Maw or Fell Landing. Both the attackers and defenders can arrive there by crossing the Southern border of Black Crag. To make it easier for the attackers (Order) to arrive at the Southern border of Black Crag, they may take a PVE route outside of their Warcamp following the bridges and roads to Dwarf Chapter 22, and from there they would run down South following the PVE road, then climb the stairs to the top and head into Butchers Pass, then jump down the cliff into the Fort (this route can be completed without flagging for RvR).
Empire vs Chaos
Reikwald
How To Get There
Reikwald is the Imperial fort at the South end of the Empire / Chaos pairing. The defenders (Order) will be able to get there by going North out of the front gate of Altdorf or taking a portal there from Stonewatch or Shining Way. Both the attackers and defenders can arrive there by crossing the Southern border of Reikland. To make it easier for the attackers (Destruction) to arrive at the Southern border of Reikland, they may take a PVE route outside of their Warcamp following the road South to Chaos Chapter 22, and from there they would run Southeast following the PVE road, then turn South into Reikwald, once in Reikwald cross the bridge West over the river into the Fort (this route can be completed without flagging for RvR).
The Maw
How To Get There
The Maw is the Chaos fort at the North end of the Empire / Chaos pairing. The defenders (Destruction) will be able to get there by going South out of the front gate of Inevitable City or taking a portal there from Butcher's Pass or Fell Landing. Both the attackers and defenders can arrive there by crossing the Northern border of Chaos Wastes. To make it easier for the attackers (Order) to arrive at the Northern border of Chaos Wastes, they may take a PVE route outside of their Warcamp following the road North to Empire Chapter 22, and from there they would run West following the PVE road, then climb down into the RVR lake at "Choke Thorn Bramble", then climb the cliff into the Fort area (this route can't be completed without flagging for RvR).
High Elves vs Dark Elves
Shining Way
How To Get There
Shining Way is the High Elven fort at the East end of the High Elf / Dark Elf pairing. The defenders (Order) will be able to get there by taking a portal there from Stonewatch or Reikwald. Both the attackers and defenders can arrive there by crossing the Eastern border of Eataine. To make it easier for the attackers (Destruction) to arrive at the Eastern border of Eataine, they may take a PVE route outside of their Warcamp following the river East to "Follow the Light" Player Quest, and from there they would Swim East into Shining Way, then swim North into the Fort (this route can be completed without flagging for RvR).
Fell Landing
How To Get There
Fell Landing is the Dark Elven fort at the West end of the High Elf / Dark Elf pairing. The defenders (Destruction) will be able to get there by taking a portal there from Butcher's Pass or The Maw. Both the attackers and defenders can arrive there by crossing the Western border of Caledor. To make it easier for the attackers (Order) to arrive at the Western border of Caledor, they may take a PVE route outside of their Warcamp following the Road South and then West to High Elf CH22, and from there they would run North and then West following the road to the waterfall outside of Hatred's Way, then carefully attempt to decend the waterfall, aiming for rocks (yes really) from there, if you make it alive, run west into the Fort (this route can't be completed without flagging for RvR).
Stages
Stage 1.
Stage 1 is the same for both attackers and defenders. A 5 minute timer will count down to the end of the stage, during which both sides will begin to organise, form warbands, and strategise entrances, defences, locations etc. During this time the attackers cannot access the inner fortress. If the population caps have been hit, those who did not get into the fortress can queue (by running into the zone) at which point they'll be teleported to their Realm queueing location; behind the fort for defenders, the zone boundary for attackers.
Once the timer is completed, all those who had reservations that did not join the fortress battle surrender those reservations, and the people in the queue are invited to fill the open spots.
Stage 2.
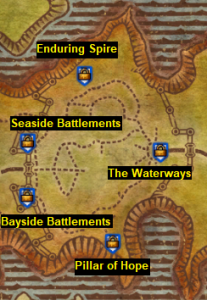
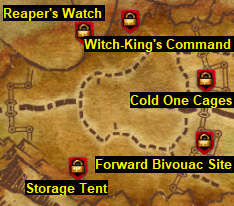
Stage 2 plays like a much smaller zone battle, but with five Battlefield Objectives instead of four. Each realm vies for control of each objective, with objectives granting a realm points on a control bar (shown in the upper centre of your screen). When your control points exceed the opposing Realm's points, the inner door health moves in your direction (down for attackers, up for defenders).
It is important to fight at Battlefield Objectives, both for your realm and yourself. Objectives provide points towards victory for your realm, but they also provide contribution for you. Defending friendly objectives and attacking enemy objectives gives greater amounts of contribution, and therefore you're more likely to be rewarded at the end.
Once the door reaches ~20% it is typical for the defenders to retreat into the keep for two reasons. Firstly to wait out any lingering wounds debuffs before the attackers get in, and secondly to avoid being unable to make it to the keep when the door hits 0, because dying after that point sends defenders to jail if an ally is unable to resurrect them.
Stage 3.
Stage 3 begins once the outer keep door reaches 0%, when it opens up and the attackers flood in. They'll clear out the mobs inside and make their way to the second floor, where the siege begins anew. The Fortress Lord resides in the centre of the second floor, and the defenders will surround the two entrances - main, and postern.
This stage is the most important by far. Fortress outcomes are, in almost all cases, decided by which side organises better in stage 3.
Strategy & Tips
Morale is key to victory, for both sides. It's vitally important that every individual player builds up their morale abilities. It is therefore equally important that you do not die whilst waiting for the clash to begin. If you die your morale resets, and you are much less useful without it once the fight begins. Enough people dying and losing morale will ensure the fight ends unfavourably for your side.
Each archtype has a role to play before the fighting begins.
- Tanks need to Hold The Line near, but not in front of, the doors. Ranged combatants will be flinging spells and attacks through the doors constantly, in both directions, and using point 1 it's clear you must protect the people behind you.
- RDPS tpyically attack through the doors, however this is of limited usefulness and often gets you shot in return, putting pressure on your healers when they really need to be keeping tanks alive.
- MDPS need to maintain combat status. This is best achieved by edging out or forward until you get shot then backing off immediately. Staying in the firing line puts pressure on your healers, and they really need to keep tanks alive.
- Healers need to keep the tanks alive, and at the same time ensure the DPS that don't follow the above advice don't die either.
Warband leaders need to communicate on both sides. Both sides will attack/defend two locations (postern door, main door), and on some occassions the upper floors. All entrances need to be covered by both sides in most cases.
For the attackers during stage 3 another option exists. Flyers will spawn in your warcamp (six currently) that will fly one person to a random choice between the third and fourth floors.
- Flyers are a relatively new addition to Fortress sieges.
- Solo or uncoordinated players taking the flyers are going to be knocked off the floor instantly, or die; flyers heavily telegraph your landing spot to anyone watching, and it takes much, much less time for a defender to run upstairs than it does for your flyer to make a round trip anyone going on a flyer without a group plan will be useless. Don't take the flyers if you don't have a group plan to do so - you're preventing a coordinated group from using them, and they're very slow.
- The most successful uses of flyers so far appear to be sending tanks and healers first. Three tanks and three healers demand more than six players to respond to them, else they can hold the upper floors until more arrive.
- If a foothold is gained on the upper floors, the sole objective of the inhabitants when the siege begins is to get down the ramp and push as many healers and RDPS off it as soon as possible. This removes a huge tactical advantage from the defenders, and pushes a lot of now-panicking healers and RDPS into the AoE storm that occurs in the centre of the floor. Doing this will heavily lower the AoE pressure on your own team.
Outcome
If the defenders won the fight they'll begin resurrecting their allies (since anyone clicking respawn will go to Jail). The attackers will do the same, and some will run back from the warcamp. The process then repeats, with both sides beginning to build morales once again.
If the attackers win the fight they'll immediately begin attacking the Fortress Lord. The Fortress Lord has a tremendous amount of health, and will take 5-8 minutes to kill even with all of the attacker solely focused on him.
During this time, the defenders will be in Jail. A lever exists outside of Jail that the attackers will usually guard. If that lever is pulled, all the attackers flood out of the jail and can immediately make their way to the keep and attempt to stop the Fortress Lord being attacked. "JAILBREAK" will be called for the attackers, and tanks will begin to move and cover the doors, just like the defenders did minutes prior. Jailbreaks do not often lead to successful Fortress Lord saves for two reasons; firstly, the attackers build morale on the Fortress Lord while the defenders coming from Jail have no morale built up, and secondly the attackers outnumber the defenders. Think how hard attacking is (pushes fail in many Fortress sieges, and defenders often win by repelling 4-5 pushes) and then imagine how hard that'd be if the defenders outnumbered the attackers rather than the other way around!
If the Fortress Lord is killed the attackers win instantly. For defenders to win the timer must run out with the Lord alive - note that alive simply means alive, not at 100%. If the Lord has 1% health when the timer runs out the defenders still win. Both sides are free to leave at this point; rewards are given out automatically, and bags will land in your mailbox as usual.
Rewards
| Bags | Victory | Defeat |
|---|---|---|
| Gold | 60 War Crests | N/A |
| Purple | 48 War Crests | N/A |
| Blue | 36 War Crests | 36 War Crests |
| Green | 24 War Crests | 24 War Crests |
| White | 12 War Crests | 12 War Crests |
